← All firearms · Printable work order
Ruger LCP II
- moderate
- Shop tier 1
- high confidence
- Pistol
- pocket pistol
- blowback
- concealed carry
- requires tools
field strip ~3 min · reassembly ~4 min · detail strip ~20 min
Specifications
- Manufacturer
- Sturm, Ruger & Co.
- Origin
- United States
- Category
- Pistol
- Action
- Blowback
- Calibers
- .380 ACP, .22 Long Rifle
- Capacity
- 6+1 in .380 ACP
- Production
- 2016–present (in-production)
- Also known as
- LCP II, LCP MAX (related)
Model-specific safety
- This is a very small pistol with a stiff recoil spring in a short package. The recoil spring assembly is strongly compressed when the slide comes off — control it.
- The takedown pin is small and is removed with a tool. Work over a tray so it is not lost.
- Pocket pistols collect lint aggressively. Debris around the striker and extractor causes malfunctions on exactly the pistol you least want to malfunction.
- Do not dry fire the .22 LR version.
- The takedown pin comes out of this pistol completely. It is not captive, and it is small. Work over a tray.
- The recoil spring is a nested assembly. The flared end of the inner spring must face the muzzle.
- The takedown pin does not go back in straight. It enters the frame at roughly 45 degrees, nose-down, to push its retaining spring clear, and is then rotated into line with its hole.
- The slide stop is spring loaded. With a loaded magazine in place, jarring the pistol can let the slide run forward and chamber a round.
If it will not go back together
Common ways this firearm resists reassembly, and what is actually wrong. Forcing a part that will not seat is how firearms get damaged.
-
The takedown pin will not go back into the frame.
Why It is being pushed in straight. The pin has to displace its retaining spring first.
Fix Start the pin into the frame nose-down at about 45 degrees until its tip pushes the retaining spring down, then rotate it level with its hole and push it home.
Forcing it Hammering a straight-in pin bends the retaining spring and burrs the pin.
-
The slide will not sit down on the frame, or binds part way.
Why The recoil spring assembly is not seated against the barrel lug, or the nested spring is in backwards.
Fix Lift the recoil spring assembly out and refit it with the flared end of the inner spring facing the muzzle and the rear of the guide rod against the barrel lug.
-
The barrel will not drop into the slide.
Why It is being lowered straight down. The barrel has to go in at an angle.
Fix Enter the barrel forward and slightly up, then push it rearward into its locked position — the reverse of the forward, down and back motion that removed it.
-
The takedown pin went missing during cleaning.
Why Unlike most striker pistols, the LCP II's takedown pin is not captive and leaves the frame entirely.
Fix Ruger sells the part; contact Customer Service with the pistol's model and serial. Do not substitute a pin of approximate size.
Gunsmith Do not attempt this one yourself.
Under spring tension
- Recoil spring assembly
Easily lost parts
Takedown pin · Recoil spring assembly
Tools
| Tool | Required | Used for | Substitute |
|---|---|---|---|
| Screwdriver or other flat, blunt tool | Yes | Prying the takedown pin loose. | Any flat blunt tool; take care not to mar the slide. |
Shop difficulty
Shop tier 1 Tier 1 — easy among pistols, for the full job: strip to the parts that get coated and put it back together working. 39 parts on a pinned frame insert in a polymer grip; the traps are field-strip-level (the non-captive takedown pin must go in at 45 degrees past its retaining spring, the nested recoil spring has a direction, the barrel goes in at an angle). Nothing needs timing.
Parts: 39 numbered parts (LCP II parts list, complete pistol incl. magazine (manual p. 29).), from Ruger LCP II Instruction Manual — Sturm, Ruger & Co., Inc., p. 29 ruger-docs.s3.amazonaws.com [1].
Bench time: about 15 min to strip, 25 min to rebuild (estimate). Slide (firing pin, extractor and plunger, sights) and frame insert out of the grip (hammer, trigger, sear pins); rebuild longer for the hammer spring and takedown-pin spring.
Small parts: 12 pins, 9 springs, 2 detents or plungers (counted from the manufacturer's parts list (one per key number unless a quantity is given))
What comes off for coating
- Slide: firing pin, spring and retainer, extractor, plunger and spring, rear sight, front sight — pin punch, sight pusher
- Frame: frame insert pins (front/rear), frame insert, hammer, hammer spring and pins, trigger, inner trigger and springs, sear and pin, magazine latch and spring, takedown pin and retaining spring — pin punches
Special tools
- dovetail sight pusher (or brass drift and padded vise) — Removing and refitting dovetailed sights for coating
Known pain points
- The takedown pin has to be started at about 45 degrees so its tip pushes the retaining spring down, then rotated in; pushed straight it will not go. (reassembly)
Source: Ruger LCP II Instruction Manual — Sturm, Ruger & Co., Inc. ruger-docs.s3.amazonaws.com [1] — “Insert the takedown pin into the frame at a downward angle (about 45º) until its tip pushes down its retaining spring.” - The inner recoil spring has a flared end that must face the muzzle. (reassembly)
Source: Ruger LCP II Instruction Manual — Sturm, Ruger & Co., Inc. ruger-docs.s3.amazonaws.com [1] — “NOTE: When replacing the recoil spring assembly, be sure the flared end of the inner recoil spring is oriented toward the muzzle of the pistol.”
See also 4 documented reassembly problems and their fixes.
Fit or check on rebuild
- Recoil spring direction — Nested spring reversed binds the slide
- Function check: trigger reset, sear/striker engagement, safeties — Standard post-reassembly check on any pistol whose fire-control parts were removed; a mis-seated spring shows up here, not on the bench
This is Pew-Takedown's rating, not the manufacturer's. How tiers are rated. Forum reports are owners' experience, not specifications.
Manufacturer videos
Official videos from Sturm, Ruger & Co.'s own channels, linked rather than copied. Where a video and the steps on this page differ, follow the manufacturer's manual and video.
- Ruger® LCP® II Disassembly, Cleaning & reassembly Tech Tip RugerFirearms
field strip, cleaning, reassembly · 2021-11-19
Covers: Ruger LCP II - Ruger® LCP® II in 22LR Magazine Maintenance Tech Tip RugerFirearms
maintenance · 2021-11-22
Covers: Ruger LCP II in .22 LR only (magazine)
Procedures
Clear and Make Safe
Clear & Make Safe- Keep the pistol pointed in a safe direction. Press the magazine latch and withdraw the magazine from the butt.
- Pull the slide to the rear and lock it open by pushing upward on the slide stop.
- Inspect the chamber and verify that it is empty.
- Remove all live ammunition from the work area.
Field Strip
Field Strip tools requiredManufacturer’s video: Ruger® LCP® II Disassembly, Cleaning & reassembly Tech Tip RugerFirearms
- Complete the Clear and Make Safe procedure.
- Retract the slide slightly and release it. This disengages the slide stop and lets the slide move fully forward.
- Pry the takedown pin loose using a screwdriver or other flat, blunt tool.TipRuger's own illustration shows a screwdriver tip under the head of the pin.
- Remove the takedown pin completely.WarningThe pin is not captive and will come free of the frame. Do not lose it.Removed at this step:
Takedown pin - Move the slide assembly forward and separate it from the grip frame.Removed at this step:
Slide assembly - Compress the recoil spring assembly slightly to disengage it from its seat against the barrel lug, and remove it completely.WarningUnder spring tension.Removed at this step:
Recoil spring assembly - Remove the barrel by moving it forward slightly, then down and back to extract it from the slide.Removed at this step:
Barrel - The pistol is now disassembled for cleaning. Go no further.WarningRuger describes no disassembly below this level.
Reassembly
ReassemblyManufacturer’s video: Ruger® LCP® II Disassembly, Cleaning & reassembly Tech Tip RugerFirearms
- Be certain the chamber and magazine are empty.
- With the slide held upside down, replace the barrel and push it rearward into its locked position.
- Replace the recoil spring assembly so the rear end of the guide rod seats against the barrel lug.WarningThe flared end of the inner recoil spring must be oriented toward the muzzle. Fitted backwards the assembly will not seat correctly.
- Replace the slide onto the frame and put it in its closed position, as if the pistol were fully assembled.
- Insert the takedown pin into the frame at a downward angle of about 45 degrees, until its tip pushes down its retaining spring.WarningThe pin will not go straight in. Starting it at an angle is what clears the retaining spring.
- Rotate the pin downward until it is aligned with its hole, then insert it fully into the frame.
- Replace the empty magazine and perform the function check.
Patent drawings
not under copyrightDrawings from US patents on this design. A patent shows the invention as the inventor filed it; the firearm that shipped can differ in detail, and later production often does. Use them to see how the parts relate, not as a parts reference or a procedure. Per the USPTO, the text and drawings of a patent are typically not subject to copyright; each patent here was checked for a copyright notice.
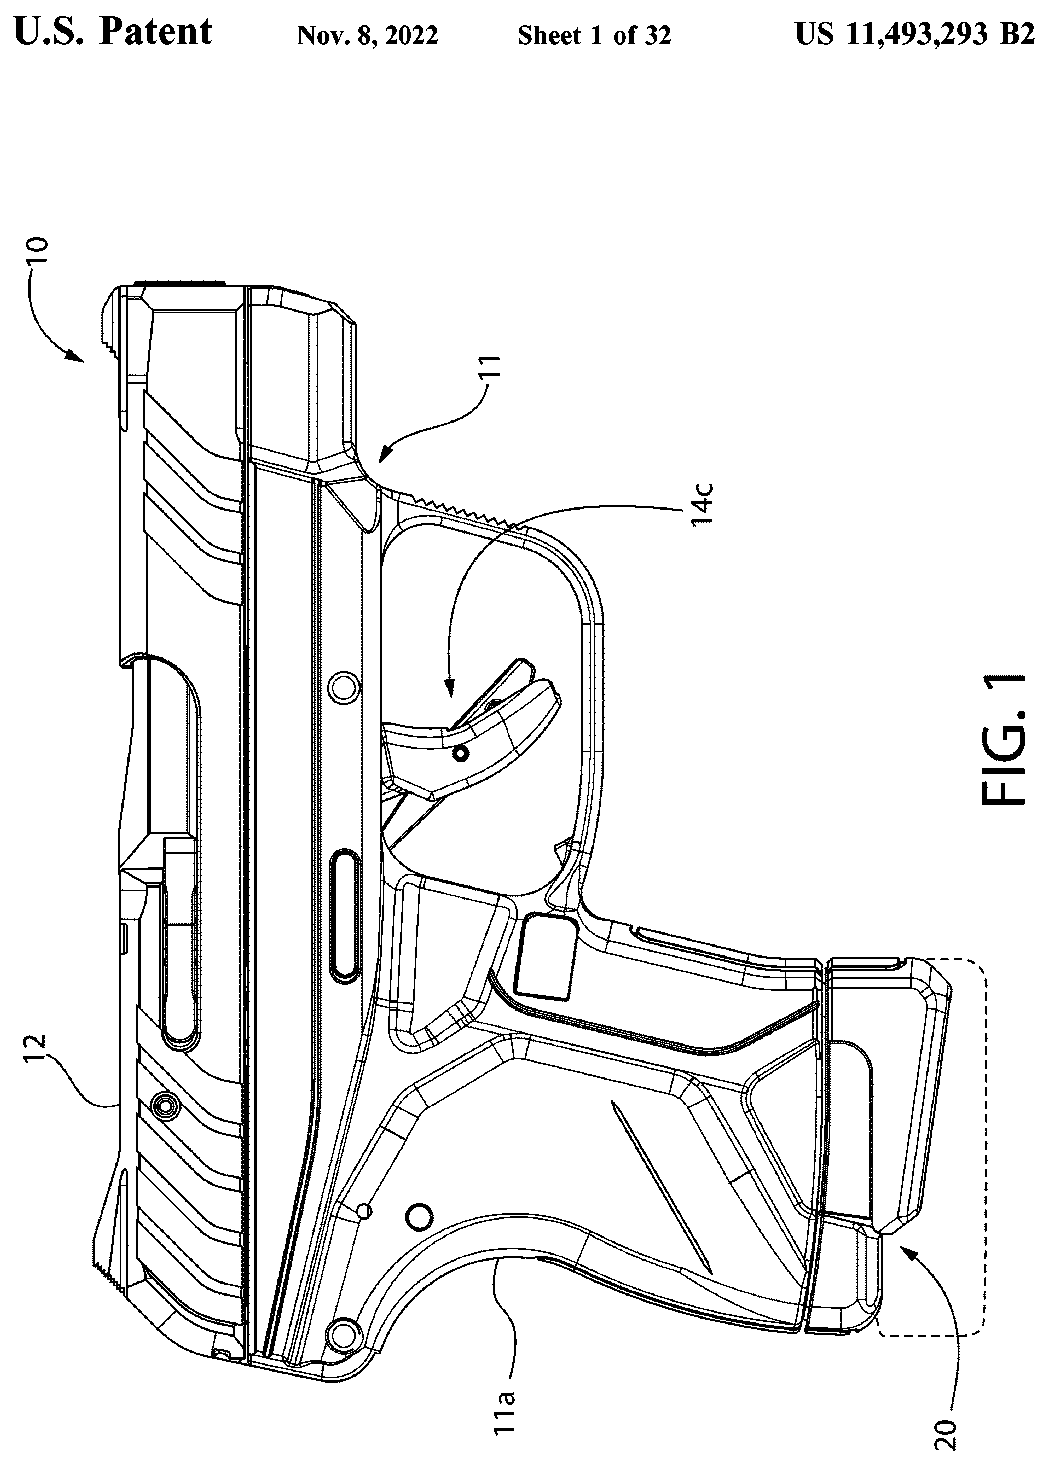
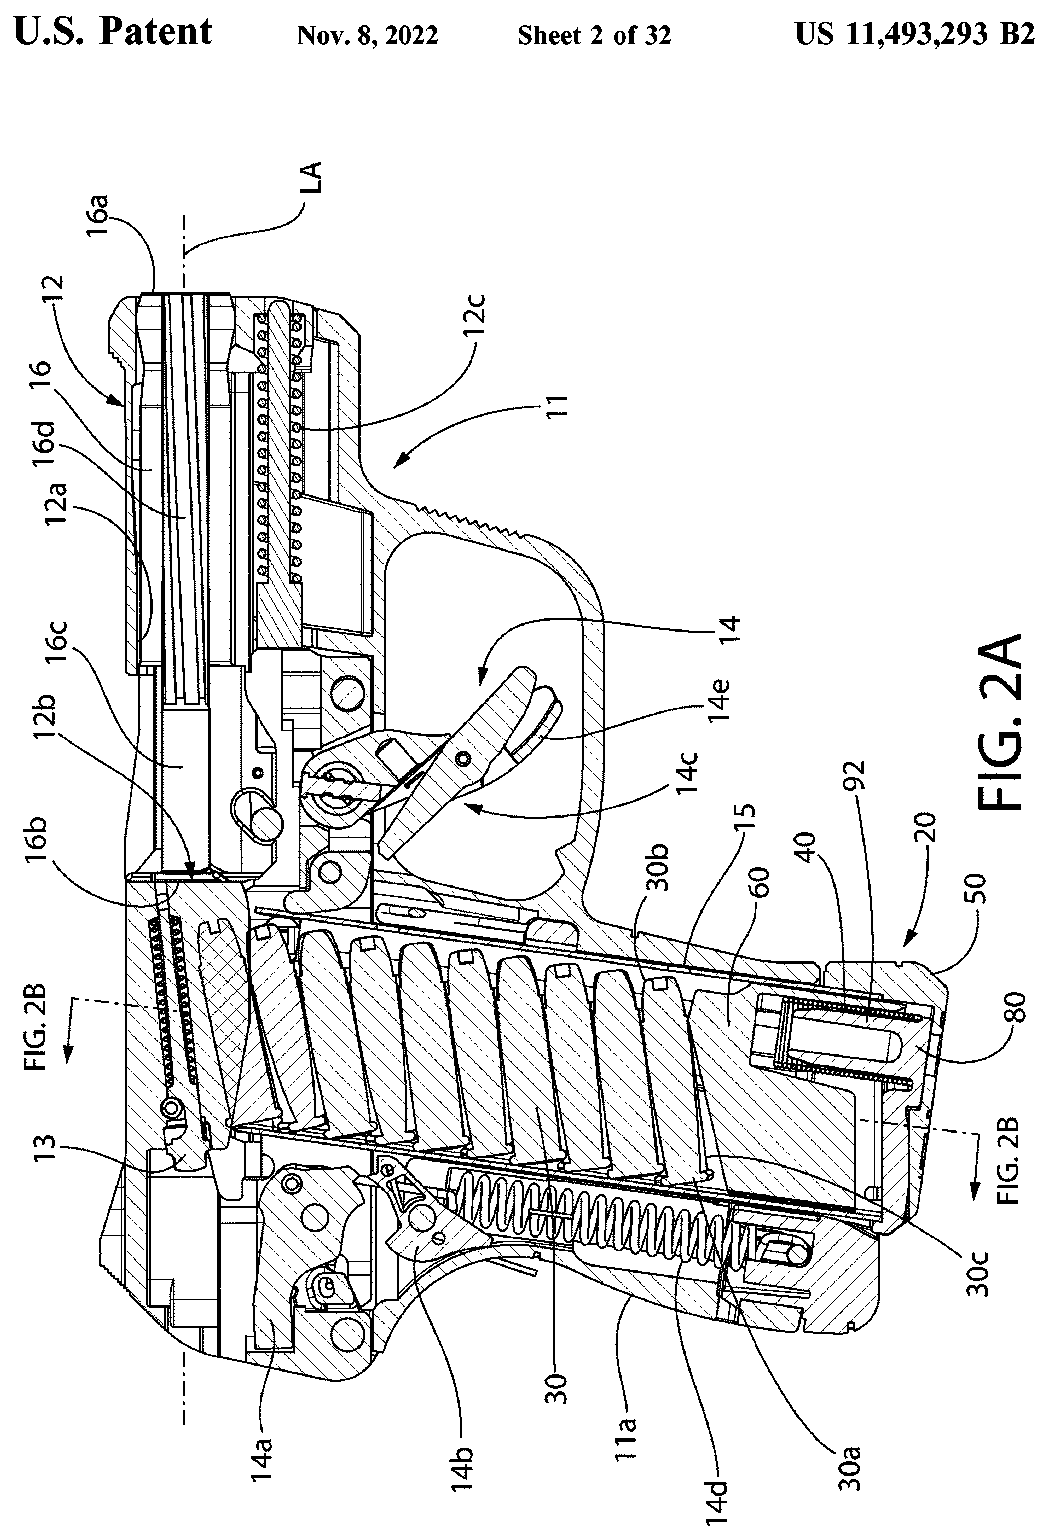
US Patent 11,493,293 — Magazine for firearm
Nathan Brown, Dwight Potter · assigned to Sturm, Ruger & Company, Inc. · filed 2020-09-24 · granted 2022-11-08. Full patent (USPTO)
The LCP II's magazine and how it seats in the grip frame below the slide.
Why this is the Ruger LCP II’s patent: listed on the maker’s patent-marking page — Ruger Patents — Sturm, Ruger & Co., Inc. ruger.com [5]: “LCP® II 11,493,293; 11,598,597”
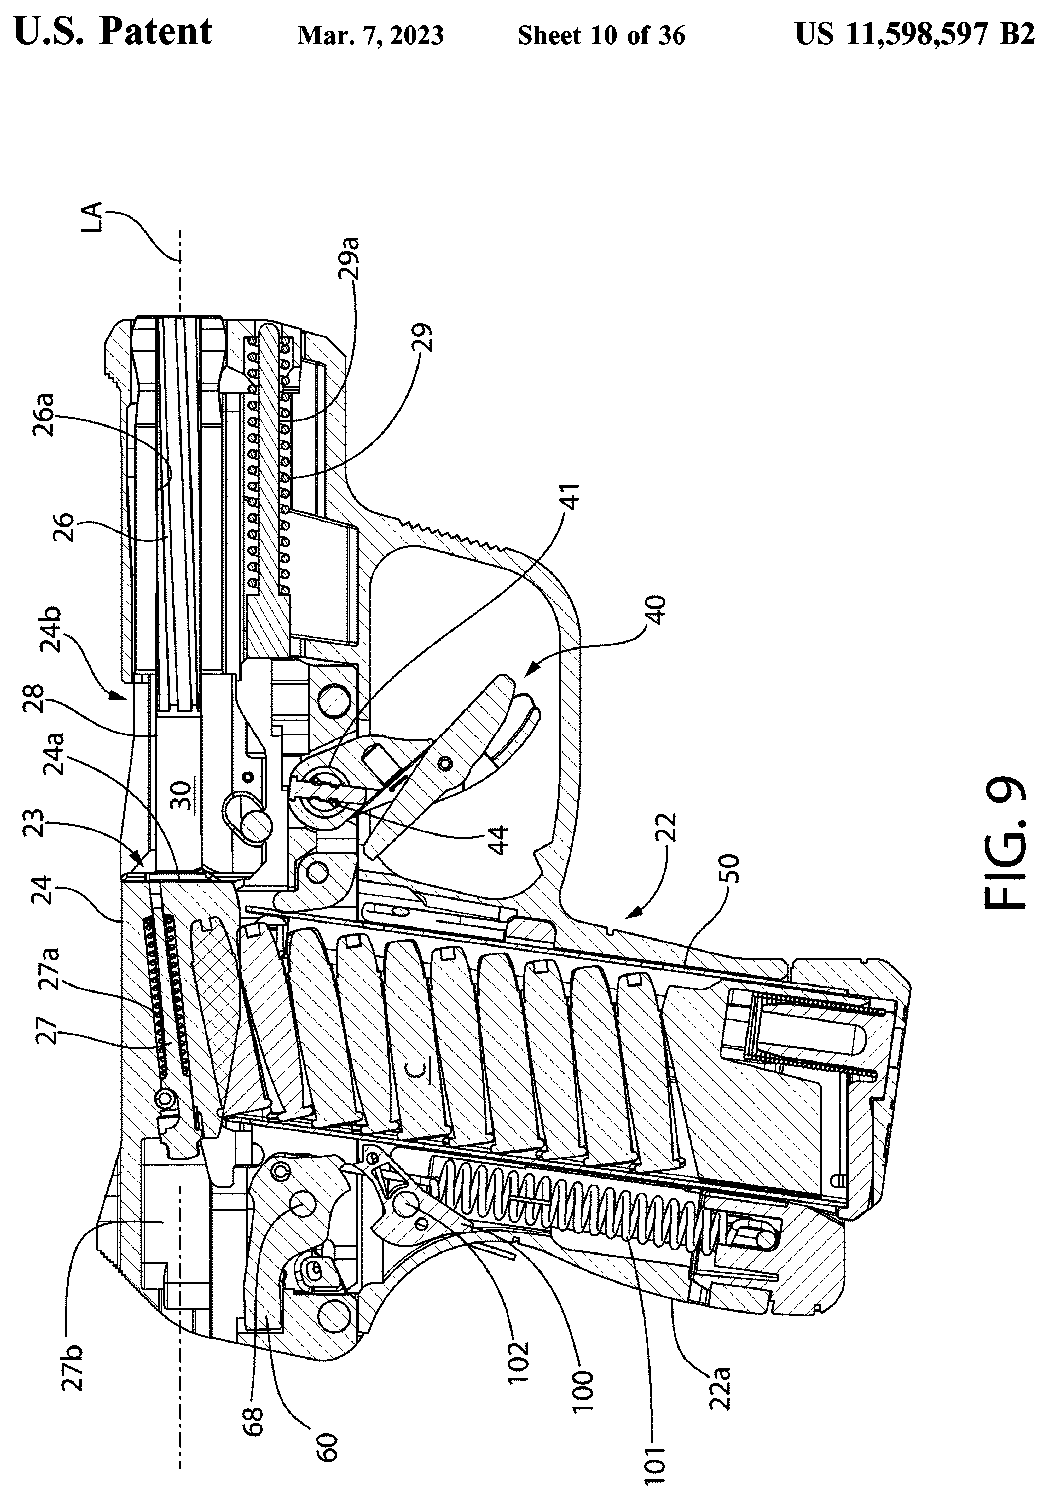
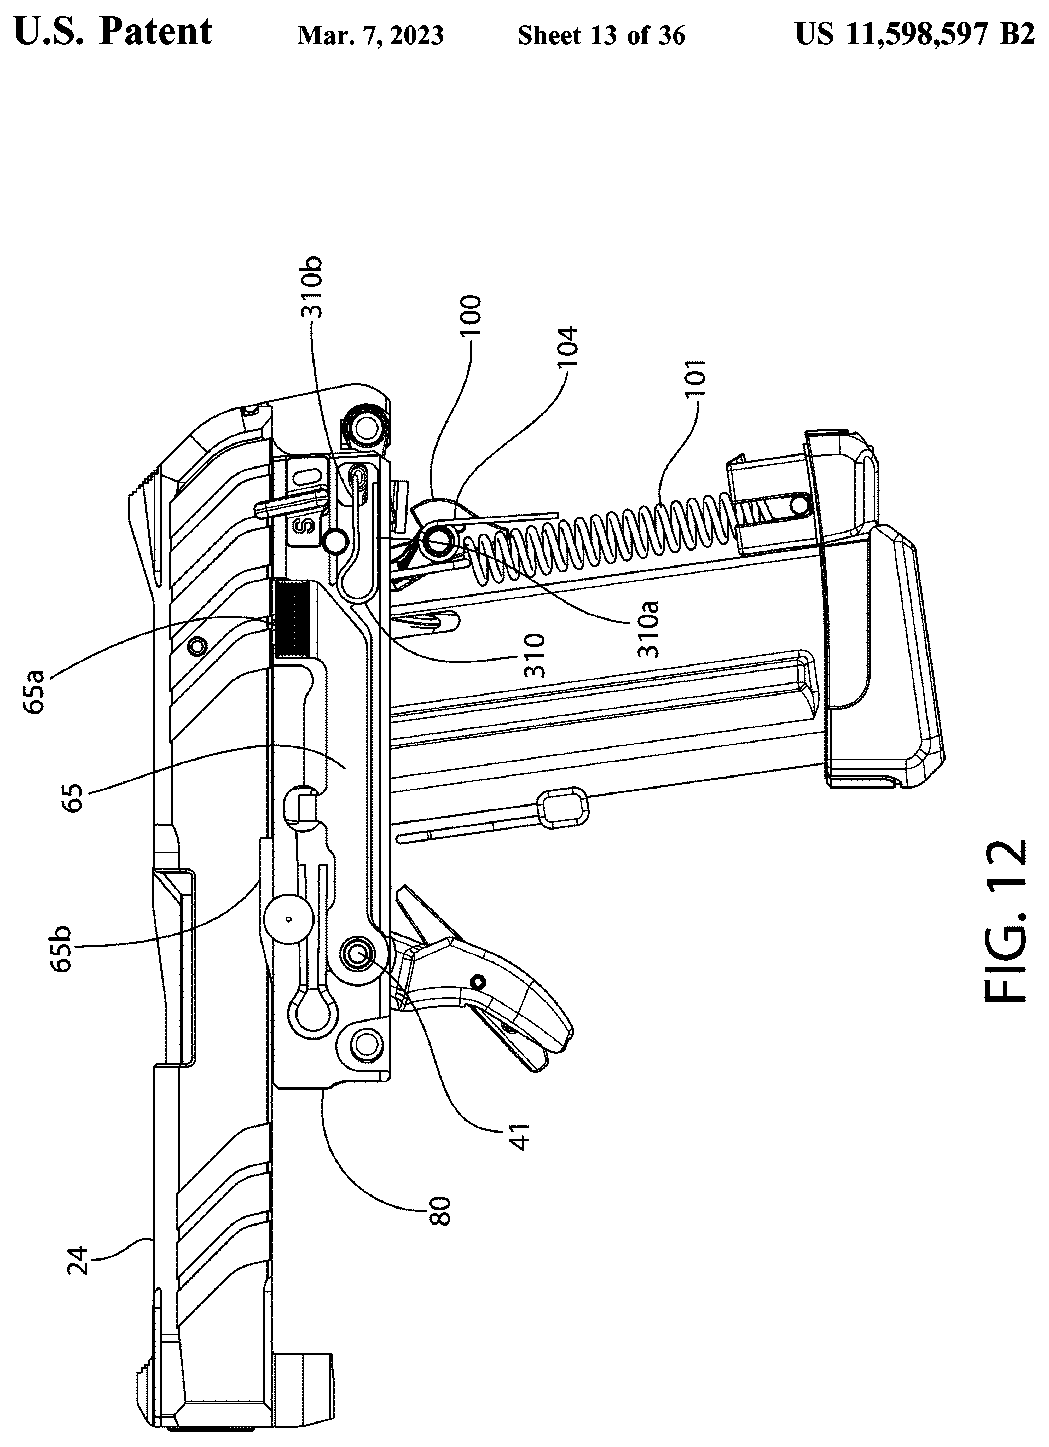
US Patent 11,598,597 — Safety mechanism for firearms
Jonathan Barrett, Nathan Brown, Darin Nebeker, Todd Wilkinson · assigned to Sturm, Ruger & Company, Inc. · filed 2020-06-29 · granted 2023-03-07. Full patent (USPTO)
The LCP II-family pistol's hammer, sear, trigger bar and a manual safety selector in the firing-control housing insert.
Why this is the Ruger LCP II’s patent: listed on the maker’s patent-marking page — Ruger Patents — Sturm, Ruger & Co., Inc. ruger.com [5]: “LCP® II 11,493,293; 11,598,597”
Torque specifications
No sourced torque values from the manufacturer are recorded for this firearm. Where a fastener has a specified torque — action screws, scope bases, muzzle devices, barrel nuts — get it from the manufacturer or a gunsmith rather than estimating it.
What the manufacturer does say: The manufacturer's documents give no torque value. They say: "use the supplied thread adapter/cap wrench to tighten the barrel cap firmly in place by turning it counterclockwise (see Figure 15)." (Ruger LCP II Lite Rack .22 LR Threaded Barrel Replacement Instructions (PM849), PDF p. 2) "NOTE: Do not use a cheater bar on the supplied thread adapter/cap wrench as damage can occur to either the thread adapter, cap or barrel." (Ruger LCP II Lite Rack .22 LR Threaded Barrel Replacement Instructions (PM849), PDF p. 2)
Materials and factory finish
As stated by Sturm, Ruger & Co.. Prep, masking and cure depend on these; a polymer or aluminium part, a nitrided or anodised finish, and a blued steel part are each a different job. Variants with other finishes may exist — check the maker's page for the exact SKU on the bench.
| Component | Material | Factory finish | Where it comes from |
|---|---|---|---|
| Slide Model 13705 (.22 LR) | Alloy Steel | Black Oxide | Ruger LCP II Centerfire Pistol — Specifications (model 13705, .22 LR) — Sturm, Ruger & Co. ruger.com [4] “Slide Material Alloy Steel … Slide Finish Black Oxide” |
| Barrel Model 13705 (.22 LR) | Stainless Steel | Satin Stainless | Ruger LCP II Centerfire Pistol — Specifications (model 13705, .22 LR) — Sturm, Ruger & Co. ruger.com [4] “Barrel Material Stainless Steel … Barrel Finish Satin Stainless” |
| Frame Model 13705 | Glass-Filled Nylon | — | Ruger LCP II Centerfire Pistol — Specifications (model 13705, .22 LR) — Sturm, Ruger & Co. ruger.com [4] “Grip Frame Black, High-Performance, Glass-Filled Nylon” |
| Slide LCP II | through-hardened steel | — | Ruger LCP II Centerfire Pistol — Specifications (model 13705, .22 LR) — Sturm, Ruger & Co. ruger.com [4] “Rugged construction with through-hardened steel slide and one-piece, high-performance, glass-filled nylon grip frame.” |
Parts list
Transcribed from the manufacturer's parts list (Ruger LCP II Instruction Manual — Sturm, Ruger & Co., Inc., p. 29 ruger-docs.s3.amazonaws.com [1]) — LCP II. Key numbers refer to the exploded view in that document.
39 parts
| Key | Part | Part no. | Qty | Group |
|---|---|---|---|---|
| 1 | Frame Insert The Frame Insert is a serial-numbered component and is defined as a “firearm” by Federal Law and is not sold as a separate component. | 1 | ||
| 2 | Hammer Pivot Pin | 1 | ||
| 3 | Hammer | 1 | ||
| 4 | Hammer Pin | 1 | ||
| 5 | Hammer Spring | 1 | ||
| 6 | Slide Stop | 1 | ||
| 7 | Takedown Pin Detent | 1 | ||
| 8 | Trigger Pivot | 1 | ||
| 9 | Trigger Bar | 1 | ||
| 10 | Trigger, Outer | 1 | ||
| 11 | Inner Trigger | 1 | ||
| 12 | Inner Trigger Spring | 1 | ||
| 13 | Inner/Outer Trigger Pin | 1 | ||
| 14 | Trigger Spring | 1 | ||
| 15 | Trigger Pivot Pin | 1 | ||
| 16 | Grip Frame | 1 | ||
| 17 | Sear Pin | 1 | ||
| 18 | Sear | 1 | ||
| 19 | Hammer Catch Spring | 1 | ||
| 20 | Magazine Latch | 1 | ||
| 21 | Magazine Latch Spring | 1 | ||
| 22 | Slide Parts so marked must be factory fit. | 1 | ||
| 23 | Firing Pin | 1 | ||
| 24 | Firing Pin Spring | 1 | ||
| 25 | Firing Pin Retainer | 1 | ||
| 26 | Extractor Spring | 1 | ||
| 27 | Extractor Plunger | 1 | ||
| 28 | Extractor | 1 | ||
| 29 | Barrel Parts so marked must be factory fit. | 1 | ||
| 30 | Takedown Pin | 1 | ||
| 31 | Hammer Spring Seat Pin | 1 | ||
| 32 | Hammer Spring Cap | 1 | ||
| 33 | Guide Rod | 1 | ||
| 34 | Recoil Spring, Inner | 1 | ||
| 35 | Recoil Spring, Outer | 1 | ||
| 36 | Frame Insert Pin, Front | 1 | ||
| 37 | Frame Insert Pin, Rear | 1 | ||
| 38 | Magazine | 1 | ||
| 39 | Magazine Flush Base | 1 |
Function check
- First be sure there is no ammunition in the chamber or magazine, and keep the pistol pointed in a safe direction.
- With no magazine and the slide forward, pull the slide fully to the rear and let it run forward quickly, twice.
- Insert an empty magazine; it should latch without excessive force. Pull the slide fully back and release — it should move forward a fraction and stay open on the slide stop.
- Remove the empty magazine. The slide should remain held open.
- With the magazine out, fully retract the slide and release it. The slide stop should disengage and the slide should close fully. The hammer should not fall.
- Cycle the slide to cock the hammer. The end of the hammer is visible through the opening at the rear of the slide when cocked.
- Pointed in a safe direction and with no magazine, pull the trigger fully rearward. The hammer should fall.
- Holding the trigger back, cycle the slide to reset the hammer, then release the trigger and feel the reset. The hammer should not fall.
Maintenance
Lubrication points
- Frame rails
- Barrel exterior where the slide rides
- Recoil spring assembly
Cleaning notes
Clean the striker channel and extractor recess specifically — pocket lint there is the most common cause of malfunctions in this class of pistol. Keep lubrication very light.
Suggested inspection interval: roughly every 1000 rounds. This is a general guideline, not a manufacturer specification.
Wear parts to inspect
Recoil spring assembly · Extractor · Magazine spring and follower
Common issues
| Symptom | Likely cause | What to do |
|---|---|---|
| Takedown pin will not come out | Slide not positioned so the pin clears its notch | Adjust slide position slightly and try again. Never hammer it. |
| Malfunctions after pocket carry | Lint in the striker channel and extractor recess | Clean those areas and re-verify function with dummy rounds. |
Also covers
The procedures above are reported to apply to: Ruger LCP MAX (similar, with a different magazine and sights). Verify against the manual for your specific model.
Similar manual of arms
Sourcing
- Confidence
- high — Cross-checked against a primary source such as the manufacturer's manual or an issuing military technical manual.
- Verification
- Checked against the manufacturer manual
- Last updated
- 2026-10-29
References
Every source this page draws on, with its web address so you can read it yourself. Numbers in brackets elsewhere on the page point here.
- [1] Ruger LCP II Instruction Manual — Sturm, Ruger & Co., Inc. manufacturer manual primary source
https://ruger-docs.s3.amazonaws.com/_manuals/LCPII-Ls6Gb8Dsk45.pdf (checked 2026-09-15) - [2] Ruger Instruction Manuals (index) — Sturm, Ruger & Co., Inc. manufacturer manual primary source
https://ruger.com/dataProcess/serialHistory/manuals.php (checked 2026-09-15) - [3] Ruger LCP II Lite Rack .22 LR Threaded Barrel Replacement Instructions (PM849) — Sturm, Ruger & Co., Inc. manufacturer manual primary source
https://shopruger.s3.amazonaws.com/LCP-II-BarrelKit.pdf (checked 2026-09-27) - [4] Ruger LCP II Centerfire Pistol — Specifications (model 13705, .22 LR) — Sturm, Ruger & Co. website primary source
https://ruger.com/products/lcpII/specSheets/13705.html (checked 2026-10-03) - [5] Ruger Patents — Sturm, Ruger & Co., Inc. website primary source
https://ruger.com/micros/Patents/index.html (checked 2026-10-13)
Notes: Verified against Ruger's LCP II manual, "Disassembly" pp. 19-22 and "Reassembly" p. 23. Most of that manual is scanned imagery rather than text, so the disassembly pages were read as rendered images. The previous entry cited the original LCP manual rather than the LCP II's, and inherited two gaps from it. Reassembly said only to insert the takedown pin and press it home; Ruger's instruction is to start the pin at about a 45-degree downward angle so its tip pushes the retaining spring clear, then rotate it into line — which is why the pin appears not to fit when pushed straight in. The entry also did not mention that the flared end of the inner recoil spring faces the muzzle. Ruger publishes a separate manual for the LCP II in .22 LR, which this entry does not cover.