← All firearms · Printable work order
Ruger SP101
- moderate
- Shop tier 2
- high confidence
- Revolver
- revolver
- double action
- modular lockwork
- no sideplate
- concealed carry
- small frame
field strip ~4 min · reassembly ~6 min · detail strip ~30 min
Specifications
- Manufacturer
- Sturm, Ruger & Co.
- Origin
- United States
- Category
- Revolver
- Action
- Double-action revolver
- Calibers
- .357 Magnum, .38 Special, .22 Long Rifle
- Capacity
- 5 rounds in .357 Magnum
- Production
- 1989–present (in-production)
- Also known as
- SP-101
Model-specific safety
- Opening the cylinder does not clear the revolver. Check every chamber individually and count them.
- The mainspring strut must be pinned before the mainspring assembly comes out, and that pin must stay in until the assembly is reinstalled. Removing it early lets the mainspring fly off the strut with great force.
- Never remove or install a loaded cylinder. A loaded cylinder can discharge if dropped or struck.
- Ruger double actions have no sideplate — the lockwork comes out as subassemblies. That makes owner-level disassembly feasible, but the manual still restricts anything beyond this procedure to factory service personnel.
- Never flick the cylinder closed.
- The .22 LR version must not be dry fired.
Under spring tension
- Mainspring and strut assembly (pin it before removal)
- Trigger return spring
- Cylinder latch spring
Easily lost parts
Mainspring seat · Mainspring strut · Cylinder latch and spring
Tools
| Tool | Required | Used for | Substitute |
|---|---|---|---|
| Properly fitting screwdriver | Yes | The grip screw, and depressing the trigger guard lock plunger through the frame hole. | |
| Pin or dedicated disassembly pin | Yes | Capturing the mainspring strut before the mainspring assembly is removed. | An appropriately sized pin or similar instrument, inserted about half its length. |
Shop difficulty
Shop tier 2 Tier 2 — moderate among revolvers, for the full job: strip to the parts that get coated and put it back together working. Same modular Ruger takedown as the GP100 in a small frame (61 pieces): easy to the module level, but the trigger guard group holds a pawl spring and detent that launch, an awkward pawl spring pin, a spring-loaded cylinder latch and a trigger-return tunnel that is easy to damage. Moderate.
Parts: 60 numbered parts (SP101 base list; supplemental list excluded (60 line items)), from Instruction Manual for Ruger SP101 Double-Action Revolvers — Sturm, Ruger & Co., Inc., p. 33 ruger-docs.s3.amazonaws.com [1].
Bench time: about 30 min to strip, 45 min to rebuild (estimate). Estimated for an experienced tech: Ruger’s sanctioned modular takedown (grip, mainspring, hammer, trigger guard group, cylinder/crane) plus stripping the trigger guard group, crane latches and sights for coating. Rebuild is longer for the pawl spring/plunger, transfer bar and pawl alignment and the mainspring.
Small parts: 13 pins, 7 springs, 6 detents or plungers (counted from the manufacturer's parts list (one per key number unless a quantity is given))
What comes off for coating
- Grip and mainspring: grip screw, grip and locator, mainspring assembly captured on its strut with the disassembly pin — disassembly pin / paper clip
- Hammer and trigger guard group: hammer pivot and hammer (with hammer dog and spring), trigger guard assembly (latch plunger pushed through the frame hole), if the trigger guard is coated: trigger, pawl, pawl plunger and spring, transfer bar, trigger return spring assembly, cy — small screwdriver for the trigger guard plunger, pin punches, vise to hold the trigger while refitting the pawl spring
- Cylinder and crane: cylinder and crane forward out of the frame, crane latch, front latch and plungers if the frame is stripped bare, ejector, center pin rod and springs if the cylinder is coated — padded vise
- Frame: rear sight (pivot pin, elevation screw, two elevation springs), front sight (plunger-retained), firing pin, spring and plug only if required (factory-fit parts) — small punch for the front sight plunger
Special tools
- Disassembly pin (supplied, or a fitting pin/paper clip) — Capturing the mainspring on its strut; it must stay in until reassembly
- Small screwdriver/punch through the frame hole — Depressing the trigger guard latch plunger
- Bench vise with soft jaws and a gallon freezer bag — Holding the trigger while the pawl spring/plunger is refitted; catching parts
- 1/8" or smaller pin punch — Trigger guard group pins, sight pins
Known pain points
- Squeezing the loose trigger group moves the pawl and frees a spring and detent that launch and are lost. (disassembly)
Source: Do-It-Yourself Ruger SP101 Trigger Job — Shooting Times shootingtimes.com [5] — “This will move the pawl (which rotates the cylinder), and a spring and detent under the pawl will be exposed and go ballistic into never-ever land (never-ever going to find that part).” - The pawl spring pin is awkward to push in against heavy spring pressure; a vise and a plastic bag help. (reassembly)
Source: Do-It-Yourself Ruger SP101 Trigger Job — Shooting Times shootingtimes.com [5] — “The pawl spring pin is in an awkward place and pushing it in was awkward. Consider doing this in a plastic bag to contain the pawl spring/pin because it is under a lot of pressure and a little slip will have you chasing parts.” - The cylinder latch is under spring pressure and its spring and plunger escape if it is moved too far sideways. (both)
Source: Do-It-Yourself Ruger SP101 Trigger Job — Shooting Times shootingtimes.com [5] — “It’s under spring pressure, so secure it down with a rubber band or tape.” - The lip at the end of the trigger-return spring tunnel captures the plunger; damaging it means a new trigger guard. (both)
Source: Do-It-Yourself Ruger SP101 Trigger Job — Shooting Times shootingtimes.com [5] — “You don’t want to damage the lip at the end of the tunnel because it captures the plunger. If you damage it, you’ll have to buy a new trigger guard!” - The mainspring must stay captured on its strut with the pin until the assembly is back in the frame. (both)
Source: Instruction Manual for Ruger SP101 Double-Action Revolvers — Sturm, Ruger & Co., Inc. ruger-docs.s3.amazonaws.com [1] — “When the hammer is cocked, the pin can be removed (it will fall free).”
Fit or check on rebuild
- Pawl and transfer bar positioned so the trigger guard swings home without resistance; trigger rotates and locks the cyli — Ruger’s own reassembly check.
Source: Instruction Manual for Ruger GP100 Double-Action Revolvers — Sturm, Ruger & Co., Inc. ruger-docs.s3.amazonaws.com [6] — “if the trigger guard will not lock into position, re-check the position of the pawl and transfer bar” - Timing / carry-up and cylinder lockup in single and double action; dry fire both ways — Ruger asks for single- and double-action dry fire after reassembly; worn pawl or cylinder stop gives the "does not lock up" fault (entry commonIssues).
- Hammer and trigger side play (shims) where fitted — SP101 manual reassembly puts hammer shims either side of the hammer; Shooting Times measures side play with a feeler gauge.
Source: Instruction Manual for Ruger SP101 Double-Action Revolvers — Sturm, Ruger & Co., Inc. ruger-docs.s3.amazonaws.com [1] — “insert the hammer into frame with the hammer shims on either side of the hammer” - Crane, front latch and cylinder latch lock the cylinder closed; cylinder spins free with no drag — Ruger’s function check (cylinder must spin freely; hammer must not cock with the cylinder open).
This is Pew-Takedown's rating, not the manufacturer's. How tiers are rated. Forum reports are owners' experience, not specifications.
Manufacturer videos
Official videos from Sturm, Ruger & Co.'s own channels, linked rather than copied. Where a video and the steps on this page differ, follow the manufacturer's manual and video.
- Ruger Double Action Revolver Disassembly RugerFirearms
field strip · 2009-04-16
Covers: Ruger double-action revolvers SP101, GP100 and Redhawk (per the video description) - Ruger Double Action Revolver Reassembly RugerFirearms
reassembly · 2009-04-16
Covers: Ruger double-action revolvers SP101, GP100 and Redhawk (per the video description) - Ruger Double Action Revolver Cleaning RugerFirearms
cleaning · 2009-04-16
Covers: Ruger double-action revolvers SP101, GP100 and Redhawk (per the video description) - Tech Tip - Double-Action Revolver Disassembly Ruger Firearms · plays on ruger.com
field strip · 2016-04-14
Covers: Ruger double-action revolvers (generic; models not stated) - Tech Tip - Double-Action Revolver Reassembly Ruger Firearms · plays on ruger.com
reassembly · 2016-04-14
Covers: Ruger double-action revolvers (generic; models not stated) - Tech Tip - Double-Action Revolver Full Cleaning Ruger Firearms · plays on ruger.com
cleaning · 2016-04-14
Covers: Ruger double-action revolvers (generic; models not stated)
Procedures
Clear and Make Safe
Clear & Make Safe- Point the muzzle in a safe direction and keep your finger off the trigger.
- Press the cylinder latch and swing the cylinder out.
- Press the ejector rod firmly to eject all cartridges or cases from the chambers.TipPoint the muzzle up and strike the rod briskly so the cases clear fully.Removed at this step:
Cartridges or cases - Look through every chamber, one at a time, and confirm each is empty.WarningEvery chamber, counted. A revolver with one loaded chamber looks identical to an empty one from most angles.
- Confirm the bore is clear of obstruction.
- Remove all live ammunition from the work area.
Field Strip
Field Strip tools requiredThe factory manual's sequence. The mainspring strut is pinned with the hammer cocked before anything comes apart.
Manufacturer’s videos: Ruger Double Action Revolver Disassembly RugerFirearms · Tech Tip - Double-Action Revolver Disassembly Ruger Firearms · plays on ruger.com
- Complete the Clear and Make Safe procedure and close the cylinder.
- Using a properly fitting screwdriver, remove the grip screw and remove the grip from the frame.TipOn the GP100 the pistol grip inserts and the grip panel locator come off first, then the grip pulls downward off the frame.Removed at this step:
Grip - Cock the hammer, then insert an appropriately sized pin about half its length into the hole at the rear of the mainspring strut.WarningThe hammer must be COCKED for this step. Pinning the strut is what keeps the mainspring captive.TipSome models ship with a dedicated disassembly pin for exactly this.
- With your thumb on the hammer spur, squeeze the trigger and let the hammer go fully forward, then lift the mainspring assembly out of the frame.WarningDo not remove the pin until the mainspring assembly is reinstalled. Removing it lets the mainspring fly off its strut with great force and can cause injury.Removed at this step:
Mainspring assembly - Hold the trigger in its rearward position and lightly strike the hammer pivot pin to release it from the frame, then lift the hammer out of the top of the frame while keeping the trigger held rearward.Removed at this step:
HammerHammer pivot - Insert a screwdriver of appropriate size through the hole in the frame to depress the trigger guard lock plunger, located inside the frame at the REAR of the trigger guard, and simultaneously pull the trigger guard assembly down and out.WarningThe plunger is at the rear of the trigger guard and is reached through a hole in the frame — not a latch at the front.TipIt may be necessary to slightly depress the trigger while removing the trigger guard assembly.Removed at this step:
Trigger guard assembly - Cradle the frame, press the cylinder latch button, swing out the cylinder assembly and remove it forward from the frame.TipThe cylinder only comes out once the trigger guard assembly is removed.Removed at this step:
Cylinder and crane assembly - Stop here. Further disassembly is not needed for normal cleaning and the manual restricts it to factory service personnel.
Reassembly
ReassemblyNot the reverse of disassembly. The pawl and transfer bar must be aligned before the trigger guard will seat.
Manufacturer’s videos: Ruger Double Action Revolver Reassembly RugerFirearms · Tech Tip - Double-Action Revolver Reassembly Ruger Firearms · plays on ruger.com
- Before starting, be certain all components and the inside of the frame are thoroughly clean — particularly the tongue on the front of the trigger guard and its mating recess in the frame.
- Replace the cylinder and crane assembly in the frame and close the cylinder.
- Hook the front of the trigger guard into the recess in the frame, align the pawl in its recess, and confirm the transfer bar is correctly positioned at the rear of the firing pin. Swing the trigger guard upward into the frame and let the latch re-engage.WarningIf you feel solid resistance, or the trigger guard will not lock into position, stop and re-check the pawl and the transfer bar. Do not force it.TipThe pawl and transfer bar alignment is the step that catches people out on this design.
- With the revolver pointed in a safe direction, pull the trigger a few times. At this stage the trigger should rotate and lock the cylinder.
- Hold the trigger in its rearward position, insert the hammer into the frame and install the hammer pivot, then release the trigger and let the hammer go fully forward.
- With the hammer forward, insert the mainspring assembly into the frame, positioning the two ends of the notch in the mainspring seat onto the matching projections of the grip frame.TipThe large notch in the mainspring seat goes forward, to clear the grip screw.
- Hold the mainspring assembly in position and cock the hammer, moving the assembly slightly if needed so the upper end of the mainspring strut rests in its recess in the hammer. Once the hammer is cocked, the pin can be removed and will fall free.WarningOnly now is it safe to remove the strut pin.
- Squeeze the trigger and ease the hammer down, then push the grip upward onto the frame and install and tighten the grip screw.
- Open and close the cylinder, then dry fire in both single action and double action to confirm all parts are working properly.
Patent drawings
not under copyrightDrawings from US patents on this design. A patent shows the invention as the inventor filed it; the firearm that shipped can differ in detail, and later production often does. Use them to see how the parts relate, not as a parts reference or a procedure. Per the USPTO, the text and drawings of a patent are typically not subject to copyright; each patent here was checked for a copyright notice.
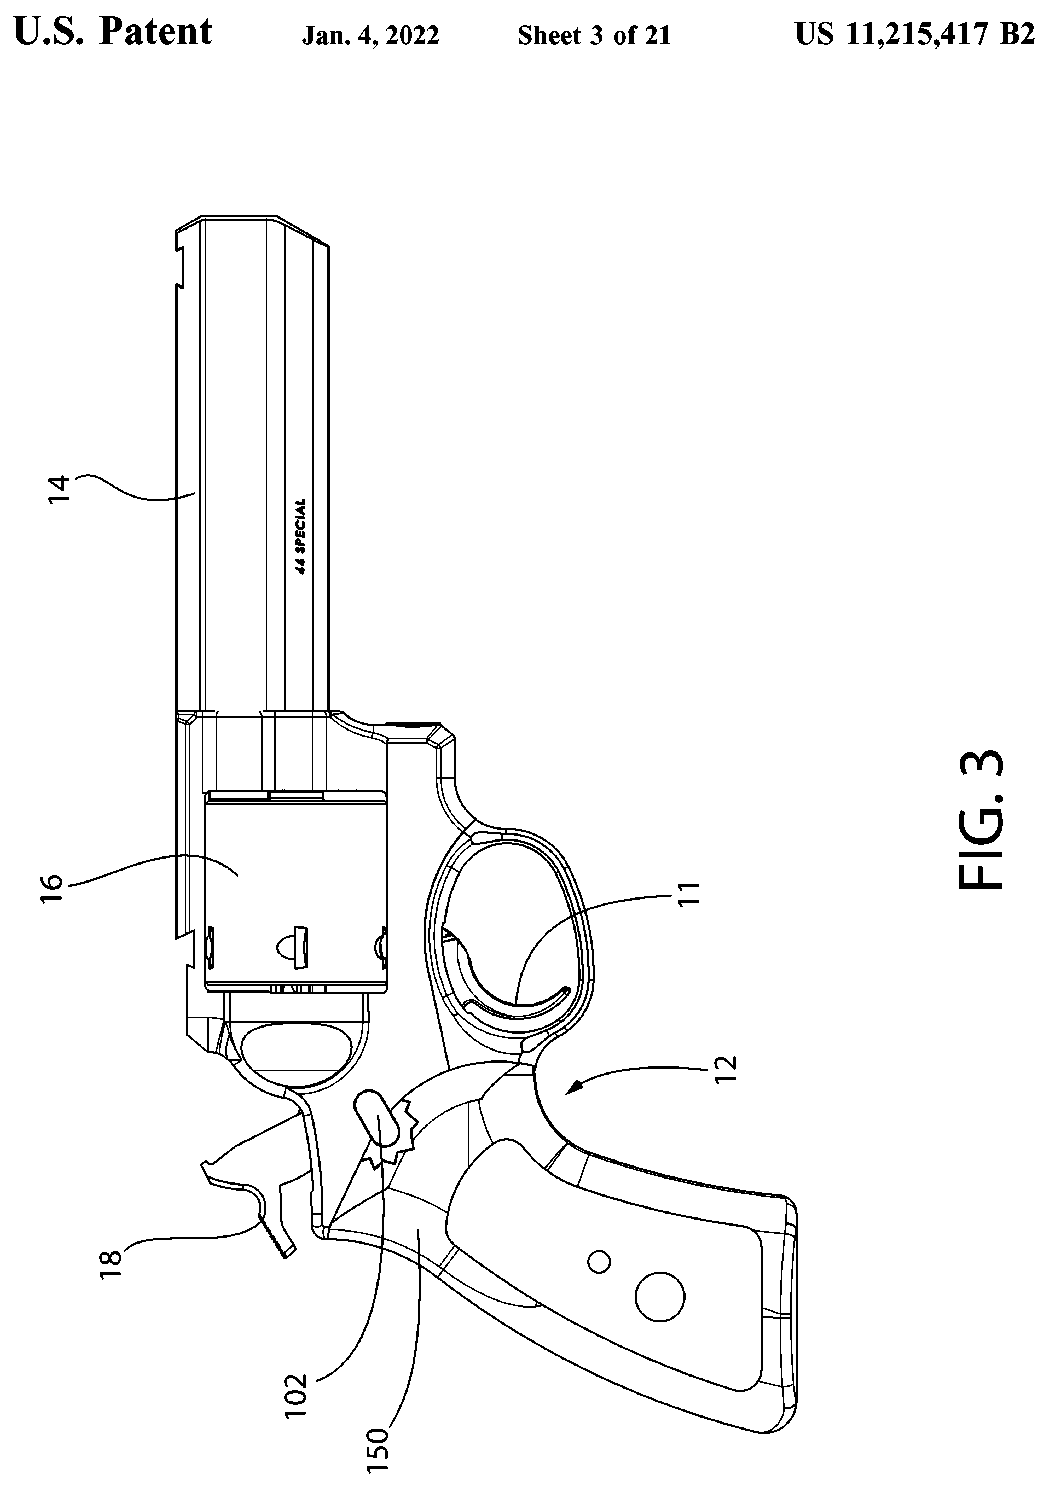
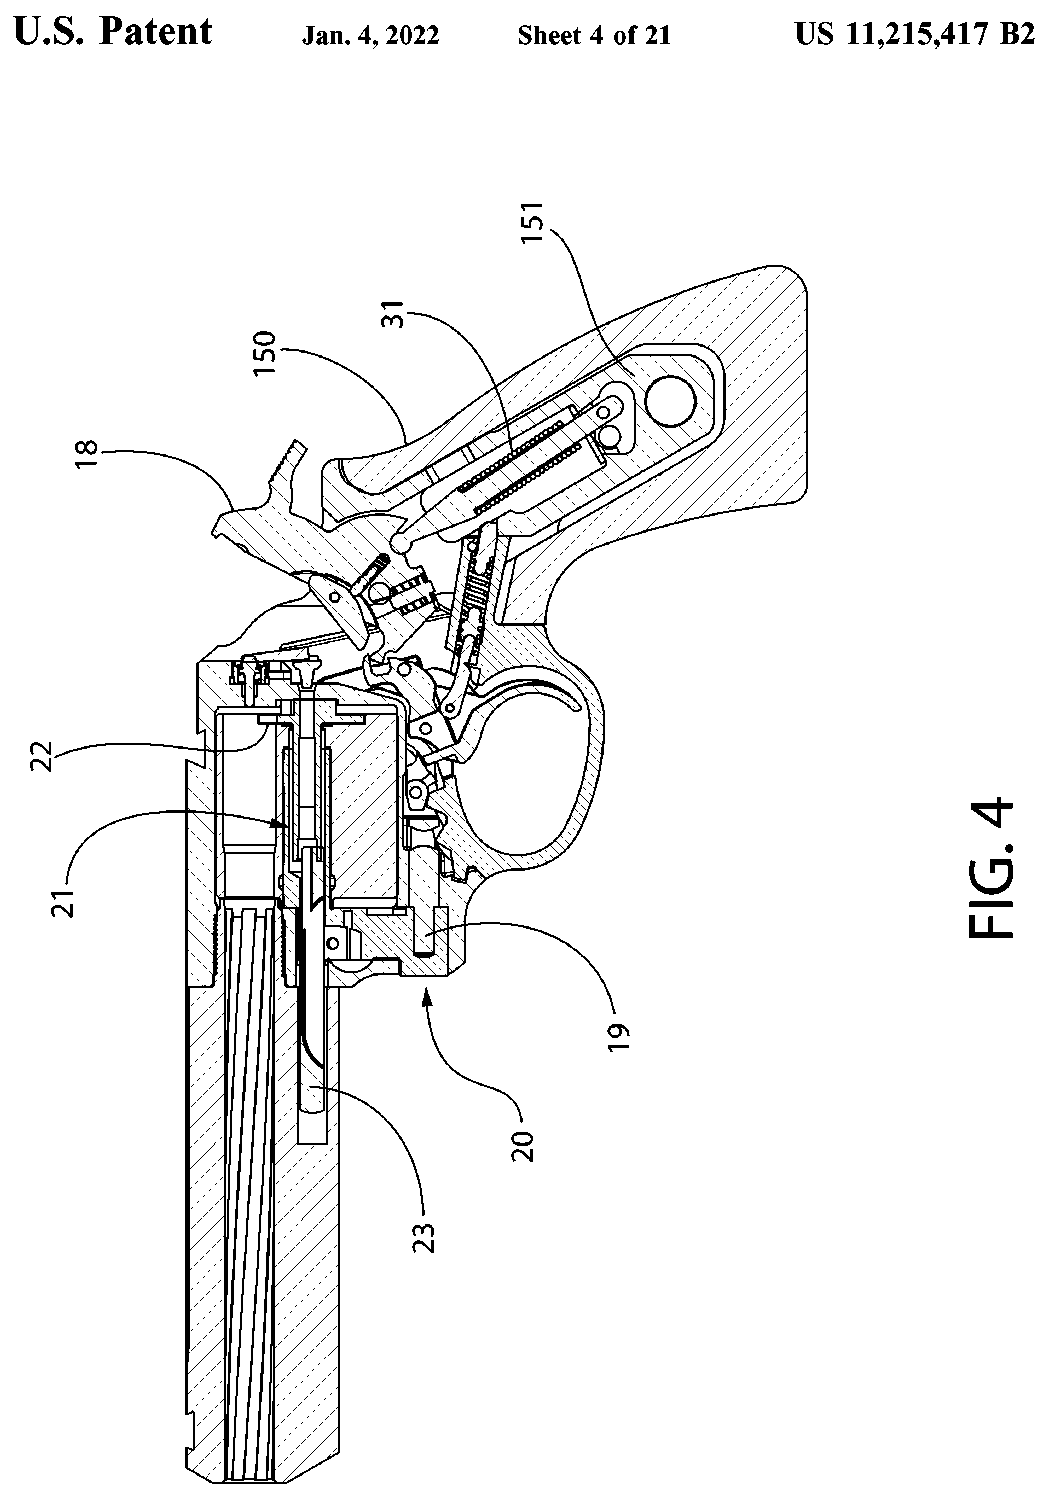
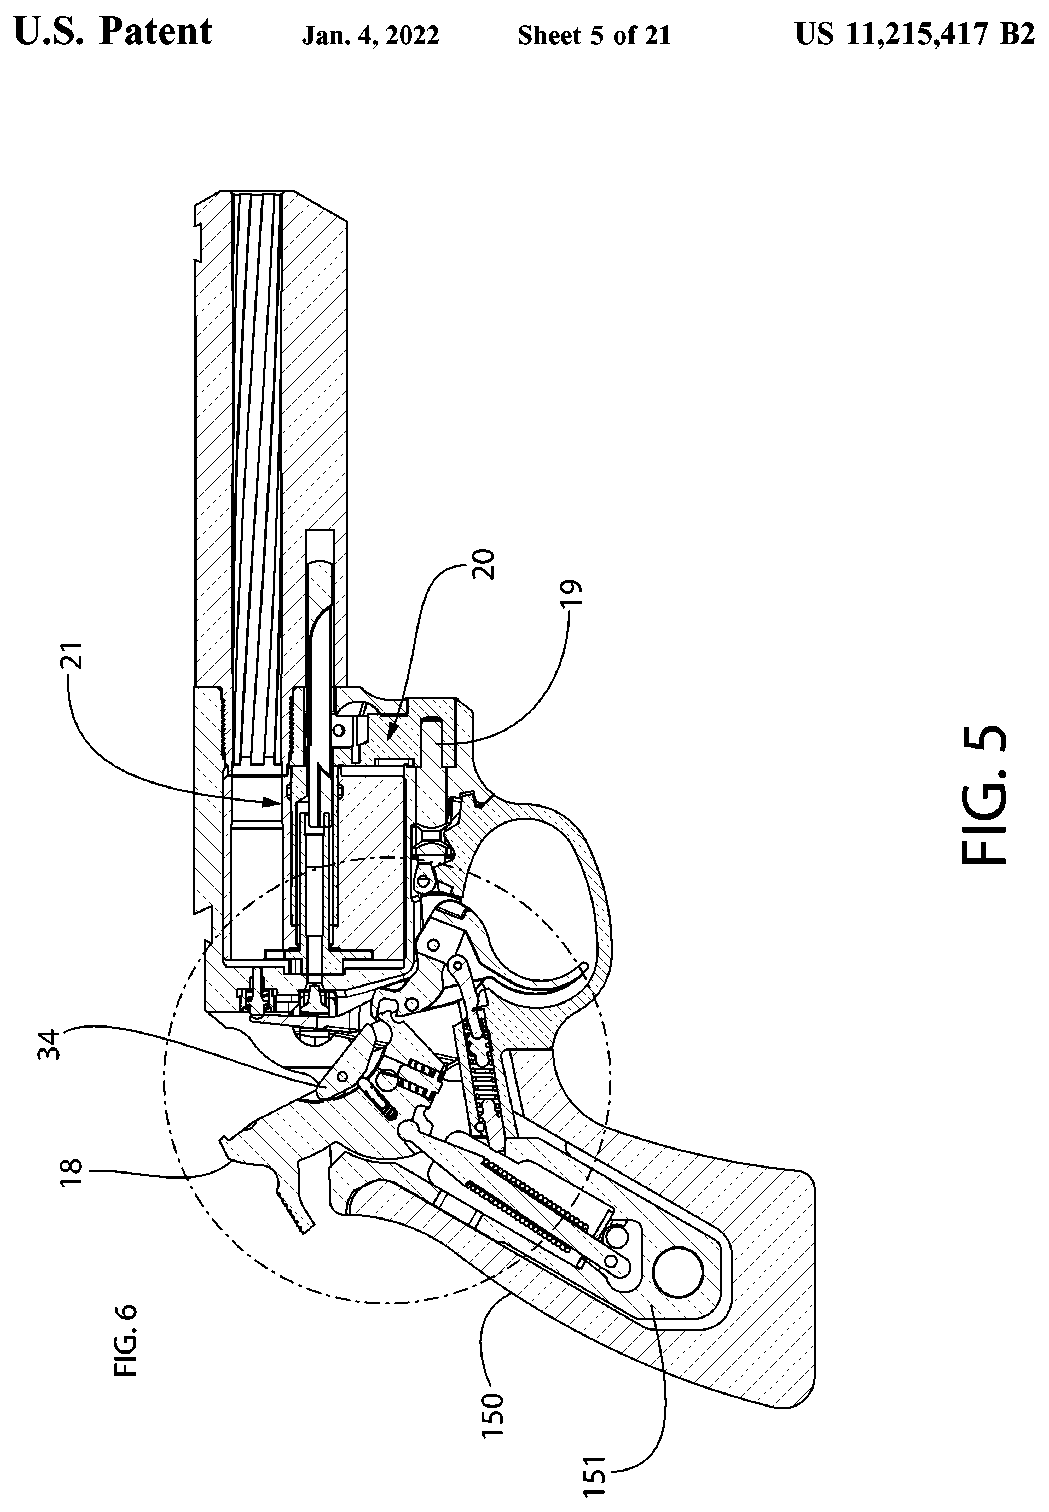
US Patent 11,215,417 — Safety mechanism for hammer-operated firearms
Jonathan Philip MATHER, Andrew James Beland, Geoffrey William Smith, Kenneth Bruce McLoud, Eric Mitchell Callum, Jonathan Barrett · assigned to Sturm, Ruger & Company, Inc. · filed 2020-07-29 · granted 2022-01-04. Full patent (USPTO)
A Ruger double-action revolver's hammer, transfer bar/blocking-pin safety and lockwork in the frame.
Why this is the Ruger SP101’s patent: listed on the maker’s patent-marking page — Ruger Patents — Sturm, Ruger & Co., Inc. ruger.com [4]: “Ruger SP101® 11,215,417”
Torque specifications
No sourced torque values from the manufacturer are recorded for this firearm. Where a fastener has a specified torque — action screws, scope bases, muzzle devices, barrel nuts — get it from the manufacturer or a gunsmith rather than estimating it.
What the manufacturer does say: The manufacturer's documents give no torque value. They say: "Install and tighten grip panel screw." (Instruction Manual for Ruger SP101 Double-Action Revolvers, PDF p. 25)
Materials and factory finish
As stated by Sturm, Ruger & Co.. Prep, masking and cure depend on these; a polymer or aluminium part, a nitrided or anodised finish, and a blued steel part are each a different job. Variants with other finishes may exist — check the maker's page for the exact SKU on the bench.
| Component | Material | Factory finish | Where it comes from |
|---|---|---|---|
| Frame Model 5718 (.357 Mag, 2.25 in) | Stainless Steel | Satin Stainless | Ruger SP101 Standard Double-Action Revolver — Specifications (model 5718) — Sturm, Ruger & Co. ruger.com [3] “Material Stainless Steel … Finish Satin Stainless” |
| Grips Model 5718 | Black Rubber, Black Synthetic | — | Ruger SP101 Standard Double-Action Revolver — Specifications (model 5718) — Sturm, Ruger & Co. ruger.com [3] “Grips Black Rubber, Black Synthetic” |
| Grips SP101 | rubber | — | Ruger SP101 Standard Double-Action Revolver — Specifications (model 5718) — Sturm, Ruger & Co. ruger.com [3] “Cushioned rubber grip with black synthetic or hardwood insert has no exposed metal in the backstrap, making it extremely comfortable.” |
Parts list
Transcribed from the manufacturer's parts list (Instruction Manual for Ruger SP101 Double-Action Revolvers — Sturm, Ruger & Co., Inc., p. 33 ruger-docs.s3.amazonaws.com [1]) — SP101. Exploded view on p. 34. Key numbers refer to the exploded view in that document.
60 parts
| Key | Part | Part no. | Qty | Group |
|---|---|---|---|---|
| 1 | Hammer Assembly - Includes Parts so marked must be factory fit. | 1 | ||
| 1a | Hammer Shim | 2 | Hammer Assembly | |
| 1b | Blocker Spring | 1 | Hammer Assembly | |
| 1c | Blocker Pin | 1 | Hammer Assembly | |
| 1d | Retention Clip | 1 | Hammer Assembly | |
| 1e | Retention “C” Clip | 1 | Hammer Assembly | |
| 2 | Hammer Pivot Pin Assembly | 1 | ||
| 3 | Hammer Dog, Crane, & Front Latch Spring | 1 | ||
| 4 | Pawl Plunger | 1 | ||
| 5 | Hammer Dog Parts so marked must be factory fit. | 1 | ||
| 6 | Hammer Dog Pivot Pin | 1 | ||
| 7 | Hammer Strut | 1 | ||
| 8 | Hammer Strut Mainspring | 1 | ||
| 9 | Hammer Strut Mainspring Seat | 1 | ||
| 10 | Trigger Assembly Parts so marked must be factory fit. | 1 | ||
| 11 | Trigger Plunger | 1 | ||
| 12 | Pawl Plunger Spring | 1 | ||
| 13 | Pawl Parts so marked must be factory fit. | 1 | ||
| 14 | Trigger Link | 1 | ||
| 15 | Trigger Link Pin | 1 | ||
| 16 | Transfer Bar | 1 | ||
| 17 | Trigger Guard Parts so marked must be factory fit. | 1 | ||
| 18 | Crane Pivot Lock Parts so marked must be factory fit. | 1 | ||
| 19 | Crane Pivot Lock Spring Parts so marked must be factory fit. | 1 | ||
| 20 | Cylinder Latch Pivot | 1 | ||
| 21 | Pawl Spring Plunger | 1 | ||
| 22 | Trigger Pivot Pin | 1 | ||
| 23 | Trigger Link Plunger | 1 | ||
| 24 | Trigger Guard Latch Spring | 1 | ||
| 25 | Trigger Guard Latch | 1 | ||
| 26 | Cylinder Latch | 1 | ||
| 27 | Ejector Retainer Parts so marked must be factory fit. | 1 | ||
| 28 | Ejector Spring | 1 | ||
| 29 | Center Pin Spring | 1 | ||
| 30 | Center Pin Rod | 1 | ||
| 31 | Center Pin Lock | 1 | ||
| 32 | Cylinder Parts so marked must be factory fit. | 1 | ||
| 33 | Ejector Parts so marked must be factory fit. | 1 | ||
| 34 | Crane & Crane Pivot Assembly Parts so marked must be factory fit. | 1 | ||
| 35 | Front Latch | 1 | ||
| 36 | Front Latch Pivot Pin | 1 | ||
| 37 | Front Latch Pivot Lock Spring | 1 | ||
| 38 | Front Latch Pivot Lock | 1 | ||
| 39 | Front Latch Spring Plunger | 1 | ||
| 40 | Ejector Rod | 1 | ||
| 41 | Firing Pin Plug | 1 | ||
| 42 | Firing Pin Spring Parts so marked must be factory fit. | 1 | ||
| 43 | Firing Pin Parts so marked must be factory fit. | 1 | ||
| 44 | Crane Latch Parts so marked must be factory fit. | 1 | ||
| 45 | Crane Latch Pivot Parts so marked must be factory fit. | 1 | ||
| 46 | Barrel Parts so marked must be factory fit. | 1 | ||
| 47 | Front Sight | 1 | ||
| 48 | Front Sight Cross Pin | 1 | ||
| 49 | Rear Sight Blade | 1 | ||
| 50 | Rear Sight Windage Spring | 1 | ||
| 51 | Rear Sight Windage Screw | 1 | ||
| 52 | Grip Panel Locator | 1 | ||
| 53 | Rubber Pistol Grip | 1 | ||
| 54 | Grip Inserts | 1 | ||
| 55 | Grip Panel Screw | 1 |
Function check
- Again, be certain the revolver is unloaded before any check.
- Visually inspect the revolver to ensure no components are damaged, missing, loose, bent, cracked, chipped, or peened.
- Open and close the cylinder and confirm it latches securely.
- Cock the hammer slowly and confirm the cylinder indexes and locks up at each chamber before the hammer reaches full cock.
- With the hammer at full cock, confirm the cylinder is locked with only minimal rotational play.
- Dry fire in single action and in double action through every chamber to confirm all parts are working properly.
- Confirm the trigger guard assembly is fully latched into the frame.
- If you observe excessive wear, stop using the revolver and contact customer service.
Maintenance
Lubrication points
- Crane where the cylinder rides
- Ejector rod
- Hammer and trigger pivots (one drop each)
- Cylinder latch
Cleaning notes
Clean the cylinder face and forcing cone thoroughly. If you shoot .38 Special in a .357 chamber, scrub the resulting carbon ring out or .357 rounds will not seat properly later.
Suggested inspection interval: roughly every 2000 rounds. This is a general guideline, not a manufacturer specification.
Wear parts to inspect
Hand · Cylinder stop · Forcing cone · Ejector rod tightness · Firing pin and return spring
Common issues
| Symptom | Likely cause | What to do |
|---|---|---|
| Cylinder will not come out during disassembly | Trigger group still installed | Remove the trigger group assembly first. |
| Cylinder binds under sustained shooting | Carbon and lead on the cylinder face, or a loose ejector rod | Clean the cylinder face and forcing cone and verify the ejector rod is tight. |
| Cylinder does not lock up before the hammer falls | Worn hand or cylinder stop | Stop shooting it and have the timing checked. see a gunsmith |
Similar manual of arms
Sourcing
- Confidence
- high — Cross-checked against a primary source such as the manufacturer's manual or an issuing military technical manual.
- Verification
- Checked against the manufacturer manual
- Last updated
- 2026-10-29
References
Every source this page draws on, with its web address so you can read it yourself. Numbers in brackets elsewhere on the page point here.
- [1] Instruction Manual for Ruger SP101 Double-Action Revolvers — Sturm, Ruger & Co., Inc. manufacturer manual primary source
https://ruger-docs.s3.amazonaws.com/_manuals/sp101.pdf (checked 2026-09-14) - [2] Ruger Instruction Manuals — Sturm, Ruger & Co., Inc. manufacturer manual primary source
https://ruger.com/dataProcess/serialHistory/manuals.php (checked 2026-09-14) - [3] Ruger SP101 Standard Double-Action Revolver — Specifications (model 5718) — Sturm, Ruger & Co. website primary source
https://ruger.com/products/sp101/specSheets/5718.html (checked 2026-10-03) - [4] Ruger Patents — Sturm, Ruger & Co., Inc. website primary source
https://ruger.com/micros/Patents/index.html (checked 2026-10-13) - [5] Do-It-Yourself Ruger SP101 Trigger Job — Shooting Times website secondary source
https://www.shootingtimes.com/editorial/do-it-yourself-ruger-sp101-trigger-job/465997 (checked 2026-10-29) - [6] Instruction Manual for Ruger GP100 Double-Action Revolvers — Sturm, Ruger & Co., Inc. manufacturer manual primary source
https://ruger-docs.s3.amazonaws.com/_manuals/gp100.pdf (checked 2026-10-29)
Notes: Corrected against the factory manual on 2026-09-14. The previous version was wrong in two material ways: it had the hammer down rather than cocked when freeing the mainspring, and omitted pinning the mainspring strut entirely; and it placed the trigger guard latch at the front of the trigger guard, where the manual locates the lock plunger at the rear, reached with a screwdriver through a hole in the frame. Hammer removal and the pawl and transfer bar alignment on reassembly were also missing.