← All firearms · Printable work order
Browning Hi-Power
- moderate
- Shop tier 3
- high confidence
- Pistol
- single action
- historic
- steel frame
- john browning
- high capacity
field strip ~3 min · reassembly ~4 min · detail strip ~35 min
Specifications
- Manufacturer
- FN Herstal
- Origin
- Belgium
- Category
- Pistol
- Action
- Hammer-fired, short recoil
- Calibers
- 9x19mm Parabellum, .40 S&W
- Capacity
- 13+1 in 9mm
- Production
- 1935–2017 (discontinued)
- Also known as
- FN GP35, P-35, Grand Puissance, Browning HP
Model-specific safety
- Most original Hi-Powers have a magazine disconnect safety, meaning the pistol will not fire without a magazine inserted. This is not a substitute for clearing the chamber — a round can still be chambered and the pistol can still discharge if the disconnect is removed or worn.
- The recoil spring and guide are under tension when the slide is off.
- The slide stop must be removed with the takedown notch aligned. Forcing it will damage the frame.
- Older Hi-Powers can have cracked slides at the high-stress areas. Inspect the slide during every cleaning, especially on high-round-count or surplus pistols.
Under spring tension
- Recoil spring and guide
- Mainspring in the housing (detail strip)
Easily lost parts
Slide stop · Extractor · Firing pin retaining plate
Tools
No tools required for the field strip.
Shop difficulty
Shop tier 3 Tier 3 — hardest among pistols, for the full job: strip to the parts that get coated and put it back together working. No parts count found. The frame strip has to be done with the hammer held cocked while the sear, sear spring, ejector and spring-loaded thumb-safety detent come out, the trigger pin is press-fit and needs special punches, the trigger and magazine-safety plunger come out as a unit, and on later guns the firing pin flies when the sear lever is pressed; a dedicated 'third hand' tool exists for it. Harder than a 1911.
No sourced part count yet.
Bench time: about 40 min to strip, 60 min to rebuild (estimate). Estimate for an experienced tech with the right tools, detail strip to coatable parts (slide internals, frame pins, trigger group, sights) and rebuild to a function-checked gun; scale used across pistols: Glock-pattern 15/20 min, other strikers 20-30/25-40, DA/SA hammer guns 30-35/45-50, Hi-Power, Colt 1903 and Mark 23 40-45/60-75.
What comes off for coating
- Slide: firing pin stop, firing pin and spring, sear lever, spring and roll pin, extractor, roll pin and spring, rear sight, front sight — 3/32 in. roll-pin punch, 5/64 in. roll-pin punch
- Barrel: barrel, recoil spring and guide
- Frame: grips, magazine catch and spring guide, ambidextrous safety right lever (if fitted), sear pin, sear and sear spring, ejector, thumb safety with detent and spring, hammer, strut and mainspring, trigger pin (press fit), trigger with magazine-safety plunger and spring — 1/8 in. screwdriver, brass punch, Third Hand Tool (optional)
Special tools
- BH Spring Solutions 'Third Hand Tool' (or a second pair of hands) — Holding the hammer cocked during the frame strip
- 3/32 in. and 5/64 in. roll-pin punches; 1/16 in. punch for ambi safety pin — Sear lever pin, extractor pin, ambi safety lever
- Wide brass punch and specialty 3/32 in. nail/non-slip punches — Press-fit trigger pin
- 1/8 in. wide screwdriver — Quarter turn of the magazine catch spring guide
Known pain points
- Much of the frame strip must be done with the hammer held back by hand (or a dedicated 'Third Hand' tool) while other spring-loaded parts are removed and replaced. (both)
Source: Browning Hi Power Custom Build Part 4 — Shooting Illustrated (NRA) shootingillustrated.com [3] — “a large portion of the process requires the hammer to be held in the rearward (or cocked) position while removing other frame components, which can be quite cumbersome, frustrating and tedious.” - The trigger pin is a factory press fit and takes force, care and special punches to move without marring the frame. (disassembly)
Source: Browning Hi Power Custom Build Part 4 — Shooting Illustrated (NRA) shootingillustrated.com [3] — “it cannot be understated just how challenging removing the trigger pin is. That's because the trigger pin is press-fit into the frame at the factory” - On later Mk II and Mk III guns the sear lever is also the firing-pin block, so pressing it launches the firing pin and spring once the retainer is out. (disassembly)
Source: Browning Hi Power Custom Build Part 4 — Shooting Illustrated (NRA) shootingillustrated.com [3] — “once the firing-pin stop is removed the firing pin and its spring are will still be under tension at this point and depressing the firing-pin safety/sear lever will send them flying.” - The thumb safety only comes out when it lines up with the rotated ejector, and its detent and spring are compressed and under tension. (both)
Source: Browning Hi Power Custom Build Part 4 — Shooting Illustrated (NRA) shootingillustrated.com [3] — “the thumb safety (along with its detent and spring—which will be compressed and under tension—will come out” - The trigger comes out with its related parts as one unit and they must go back in together; the magazine catch is locked out with a quarter-turn of its spring guide. (reassembly)
Source: Exploded View: High Power Pistol — American Rifleman (NRA) americanrifleman.org [4] — “this will allow the removal of it and related parts (21), (34) and (35) as a unit (Fig. 4). They must be replaced as a unit when reassembling the gun.”
Fit or check on rebuild
- Trigger, trigger lever and magazine-safety plunger reinstalled as a unit — They come out together and must go back together
Source: Exploded View: High Power Pistol — American Rifleman (NRA) americanrifleman.org [4] — “They must be replaced as a unit when reassembling the gun.” - Trigger pin re-seated without loosening — It is a factory press fit; a loose pin after removal may need replacement
- Sight position / re-zero — Drift or pressed sights moved for coating shift point of impact unless witness-marked and returned to the same spot
- Full function check (trigger reset, safeties, slide lock-back, drop of striker/hammer only on trigger) — Standard after any fire-control strip; confirms springs and sears went back correctly
This is Pew-Takedown's rating, not the manufacturer's. How tiers are rated. Forum reports are owners' experience, not specifications.
Procedures
Clear and Make Safe
Clear & Make Safe- Point the muzzle in a safe direction and keep your finger off the trigger.
- Press the magazine release and remove the magazine.TipWith a magazine disconnect fitted, the trigger will feel dead with the magazine out. That is normal and is not a safety check.Removed at this step:
Magazine - Retract the slide fully to eject any chambered round, and lock it open with the slide stop.
- Visually and physically verify the chamber is empty.
- Remove all live ammunition from the work area.
Field Strip
Field Strip- Complete the Clear and Make Safe procedure. Remove the magazine and visually confirm no cartridge remains in the chamber. Put on eye protection.WarningWear eye protection. Springs and spring-tensioned parts are what come loose here.
- Pull the slide back and lock it rearward by engaging the safety lever into the disassembly recess on the slide.TipThe safety lever is the takedown catch on this pistol. There is no separate takedown lever.
- Remove the slide stop: push the protrusion on the right side of the frame, lift slightly on the serrated portion of the slide stop to disengage it, and pull it out of the frame.Removed at this step:
Slide stop - Grasp the slide firmly, pull it rearward slightly, and move the safety lever down. The slide will run forward under spring tension and off the frame.WarningKeep hold of the slide. It is under spring tension and will leave the frame on its own if you let it.Removed at this step:
Slide assembly - Holding the slide, press the head of the recoil spring guide forward to release it from the barrel, then remove the recoil spring and guide.Removed at this step:
Recoil spring and guide - Lift the barrel lug and slide the barrel out of the slide toward the rear.TipRearward, not out the front. The Hi Power barrel does not come out the muzzle end of the slide.Removed at this step:
Barrel - Stop here. Browning states this is sufficient for normal maintenance and that no further disassembly is recommended.WarningIf further disassembly ever becomes necessary it should only be done by Browning's service facility or an authorised service centre. Incorrect reassembly could render the pistol inoperative or unsafe.
Reassembly
Reassembly- Replace the barrel into the slide.
- Replace the recoil spring and guide into the slide with the head of the guide positioned rearward. Compress the spring by pushing on the head of the guide until the head can be inserted in the concave recess of the barrel lug.TipThe retainer tab on the recoil spring guide is offset. Check it is aligned in the barrel lug correctly before you go further.
- Replace the slide on the frame, hold it fully rearward, and lock it there by moving the safety lever up into the recess in the slide.
- Replace the slide stop in the frame.
- Pull the slide slightly rearward, move the safety lever down, and let the slide run forward.
- Insert a completely unloaded magazine and lower the hammer to the dropped position, then perform the function check.WarningConfirm the magazine is empty before this step.
Patent drawings
not under copyrightDrawings from US patents on this design. A patent shows the invention as the inventor filed it; the firearm that shipped can differ in detail, and later production often does. Use them to see how the parts relate, not as a parts reference or a procedure. Per the USPTO, the text and drawings of a patent are typically not subject to copyright; each patent here was checked for a copyright notice.
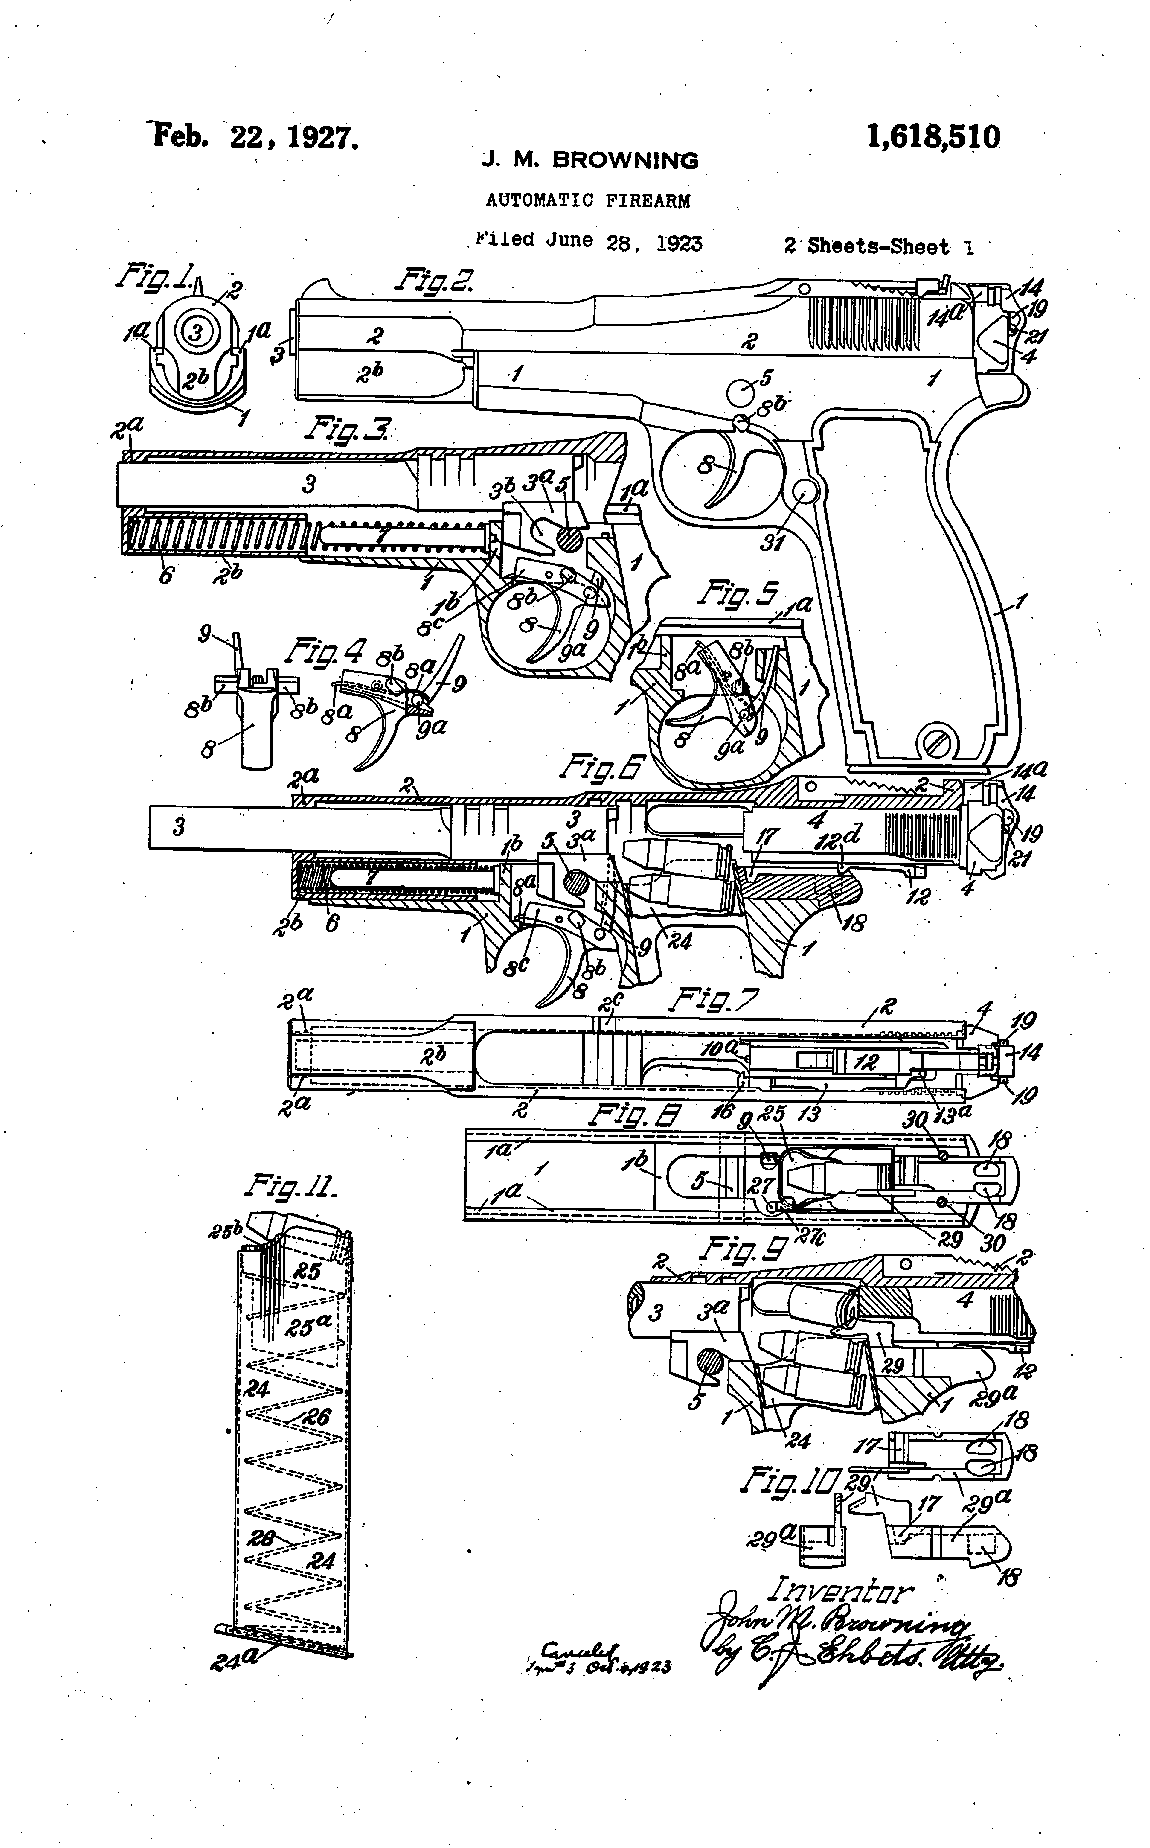
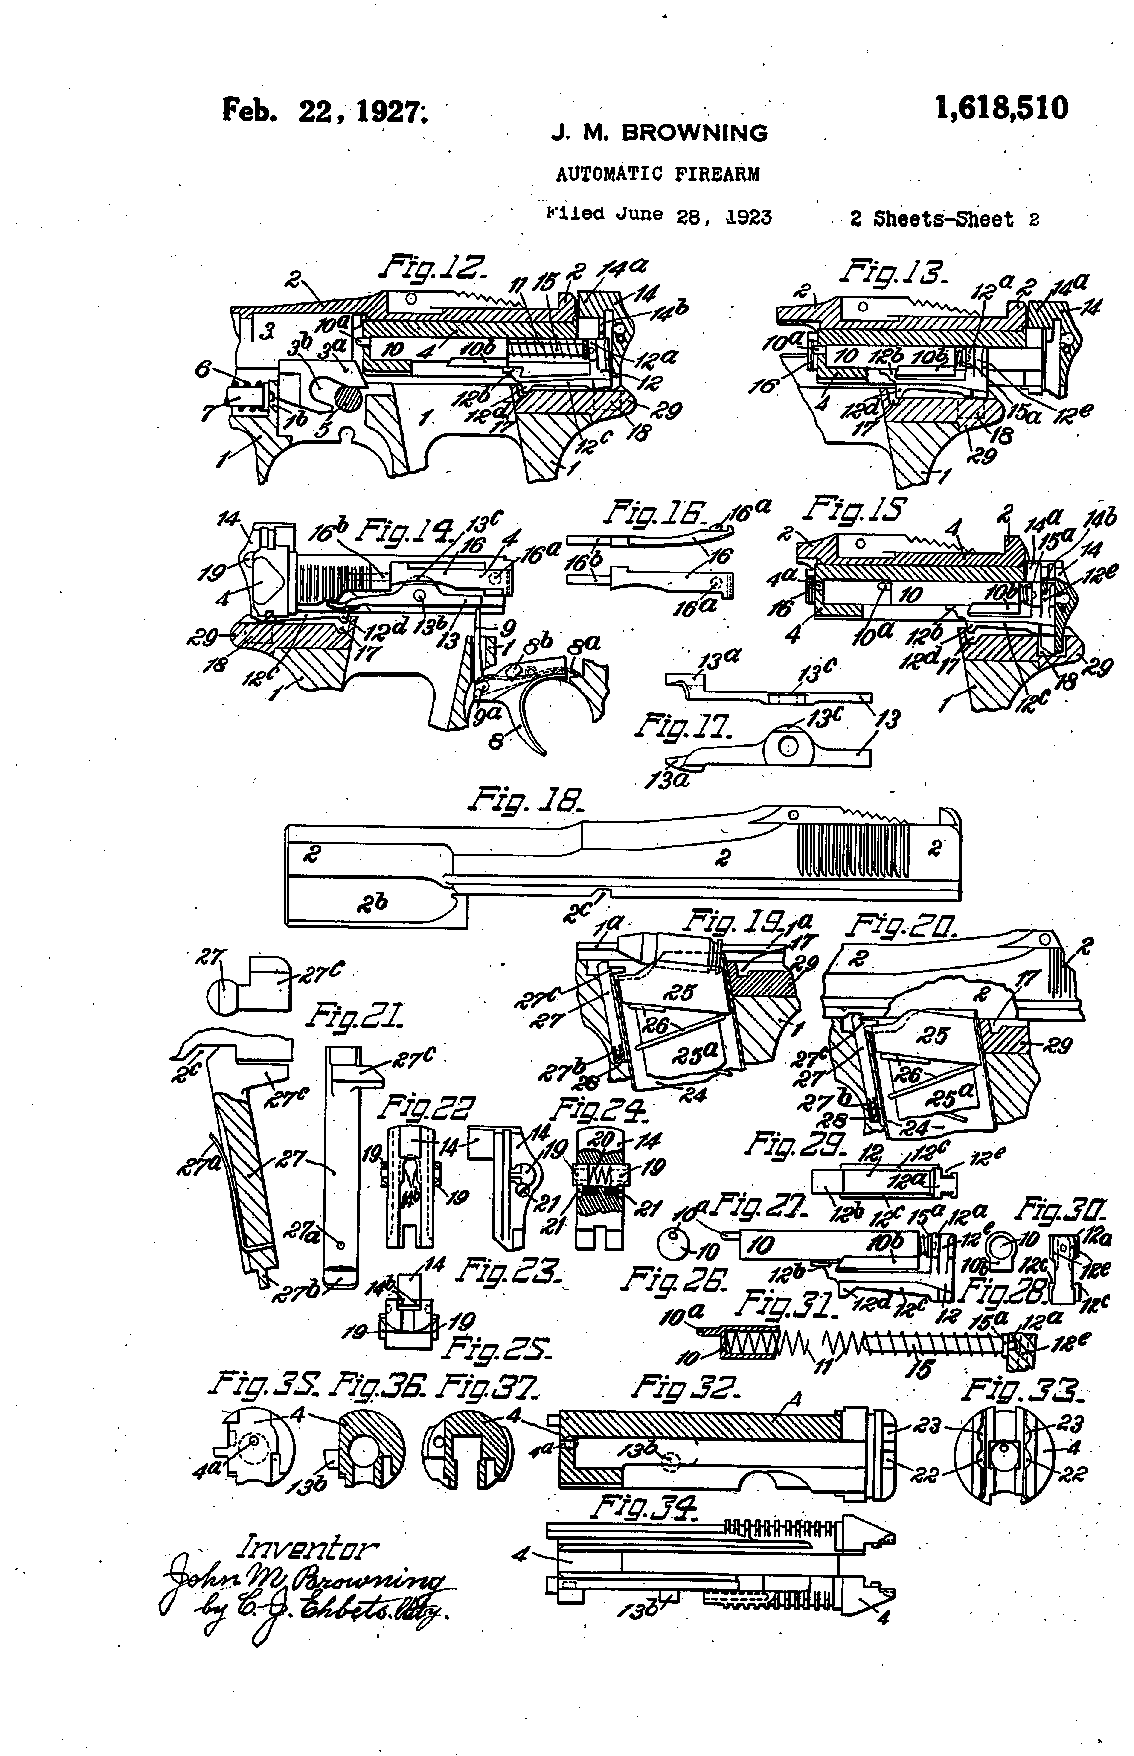
US Patent 1,618,510 — Automatic firearm
John M. Browning · filed 1923-06-28 · granted 1927-02-22. Full patent (USPTO)
John Browning's last pistol patent, the locked-breech recoil-operated pistol with a cam-groove barrel unlocking on a cross pin, a double-column magazine and tool-free disassembly, which FN developed (with Dieudonné Saive) into the Grande Puissance / Hi-Power.
Why this is the Browning Hi-Power’s patent: named by a historical source — The Classics: The Browning Hi Power in WWII — Shooting Illustrated (NRA), article by Philip Schreier, Director, NRA Museums, March 17, 2025 shootingillustrated.com [2]: “It is his last patent, #1,618,510, applied for in 1923, but not awarded until Feb. 22, 1927, (barely three months after his death) that we examine here. It was for a semi-automatic pistol design, the Grand Rendement or Grande Puissance . That translates to “high power,” which is how we get the name of that classic gun still in manufacture around the globe to this day.”
Torque specifications
No sourced torque values from the manufacturer are recorded for this firearm. Where a fastener has a specified torque — action screws, scope bases, muzzle devices, barrel nuts — get it from the manufacturer or a gunsmith rather than estimating it.
Function check
- Verify the pistol is unloaded before each check.
- With a magazine inserted (required if the magazine disconnect is fitted), cock the hammer and engage the safety. Press the trigger — the hammer must not fall.
- Disengage the safety and press the trigger. The hammer should fall.
- Remove the magazine and press the trigger. With a magazine disconnect fitted, the hammer should not fall.
- Hold the trigger back, rack the slide, release slowly for the reset, and press again.
- Confirm the slide locks open on an empty magazine.
Maintenance
Lubrication points
- Frame rails and slide grooves
- Barrel locking lugs and cam slot
- Slide stop pin
- Hammer and sear pivots
Cleaning notes
Inspect the slide for hairline cracks near the ejection port and locking lug recesses during every cleaning, particularly on surplus pistols.
Suggested inspection interval: roughly every 3000 rounds. This is a general guideline, not a manufacturer specification.
Wear parts to inspect
Recoil spring · Slide (cracks) · Extractor · Firing pin · Magazine disconnect
Common issues
| Symptom | Likely cause | What to do |
|---|---|---|
| Trigger feels dead with no magazine inserted | Magazine disconnect safety working as designed | This is normal on most Hi-Powers. It is not a clearing check. |
| Hammer bite on the web of the hand | Original spur hammer geometry | Common on GI-pattern Hi-Powers. A rounded 'Commander-style' hammer is the usual fix. see a gunsmith |
Also covers
The procedures above are reported to apply to: FN GP35 · Browning Hi-Power Mark III · Inglis Hi-Power · FEG and other Hi-Power pattern clones. Verify against the manual for your specific model.
Similar manual of arms
Sourcing
- Confidence
- high — Cross-checked against a primary source such as the manufacturer's manual or an issuing military technical manual.
- Verification
- Checked against the manufacturer manual
- Last updated
- 2026-10-29
References
Every source this page draws on, with its web address so you can read it yourself. Numbers in brackets elsewhere on the page point here.
- [1] Browning Hi Power Pistol Owner's Manual — Browning manufacturer manual primary source
https://www.browning.com/support/owners-manuals/hi-power-pistol.html (checked 2026-09-14) - [2] The Classics: The Browning Hi Power in WWII — Shooting Illustrated (NRA), article by Philip Schreier, Director, NRA Museums, March 17, 2025 periodical secondary source
https://www.shootingillustrated.com/content/the-classics-the-browning-hi-power-in-wwii (checked 2026-10-13) - [3] Browning Hi Power Custom Build Part 4 — Shooting Illustrated (NRA) website secondary source
https://shootingillustrated.com/content/browning-hi-power-custom-build-part-4 (checked 2026-10-29) - [4] Exploded View: High Power Pistol — American Rifleman (NRA) website secondary source
https://www.americanrifleman.org/articles/2020/9/15/exploded-view-high-power-pistol/ (checked 2026-10-29)
Notes: CORRECTED on 2026-09-14 against Browning's own owner's manual. The entry had the barrel coming out the front of the slide; the manual removes it rearward after lifting the barrel lug. It also described a takedown notch and slide-stop alignment borrowed from other designs — the Hi Power locks its slide back for takedown using the safety lever in the disassembly recess. Reassembly gained the manual's note that the recoil spring guide head faces rearward and its retainer tab is offset. Hi-Powers span nine decades and several factories. Mark III, older Belgian, Inglis, and FEG variants differ in details including the firing pin retaining plate, the presence of a magazine disconnect, and the extractor design. Check the manual for your specific pistol.