← All firearms · Printable work order
Ruger Mark IV
- easy
- Shop tier 2
- high confidence
- Rimfire Pistol
- rimfire
- blowback
- target pistol
- one button takedown
- beginner friendly
field strip ~1 min · reassembly ~1 min · detail strip ~20 min
Specifications
- Manufacturer
- Sturm, Ruger & Co.
- Origin
- United States
- Category
- Rimfire Pistol
- Action
- Blowback
- Calibers
- .22 Long Rifle
- Capacity
- 10+1
- Production
- 2016–present (in-production)
- Also known as
- Mark IV Target, Mark IV 22/45, Mark IV Hunter
Model-specific safety
- The Mark IV is the generation that fixed the infamous Mark II and Mark III takedown. If you find yourself holding the pistol upside down and hammering on a mainspring housing, you have a Mark III or earlier and this procedure does not apply.
- Rimfire cartridges can fire from a blow to the case rim. Keep .22 LR ammunition away from the work area.
- A .22 LR round in the chamber is small and easy to miss. Inspect with a light and a finger.
- Ruger issued a recall for Mark IV pistols manufactured before roughly late June 2017, addressing a condition where the pistol could discharge when the safety was moved. If you own an early Mark IV and do not know its recall status, contact Ruger before use.
If it will not go back together
Common ways this firearm resists reassembly, and what is actually wrong. Forcing a part that will not seat is how firearms get damaged.
-
The barrel and receiver will not lift off the grip frame.
Why The barrel is being tilted the wrong way, so it binds on the bolt stop pin.
Fix Hold the barrel in one hand and the grip frame in the other, depress the take-down button, and tilt the BARREL downward so it clears the bolt stop pin. Then lift straight up.
-
The pistol will not go back together.
Why The safety is off. The Mark IV reassembles only with the safety ON, white dot fully visible.
Fix Put the safety on so the white dot shows, then align the receiver notch with the frame pivot pin and rotate down until it clicks.
Under spring tension
- Recoil spring and guide
- Mainspring in the housing (detail strip)
Easily lost parts
Recoil spring guide · Bolt stop pin (detail strip)
Tools
No tools required for the field strip.
Shop difficulty
Shop tier 2 Tier 2 — moderate among pistols, for the full job: strip to the parts that get coated and put it back together working. Ruger fixed the old Mark-series takedown with a button, but the full job is 67 pieces (49 keys): grip frame with hammer, sear and sear spring, bolt stop, magazine disconnector, safety detent and several spring-loaded plungers; the magazine ejector springs out when the right grip comes off, and reassembly only works with the safety on.
Parts: 65 numbered parts (Mark IV pistol parts list incl. barrel/receiver sub-assembly and magazine (manual pp. 35-37); 65 rows, 49 keys. 22/45 Lite list omitted.), from Instruction Manual for Ruger Mark IV Pistols — Sturm, Ruger & Co., Inc., p. 35–36 ruger-docs.s3.amazonaws.com [1].
Bench time: about 25 min to strip, 40 min to rebuild (estimate). Bolt (firing pin, extractor), barrel/receiver (sights, ejector left riveted), grip frame (grips, mag ejector, safety, hammer, sear, bolt stop, disconnector, trigger, mainspring housing); rebuild longer for the sear spring and plungers.
Small parts: 9 pins, 13 springs, 8 detents or plungers (counted from the manufacturer's parts list (one per key number unless a quantity is given))
What comes off for coating
- Barrel/receiver and bolt: bolt, firing pin and stop pin, extractor, plunger and spring, rear sight, front sight — pin punch
- Grip frame: grip panels, magazine ejector, ambidextrous safety and detent, hammer, strut and hammer spring/plunger, sear and sear spring, bolt stop and pins, magazine disconnector, trigger and pivot, magazine latch — 3/32" and 1/16" hex wrenches, pin punches
Special tools
- 3/32" hex wrench — Grip panel screws
- 1/16" hex wrench — Right-side safety lever
Known pain points
- Taking the right grip panel off frees the spring-loaded magazine ejector, which is lost if not covered. (disassembly)
Source: Instruction Manual for Ruger Mark IV Pistols — Sturm, Ruger & Co., Inc. ruger-docs.s3.amazonaws.com [1] — “The magazine ejector is under spring tension and should be covered with your hand when removing the grip panel to prevent it from being dislodged.” - Reassembly only works with the safety on (white dot showing); with it off the barrel/receiver will not go back on. (reassembly)
Source: Instruction Manual for Ruger Mark IV Pistols — Sturm, Ruger & Co., Inc. ruger-docs.s3.amazonaws.com [1] — “The safety must be in the "on" position with the white dot fully visible for reassembly” - Ruger stops owners at the bolt; the grip-frame fire control (hammer, sear, sear spring, disconnector) is not covered and carries the old Mark-series reputation. (both)
Source: Product Preview: Hammer Strut Support for Ruger Mark Series .22 Rimfire Pistols — American Rifleman (NRA) americanrifleman.org [5] — “Owners of Ruger ’s Mark series .22 Long Rifle semi-automatic pistols have long dreaded cleaning them due to the onerous nature of the reassembly process, which could sometimes result in a non-functional pistol.”
See also 2 documented reassembly problems and their fixes.
Fit or check on rebuild
- Sear spring orientation and preload — A mis-seated sear spring gives a hammer that will not stay cocked; standard Mark-series check (Brownells tip not reachable)
- Function check: trigger reset, sear/striker engagement, safeties — Standard post-reassembly check on any pistol whose fire-control parts were removed; a mis-seated spring shows up here, not on the bench
This is Pew-Takedown's rating, not the manufacturer's. How tiers are rated. Forum reports are owners' experience, not specifications.
Manufacturer videos
Official videos from Sturm, Ruger & Co.'s own channels, linked rather than copied. Where a video and the steps on this page differ, follow the manufacturer's manual and video.
- Ruger® Mark IV™ Disassembly, Cleaning and Reassembly Tech Tip RugerFirearms
field strip, cleaning, reassembly · 2021-11-19
Covers: Ruger Mark IV (the description does not name variants; Mark IV 22/45 has a different grip frame)
Procedures
Clear and Make Safe
Clear & Make Safe- Point the muzzle in a safe direction and keep your finger off the trigger.
- Press the magazine release and remove the magazine.Removed at this step:
Magazine - Pull the bolt fully to the rear and lock it back with the bolt stop.
- Inspect the chamber and magazine well with a light, then physically confirm the chamber is empty.WarningA .22 case is small and dull. Look and feel.
- Engage the manual safety and remove all ammunition from the work area.
Field Strip
Field StripOne button. This is the easiest field strip of any rimfire pistol in common use.
Manufacturer’s video: Ruger® Mark IV™ Disassembly, Cleaning and Reassembly Tech Tip RugerFirearms
- Complete the Clear and Make Safe procedure. Remove the magazine and empty it, draw the bolt fully rearward, confirm the chamber is empty, release the bolt, and put the safety ON so the white dot is visible.TipThe Mark IV comes apart with no tools at all. If you are reaching for one, you are on the wrong procedure — that is the Mark III.
- Hold the barrel in one hand and the grip frame assembly in the other, and depress the take-down button just below the rear of the bolt.
- With the button pressed, tilt the BARREL downward so that it clears the bolt stop pin.TipBarrel down, not receiver up. Tilting the wrong way binds it on the bolt stop pin and no amount of force helps.
- Lift the barrel and receiver assembly straight up off the grip frame assembly.Removed at this step:
Barrel and receiver assembly - Pull straight back on the bolt ears to draw the bolt out of the receiver.Removed at this step:
Bolt - Clean the bolt face, chamber, and receiver interior. Rimfire fouling accumulates fast here.
- Stop here. Ruger states no further disassembly is necessary. The grips can come off with a 3/32 in hex wrench if you want them off.
Reassembly
ReassemblyManufacturer’s video: Ruger® Mark IV™ Disassembly, Cleaning and Reassembly Tech Tip RugerFirearms
- Confirm the pistol is free of cartridges and keep your finger out of the trigger guard. The safety must be ON, with the white dot fully visible, or it will not go back together.TipSafety off is the single most common reason a Mark IV refuses to reassemble.
- Insert the bolt fully into the barrel and receiver assembly.
- Place the barrel and receiver assembly on top of the frame so the notch in the receiver aligns with the pivot pin in the grip frame.
- Rotate the barrel and receiver assembly down onto the bolt stop pin in the grip frame.
- Gently squeeze the barrel/receiver and grip frame together until you hear a click, then check that they are firmly together and cannot be pulled apart.
- Replace the empty magazine, point the pistol in a safe direction, move the safety off to expose the red dot, and pull the trigger to uncock it.WarningConfirm the magazine is empty first.TipRuger's own instruction: guns should not be stored loaded or cocked.
- Perform the function check.
Patent drawings
not under copyrightDrawings from US patents on this design. A patent shows the invention as the inventor filed it; the firearm that shipped can differ in detail, and later production often does. Use them to see how the parts relate, not as a parts reference or a procedure. Per the USPTO, the text and drawings of a patent are typically not subject to copyright; each patent here was checked for a copyright notice.
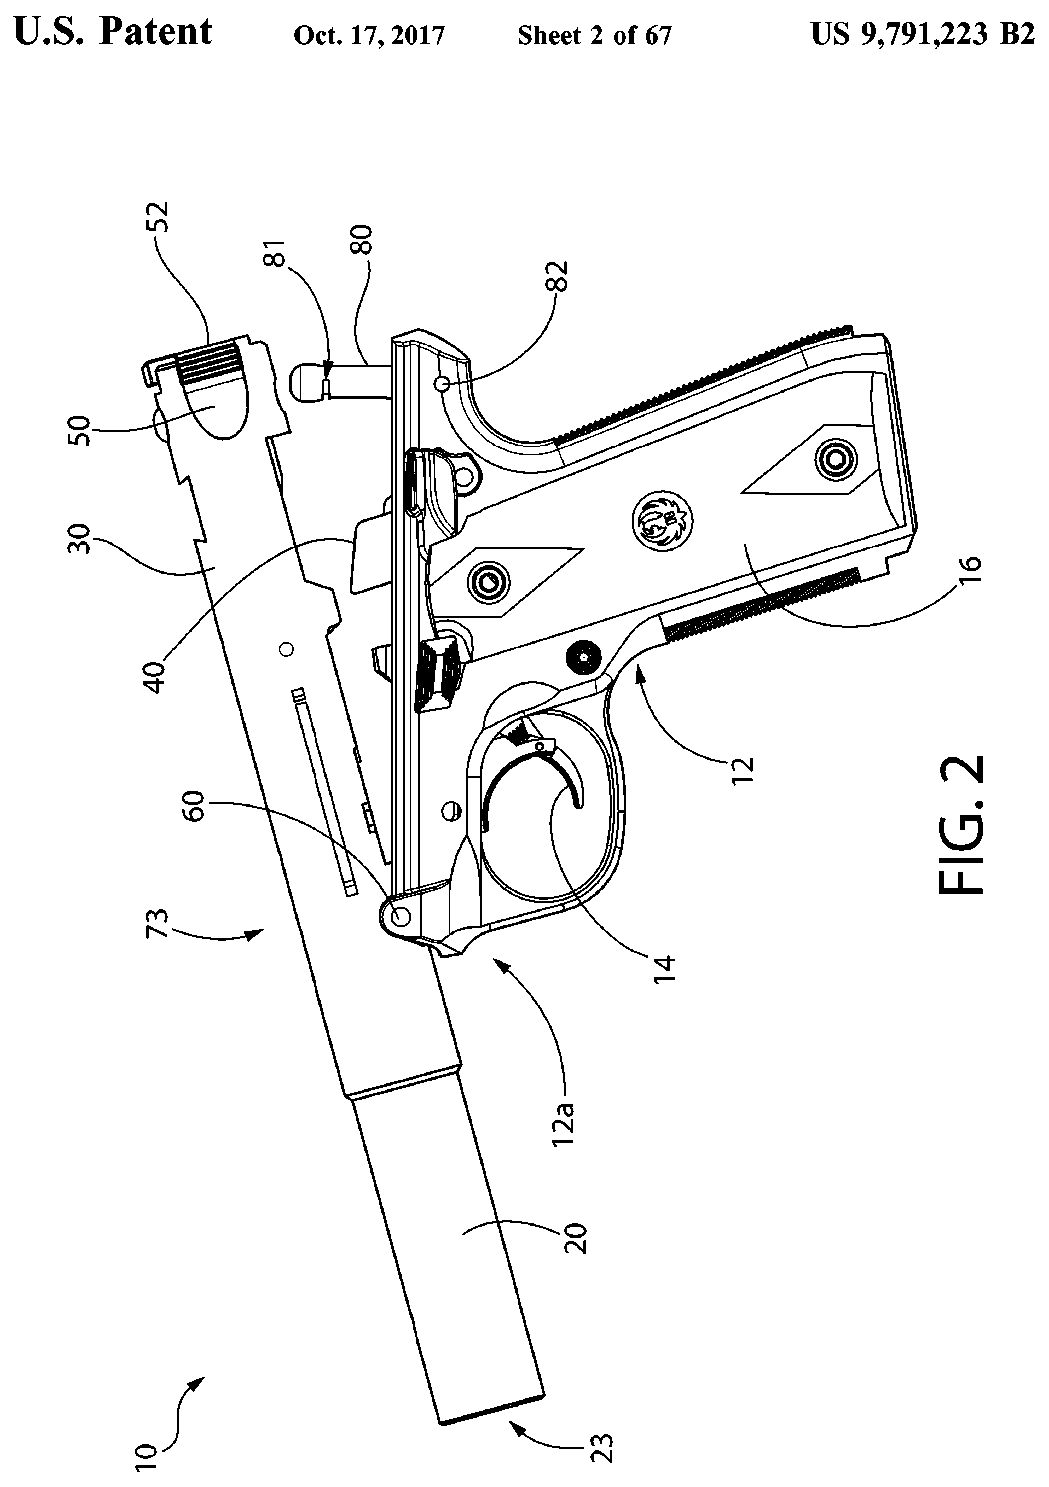
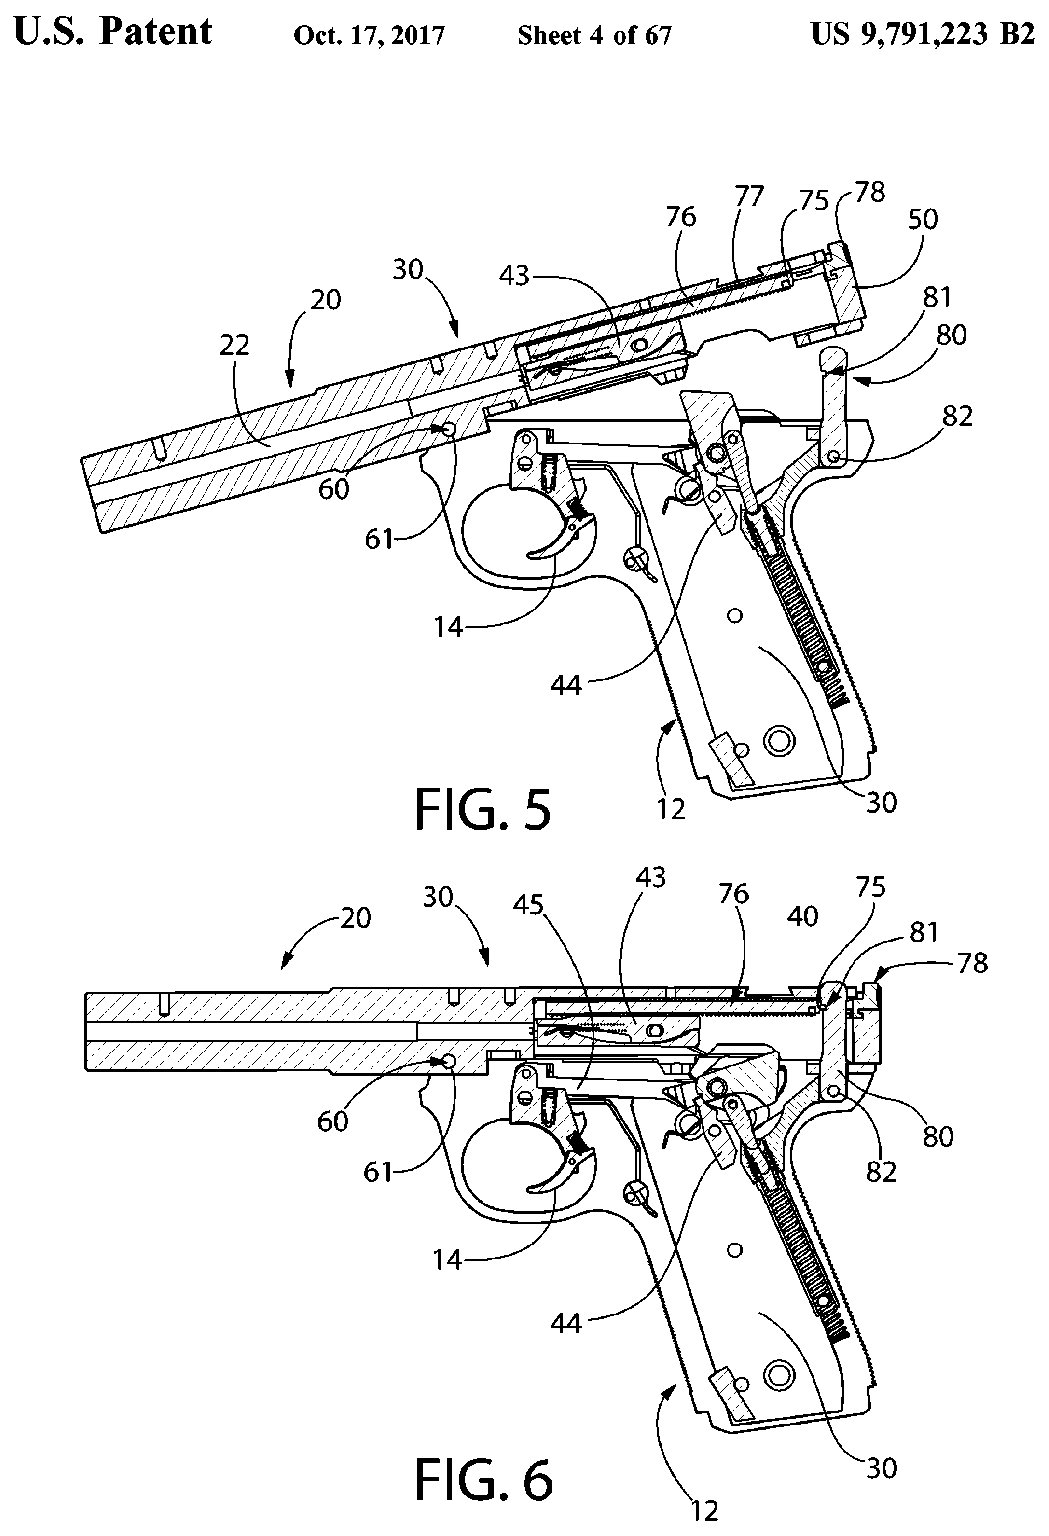
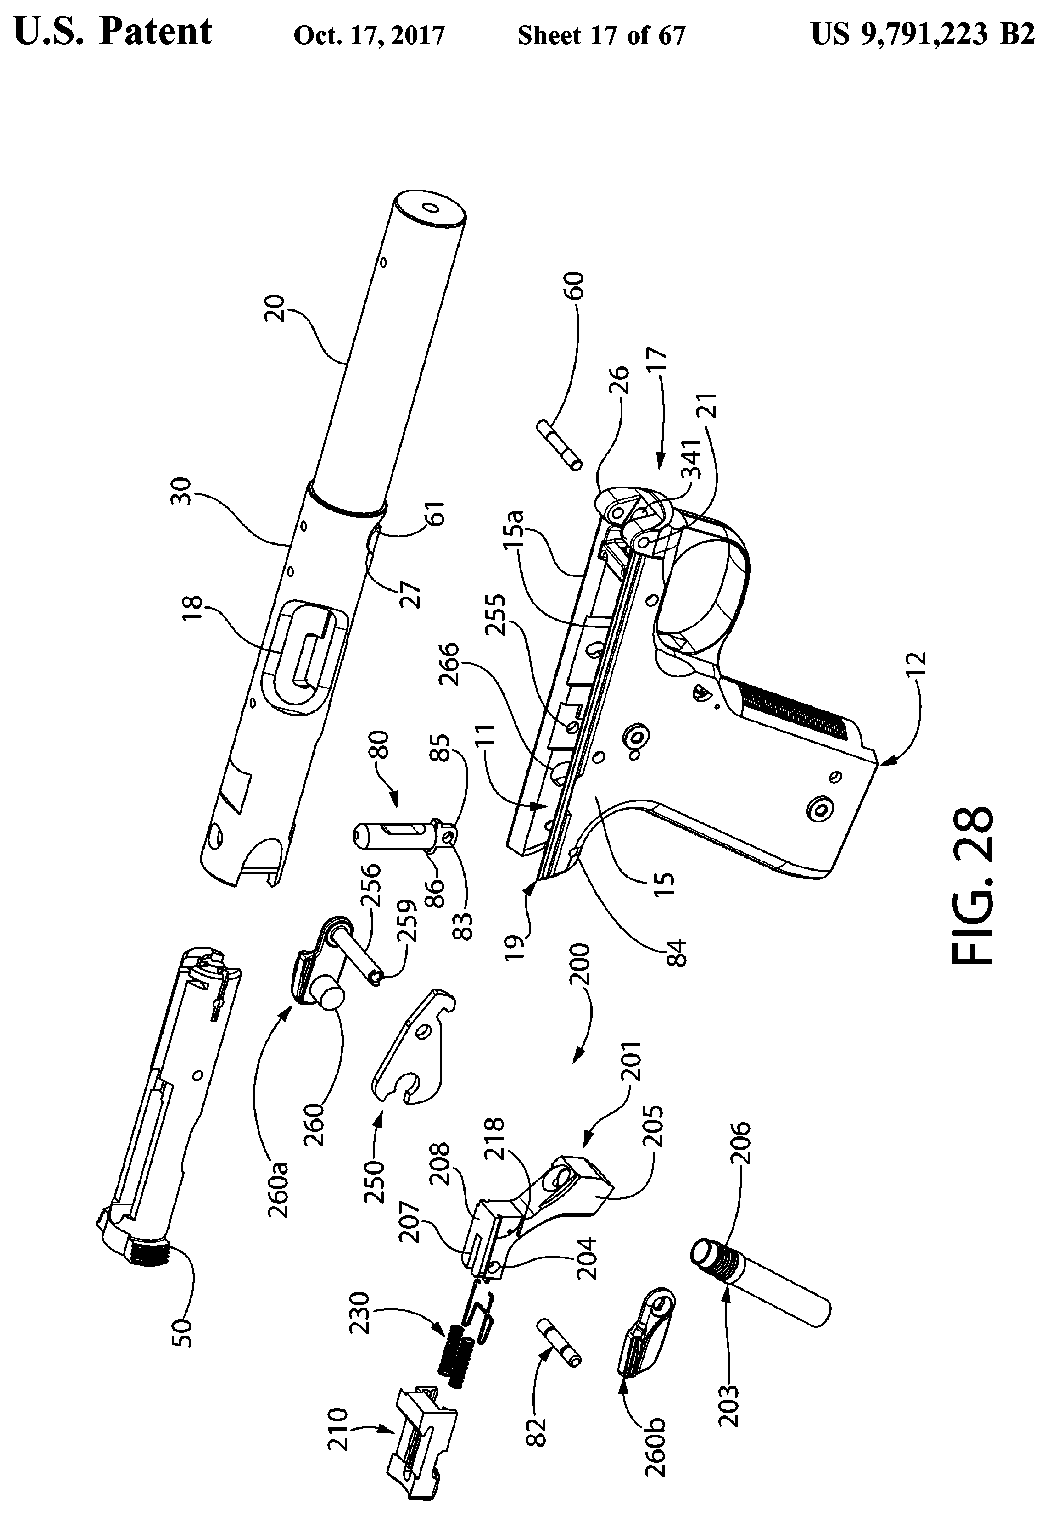
US Patent 9,791,223 — Firearm with pivoting barrel-receiver assembly
David Anderson, Joseph J. Cramer, Dwight Potter · assigned to Sturm, Ruger & Company, Inc. · filed 2016-04-08 · granted 2017-10-17. Full patent (USPTO)
The Mark IV's tilting barrel-receiver assembly, its rear latch and one-button takedown, and the bolt inside the receiver.
Why this is the Ruger Mark IV’s patent: listed on the maker’s patent-marking page — Ruger Patents — Sturm, Ruger & Co., Inc. ruger.com [4]: “Mark IV™ - 22/45 Lite™ 10,520,271; 10,175,012; 9,791,223; 9,291,411; 8,701,326; 7,096,618; D777,284; D777,283; 12,498,189”
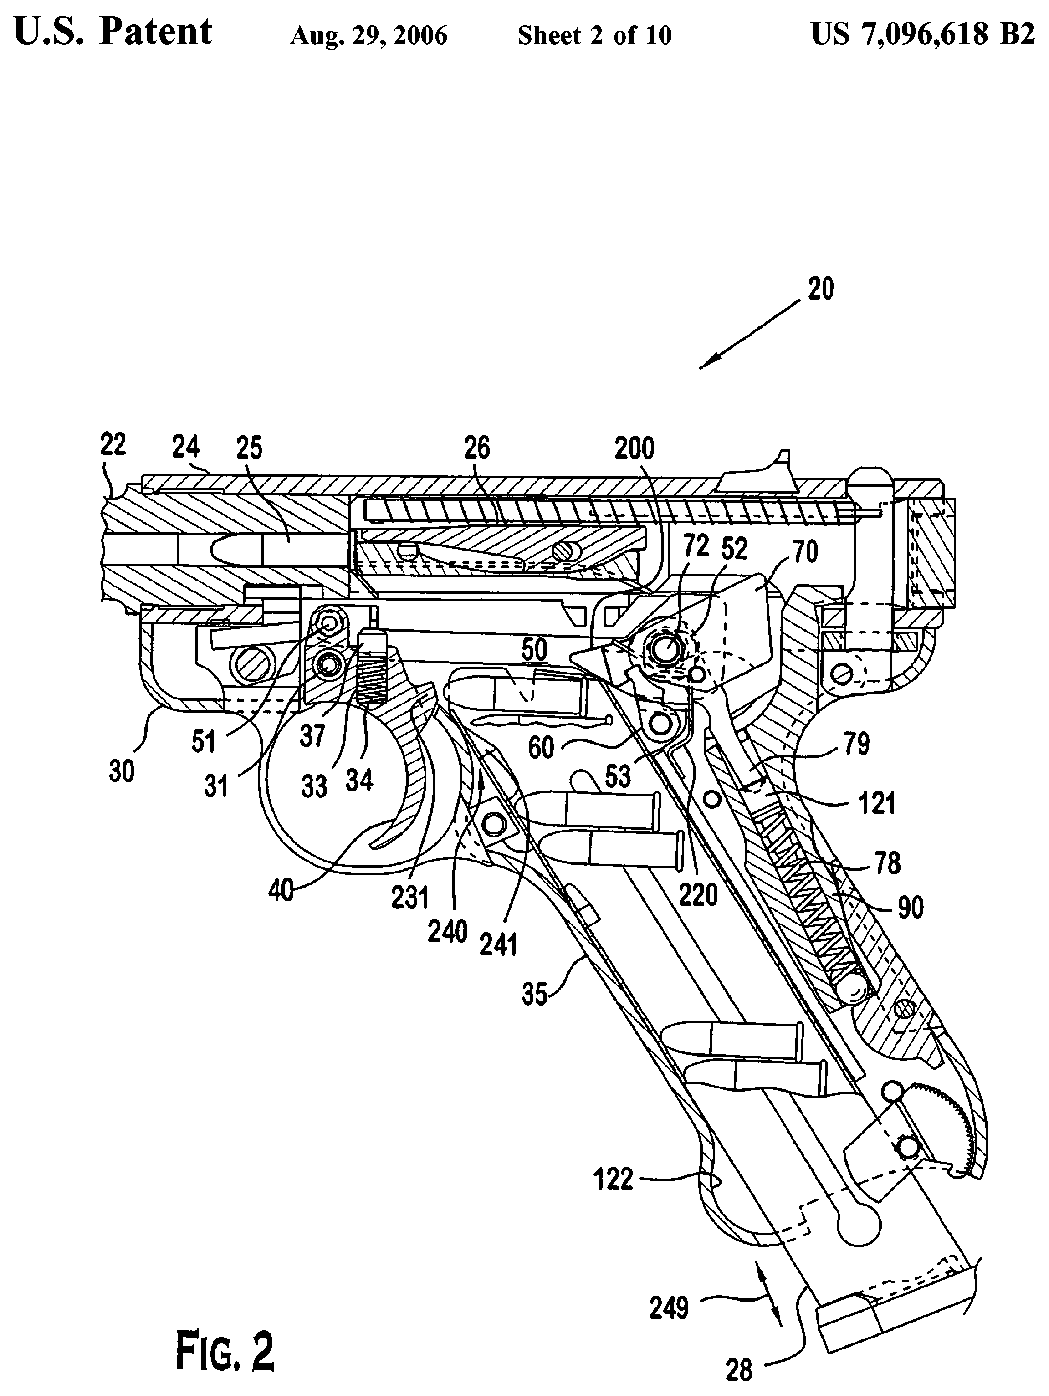
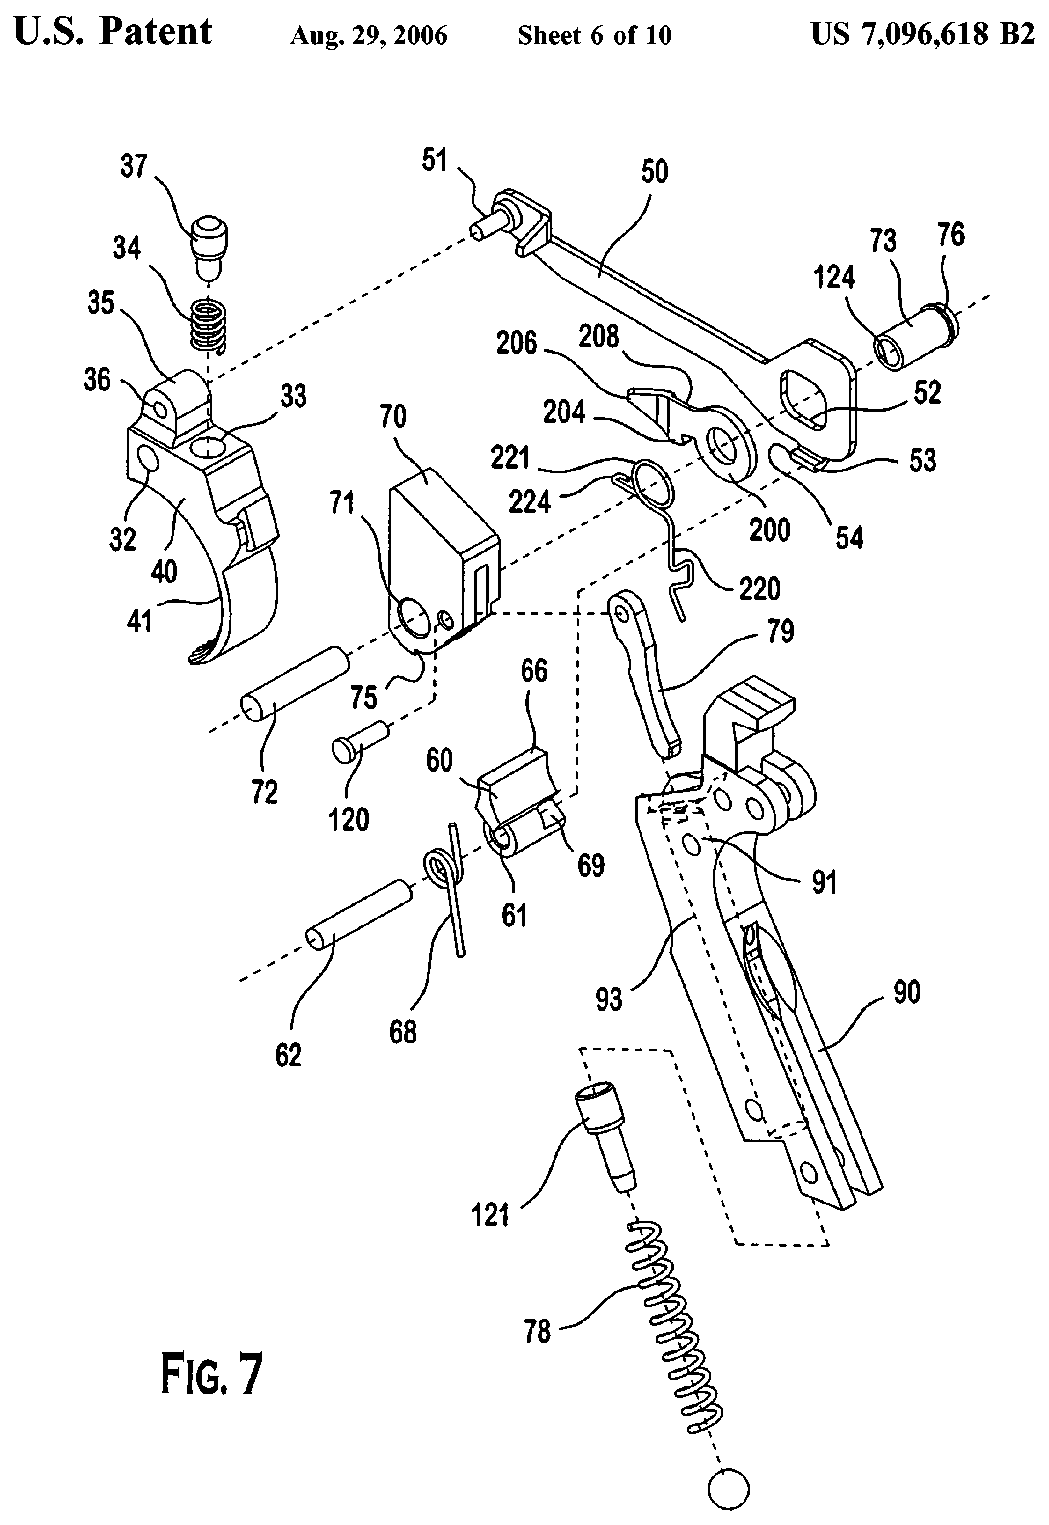
US Patent 7,096,618 — Pistol with magazine disconnect
James McGarry · assigned to Sturm, Ruger & Company, Inc. · filed 2004-04-15 · granted 2006-08-29. Full patent (USPTO)
The Ruger rimfire pistol's frame, hammer, sear and trigger assembly with the magazine disconnect.
Why this is the Ruger Mark IV’s patent: listed on the maker’s patent-marking page — Ruger Patents — Sturm, Ruger & Co., Inc. ruger.com [4]: “Mark IV™ - 22/45 Lite™ 10,520,271; 10,175,012; 9,791,223; 9,291,411; 8,701,326; 7,096,618; D777,284; D777,283; 12,498,189”
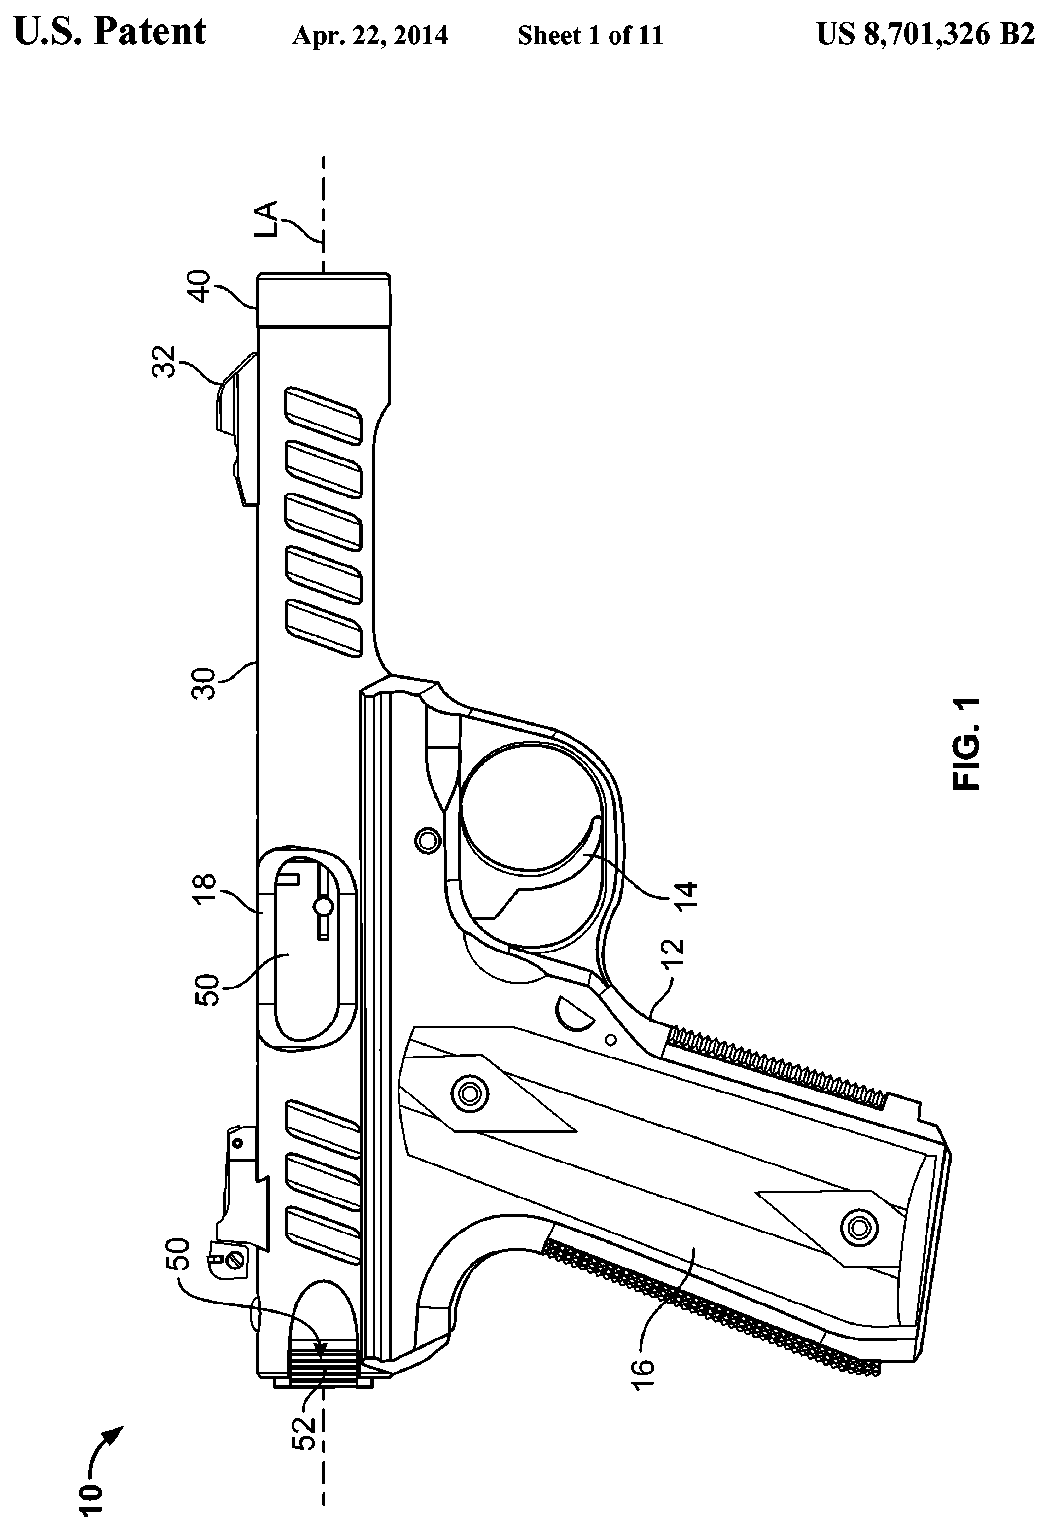
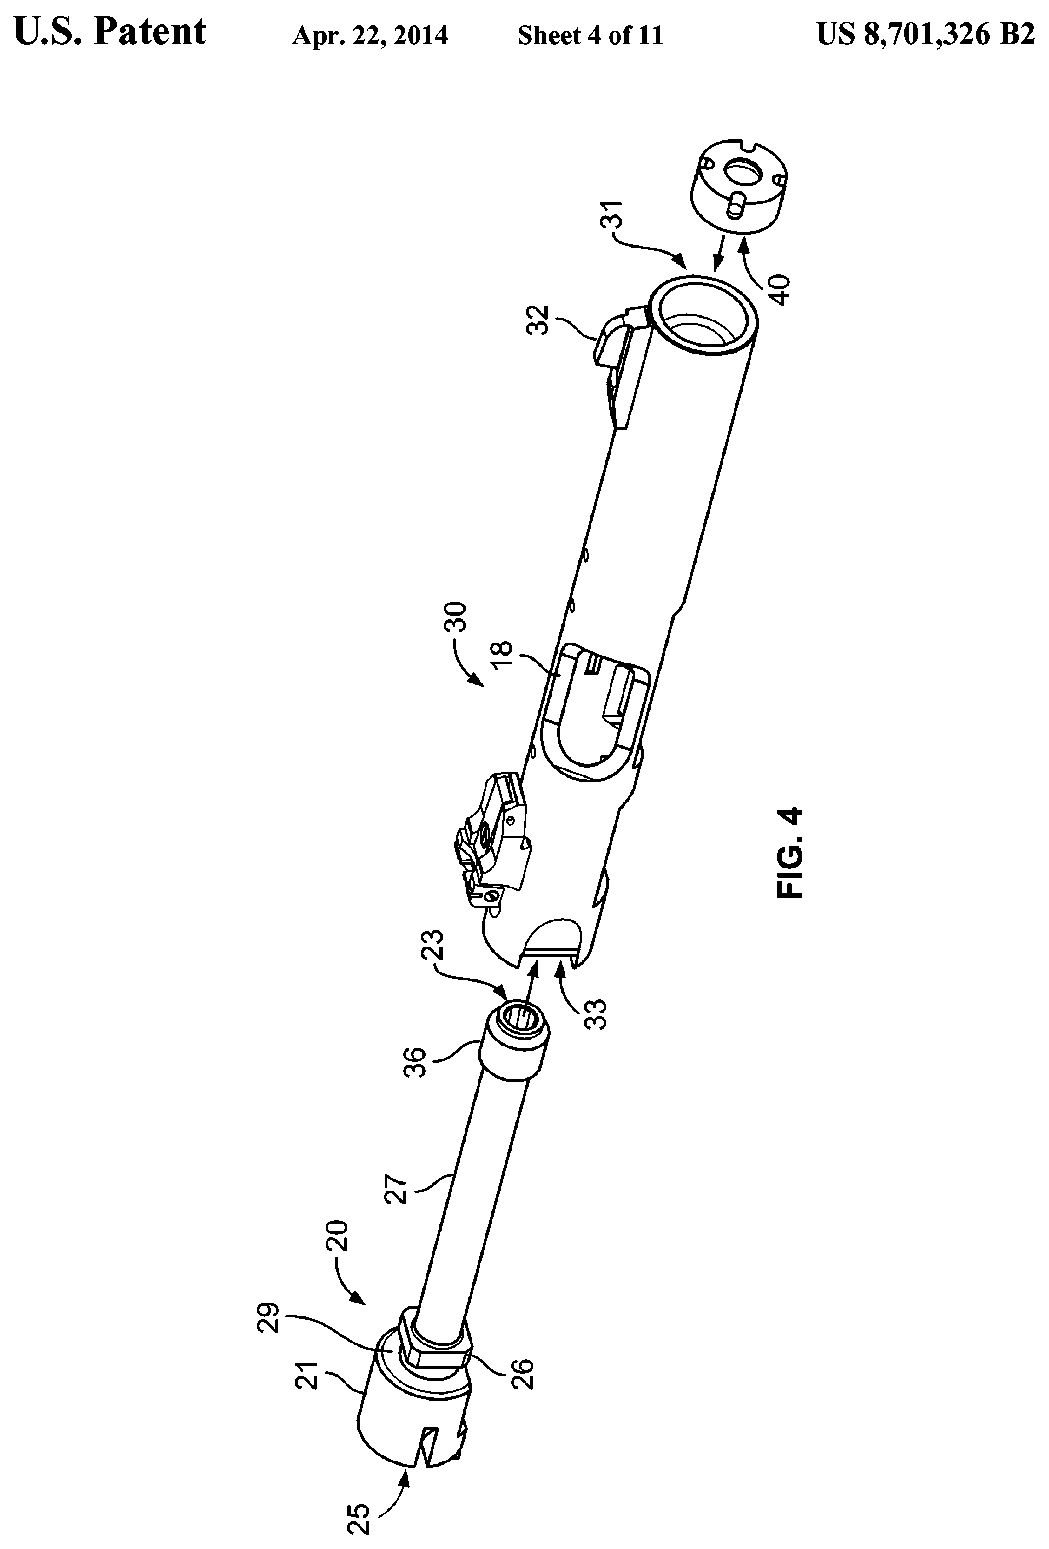
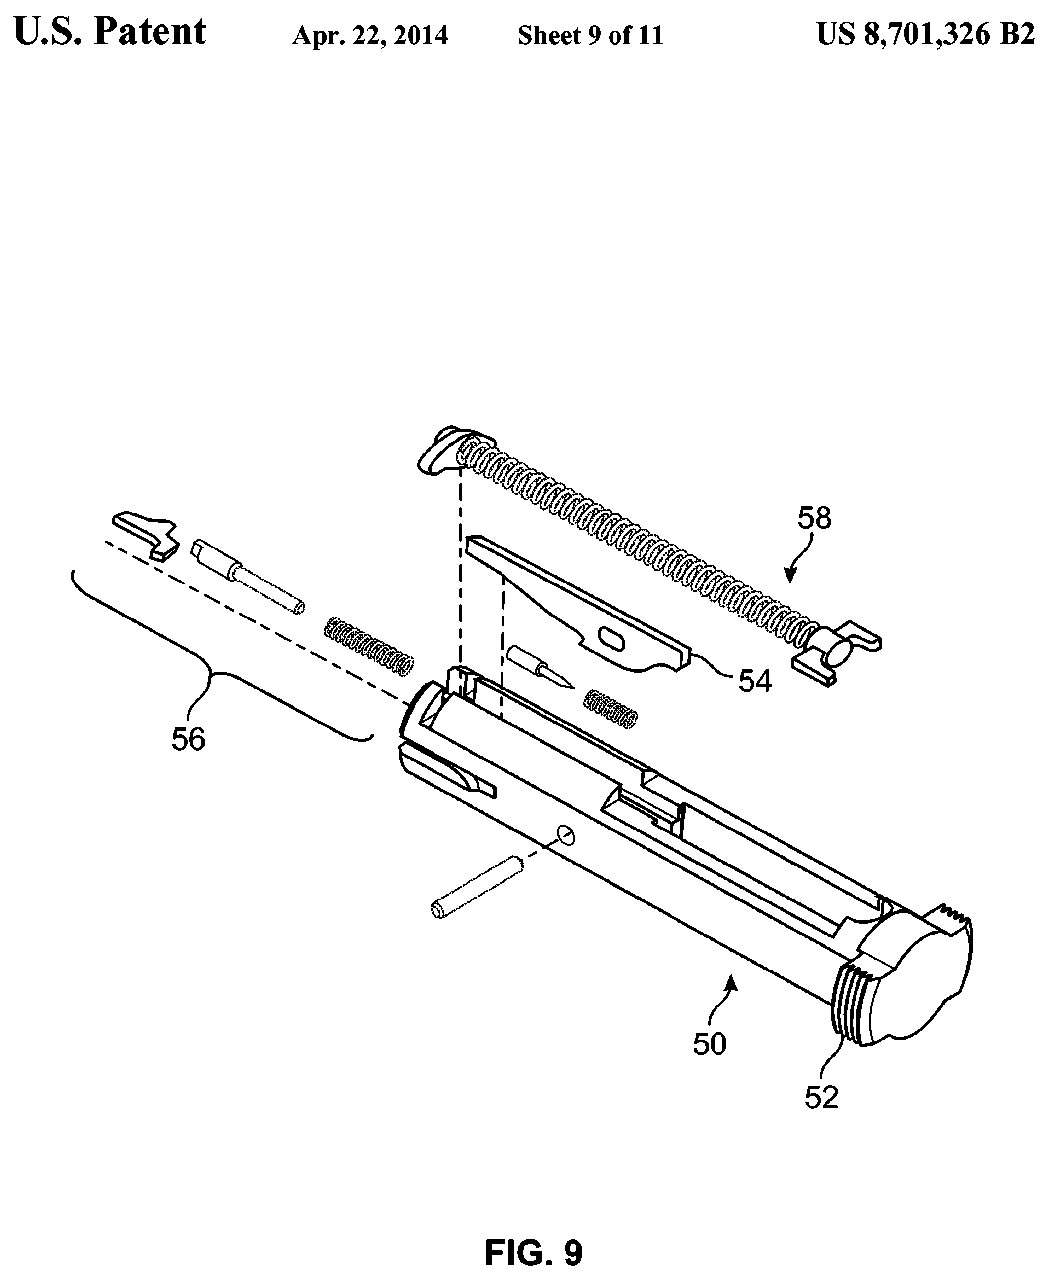
US Patent 8,701,326 — Pistol barrel system and method
Amir Zonshine · assigned to Sturm, Ruger & Company, Inc. · filed 2012-04-10 · granted 2014-04-22. Full patent (USPTO)
The barrel insert, receiver and barrel nut of the 22/45 Lite version, and its bolt assembly.
Why this is the Ruger Mark IV’s patent: listed on the maker’s patent-marking page — Ruger Patents — Sturm, Ruger & Co., Inc. ruger.com [4]: “Mark IV™ - 22/45 Lite™ 10,520,271; 10,175,012; 9,791,223; 9,291,411; 8,701,326; 7,096,618; D777,284; D777,283; 12,498,189”
Torque specifications
No sourced torque values from the manufacturer are recorded for this firearm. Where a fastener has a specified torque — action screws, scope bases, muzzle devices, barrel nuts — get it from the manufacturer or a gunsmith rather than estimating it.
What the manufacturer does say: The manufacturer's documents give no torque value. They say: "This nut should never be loosened, removed or tampered with. This nut is epoxied and torqued in place at the factory." (Instruction Manual for Ruger Mark IV Pistols, PDF p. 32) "After the degreased areas are dry, place a drop of blue LOCTITE® adhesive/sealant or equivalent to the scope base screws." (Instruction Manual for Ruger Mark IV Pistols, PDF p. 32)
Materials and factory finish
As stated by Sturm, Ruger & Co.. Prep, masking and cure depend on these; a polymer or aluminium part, a nitrided or anodised finish, and a blued steel part are each a different job. Variants with other finishes may exist — check the maker's page for the exact SKU on the bench.
| Component | Material | Factory finish | Where it comes from |
|---|---|---|---|
| Receiver Mark IV Standard, Model 40104 (4.75 in) | Alloy Steel | Blued | Ruger Mark IV Standard Rimfire Pistol — Specifications (model 40104) — Sturm, Ruger & Co. ruger.com [3] “Material Alloy Steel … Finish Blued” |
| Frame Model 40104 | Aluminum | — | Ruger Mark IV Standard Rimfire Pistol — Specifications (model 40104) — Sturm, Ruger & Co. ruger.com [3] “Grip Frame Aluminum” |
| Grips Model 40104 | Checkered Synthetic | — | Ruger Mark IV Standard Rimfire Pistol — Specifications (model 40104) — Sturm, Ruger & Co. ruger.com [3] “Grips Checkered Synthetic” |
Parts list
Transcribed from the manufacturer's parts list (Instruction Manual for Ruger Mark IV Pistols — Sturm, Ruger & Co., Inc., p. 35–36 ruger-docs.s3.amazonaws.com [1]) — Mark IV pistol; the manual's separate Mark IV 22/45 Lite list is not included. Exploded view on p. 37. Key numbers refer to the exploded view in that document.
65 parts
| Key | Part | Part no. | Qty | Group |
|---|---|---|---|---|
| 1 | Grip Frame Parts so marked must be factory fit. | 1 | ||
| 2 | Frame Lug Parts so marked must be factory fit. | 1 | ||
| 3 | Receiver Frame Screw | 1 | ||
| 4 | Bolt Open Stop Spring | 1 | ||
| 5 | Trigger Spring | 1 | ||
| 6 | Trigger Spring Plunger | 1 | ||
| 7 | Bolt Open Stop | 1 | ||
| 8 | Trigger Bar Parts so marked must be factory fit. | 1 | ||
| 9 | Trigger Bar Pivot Pin | 1 | ||
| 10 | Trigger Pivot Pin | 1 | ||
| 11 | Magazine Latch | 1 | ||
| 12 | Magazine Latch Spring | 1 | ||
| 13 | Magazine Latch Screw | 1 | ||
| 14 | Sear Parts so marked must be factory fit. | 1 | ||
| 15 | Sear Spring | 1 | ||
| 16 | Hammer Bushing | 1 | ||
| 17 | Hammer Parts so marked must be factory fit. | 1 | ||
| 18 | Hammer Strut | 1 | ||
| 19 | Magazine Disconnector Spring | 1 | ||
| 20 | Safety Parts so marked must be factory fit. | 1 | ||
| 21 | Spring Plunger for Auto Safety | 1 | ||
| 22 | Safety Lever, Left Parts so marked must be factory fit. | 1 | ||
| 23 | Safety Lever, Right | 1 | ||
| 24 | Main Spring Housing Parts so marked must be factory fit. | 1 | ||
| 25 | Hammer Spring | 1 | ||
| 26 | Hammer Spring Plunger | 1 | ||
| 27 | Latch Spring | 1 | ||
| 28 | Latch Parts so marked must be factory fit. | 1 | ||
| 29 | Bolt Stop Pin Parts so marked must be factory fit. | 1 | ||
| 30 | Bolt Stop Thumbpiece | 1 | ||
| 31 | Left Grip Panel | 1 | ||
| 32 | Grip Panel Screw | 1 | ||
| 33 | Right Grip Panel | 1 | ||
| 34 | Magazine | 1 | ||
| 35 | Bumper (Includes Bumper Ball – Not Illustrated) | 1 | ||
| 36 | Magazine Latch Plunger | 1 | ||
| 37 | Sear Pivot Pin | 1 | ||
| 38 | Hammer Strut Pin | 1 | ||
| 39 | Bolt Stop Thumbpiece Screw | 1 | ||
| 40 | Trigger Pivot Retainer Spring | 1 | ||
| 41 | Bolt Stop Retainer Pin Retainer | 1 | ||
| 42 | Safety Detent Spring | 1 | ||
| 43 | Trigger Parts so marked must be factory fit. | 1 | ||
| 44 | Bolt Stop Cross Pin | 1 | ||
| 45 | Magazine Disconnector | 1 | ||
| 46 | Safety Lever Screw | 1 | ||
| 47 | Magazine Assist | 1 | ||
| 48 | Manual Safety Spring | 1 | ||
| 49 | Safety Plunger | 1 | ||
| Barrel/Receiver Assembly component parts | ||||
| 1 | Barrel/Receiver Assembly Because it is a serial-numbered component, the RUGER® MARK IV™ pistol barrel/receiver assembly is defined as a “firearm” by Federal Law and is not offered for sale separately. | 1 | ||
| 2 | Front Sight | 1 | ||
| 3 | Front Sight Screw | 1 | ||
| 4 | Rear Sight | 1 | ||
| 5 | Barrel Receiver Filler Screw | 3 | ||
| 6 | Rebound Spring | 1 | ||
| 7 | Rebound Spring Guide Rod | 1 | ||
| 8 | Guide Rod Assembly | 1 | ||
| 9 | Firing Pin | 1 | ||
| 10 | Bolt Parts so marked must be factory fit. | 1 | ||
| 11 | Firing Stop Pin | 1 | ||
| 12 | Extractor Plunger | 1 | ||
| 13 | Extractor Spring | 1 | ||
| 14 | Extractor | 1 | ||
| 15 | Ejector | 1 | ||
| 16 | Ejector Rivet | 1 | ||
Function check
- Verify the pistol is unloaded with no magazine inserted before each step.
- Cycle the bolt by hand and confirm it returns fully into battery.
- Cock the action, engage the safety, and press the trigger. The hammer must not fall.
- Disengage the safety and press the trigger. The hammer should fall.
- Confirm the bolt stop holds the bolt open and releases cleanly.
- Confirm the magazine seats, locks, and drops free.
Maintenance
Lubrication points
- Bolt sides where they ride in the receiver
- Recoil spring guide
- Hammer and sear pivots
Cleaning notes
Rimfire ammunition leaves heavy waxy fouling. Clean the chamber and bolt face regularly, and keep lubrication light so unburned powder does not build into a paste.
Suggested inspection interval: roughly every 500 rounds. This is a general guideline, not a manufacturer specification.
Wear parts to inspect
Extractor and extractor spring · Recoil spring · Magazine follower and feed lips · Firing pin
Common issues
| Symptom | Likely cause | What to do |
|---|---|---|
| Takedown button will not depress | Manual safety not engaged | Engage the safety, then press the button. |
| Failures to feed with bulk ammunition | Dirty chamber or a tired magazine | Clean the chamber thoroughly and try a fresh magazine before suspecting the pistol. |
Also covers
The procedures above are reported to apply to: Ruger Mark IV Target · Mark IV Hunter · Mark IV 22/45 · Mark IV 22/45 Lite. Verify against the manual for your specific model.
Similar manual of arms
Sourcing
- Confidence
- high — Cross-checked against a primary source such as the manufacturer's manual or an issuing military technical manual.
- Verification
- Checked against the manufacturer manual
- Last updated
- 2026-10-29
References
Every source this page draws on, with its web address so you can read it yourself. Numbers in brackets elsewhere on the page point here.
- [1] Instruction Manual for Ruger Mark IV Pistols — Sturm, Ruger & Co., Inc. manufacturer manual primary source
https://ruger-docs.s3.amazonaws.com/_manuals/Mark-IV-Pc4tS28s.pdf (checked 2026-09-14) - [2] Ruger — Mark IV Recall — Sturm, Ruger & Co., Inc. website primary source
https://ruger.com/dataProcess/markIVRecall/index.php (checked 2026-10-03) - [3] Ruger Mark IV Standard Rimfire Pistol — Specifications (model 40104) — Sturm, Ruger & Co. website primary source
https://ruger.com/products/markIV/specSheets/40104.html (checked 2026-10-03) - [4] Ruger Patents — Sturm, Ruger & Co., Inc. website primary source
https://ruger.com/micros/Patents/index.html (checked 2026-10-13) - [5] Product Preview: Hammer Strut Support for Ruger Mark Series .22 Rimfire Pistols — American Rifleman (NRA) website secondary source
https://www.americanrifleman.org/content/product-preview-hammer-strut-support-for-ruger-mark-series-22-rimfire-pistols (checked 2026-10-29)
Notes: CORRECTED on 2026-09-14 against the factory manual. The entry had the takedown backwards: it said to tilt the upper receiver up at the rear, where Ruger tilts the barrel downward so it clears the bolt stop pin. It also omitted the condition that decides whether the pistol goes back together at all — the safety must be ON with the white dot visible for reassembly. Added the bolt's removal by pulling straight back on its ears, and Ruger's note that the Mark IV needs no tools, which is the whole point of the design change from the Mark III. Mark I, Mark II, and Mark III pistols use an entirely different and much more difficult takedown involving the mainspring housing latch. Do not apply this procedure to them.