← All firearms · Printable work order
Ruger Precision Rifle
- easy
- Shop tier 2
- high confidence
- Rifle
- bolt action
- precision
- chassis rifle
- ar compatible furniture
- detachable magazine
field strip ~2 min · reassembly ~3 min · detail strip ~30 min
Specifications
- Manufacturer
- Sturm, Ruger & Co.
- Origin
- United States
- Category
- Rifle
- Action
- Bolt action
- Calibers
- 6.5 Creedmoor, .308 Winchester, .300 Winchester Magnum, 6mm Creedmoor
- Capacity
- 10 rounds in an AICS-pattern detachable magazine
- Production
- 2015–present (in-production)
- Also known as
- RPR, Ruger Precision Rimfire (related)
Model-specific safety
- The bolt cannot be removed until the stock is folded. The buttstock sits directly behind the bolt's path, and Ruger's procedure folds and locks it out of the way first.
- Ruger's disassembly procedure runs with the safety selector in the SAFE position, not FIRE.
- The firing pin back will only rotate fully clockwise relative to the bolt body. Rotated too far, it drops to the bottom of the cocking cams and takes significant effort — possibly hand tools — to get back into the cam notches.
- The bolt has a 70-degree throw and a three-lug head. It is not a Remington 700 bolt and its parts do not interchange.
- The rifle uses an AR-pattern pistol grip, safety selector and buffer-tube interface. Those AR parts interchange; the action parts do not.
- Clean from the breech with a bore guide. A precision rifle's throat and crown are exactly what a careless cleaning rod damages.
If it will not go back together
Common ways this firearm resists reassembly, and what is actually wrong. Forcing a part that will not seat is how firearms get damaged.
-
The bolt will not go back into the receiver, or will not come out in the first place.
Why The stock is not folded. The buttstock sits directly behind the bolt's line of travel.
Fix Push the stock pivot lock button, fold the stock to the left, and rotate the stock pivot latch a quarter turn clockwise to lock it folded. Then work the bolt.
Forcing it Forcing the bolt against the stock or the bolt stop can peen the stop and the bolt lug.
-
The firing pin back has dropped down and the bolt shroud will not go back on at rest.
Why The firing pin back was rotated past the positions Ruger illustrates, so it fell to the bottom of the cocking cams.
Fix Rotate the firing pin back clockwise, through both cocking cams if necessary, until its lobe returns to the notch on the cam. Ruger warns this takes significant effort and possibly a gripping aid.
Forcing it Levering the shroud on over a dropped firing pin back can damage the cocking cams.
Gunsmith Do not attempt this one yourself.
-
The bolt goes in but the rifle will not cock, or the firing pin does not release.
Why The bolt shroud was not rotated the full 30 degrees counterclockwise on reassembly, so the firing pin back is not locked at rest.
Fix Remove the bolt and confirm the lobe of the firing pin back sits in the notch on the cam, as Ruger illustrates, before reinstalling.
Under spring tension
- Firing pin spring inside the bolt
- Magazine spring
Easily lost parts
Bolt release · Action screws · Bolt shroud components
Tools
| Tool | Required | Used for | Substitute |
|---|---|---|---|
| Bore guide | Yes | Cleaning from the breech without wearing the throat or crown. | |
| Torque wrench and hex keys | Optional | Action screws, rail screws, and handguard fasteners. |
Shop difficulty
Shop tier 2 Tier 2 — moderate among rifles and carbines, for the full job: strip to the parts that get coated and put it back together working. 136 pieces, but most are chassis, stock and rail hardware that just bolts on in order. The action traps are the dual-cam firing-pin back, which drops if over-rotated, and a trigger group Ruger says has parts that dislodge abruptly. So it is Tier 2, not 3, despite the count.
Parts: 114 numbered parts (Complete rifle including chassis/stock (114 line items)), from Ruger Precision Rifle Instruction Manual — Sturm, Ruger & Co., Inc., p. 56–58 ruger-docs.s3.amazonaws.com [1].
Bench time: about 45 min to strip, 60 min to rebuild (estimate). Chassis, stock and rail hardware, bolt (shroud, firing-pin back), trigger group as a unit, magazine latch.
Small parts: 26 pins, 15 springs, 4 detents or plungers (counted from the manufacturer's parts list (one per key number unless a quantity is given))
What comes off for coating
- Chassis / stock: handguard and screws, folding stock assembly, buttpad, cheek riser, LOP buttons, pistol grip, action screws
- Bolt: bolt shroud, firing pin back and firing pin, extractor and ball, ejector plunger and spring
- Receiver: trigger group (as a unit), bolt stop, rail
Special tools
- hex keys and torque driver — Action, rail and handguard screws
Known pain points
- The firing-pin back drops to the bottom of the dual cocking cams if turned too far, and it is hard to recover. (both)
Source: Ruger Precision Rifle Instruction Manual — Sturm, Ruger & Co., Inc. ruger-docs.s3.amazonaws.com [1] — “If the firing pin back is turned too far, it will “fall down” to the bottom of the cocking cams and will take significant effort, and possibly the use of hand tools or a gripping aid, to return the firing pin back to the correct cam notches.” - Trigger-group internals are spring-loaded and dislodge when removed. Ruger gives no procedure beyond the group. (disassembly)
Source: Ruger Precision Rifle Instruction Manual — Sturm, Ruger & Co., Inc. ruger-docs.s3.amazonaws.com [1] — “NOTE: Further disassembly of the trigger group is not required for cleaning, some parts are under spring tension and may dislodge abruptly if removal is attempted.” - Ruger warns that going beyond its disassembly section can leave the rifle not working. (both)
Source: Ruger Precision Rifle Instruction Manual — Sturm, Ruger & Co., Inc. ruger-docs.s3.amazonaws.com [1] — “Disassembly beyond what is described in this section is not recommended and may result in a non-functioning firearm.”
See also 3 documented reassembly problems and their fixes.
Fit or check on rebuild
- Firing-pin back locked in cam notch — If not, the rifle will not cock.
Source: Ruger Precision Rifle Instruction Manual — Sturm, Ruger & Co., Inc. ruger-docs.s3.amazonaws.com [1] — “Because there are dual cocking cams, you may need to rotate the firing pin back through both cams in order to return the firing pin back to its proper position.” - Action/rail screw torque — Affects zero.
- Re-zero sights or scope — Sights and optics come off for coating, and point of impact must be re-confirmed. This is a standard check, so no source.
This is Pew-Takedown's rating, not the manufacturer's. How tiers are rated. Forum reports are owners' experience, not specifications.
Manufacturer videos
Official videos from Sturm, Ruger & Co.'s own channels, linked rather than copied. Where a video and the steps on this page differ, follow the manufacturer's manual and video.
- Ruger Precision Rifle®-Tech Tip-Disassembly RugerFirearms
field strip, reassembly · 2015-07-30
Covers: Ruger Precision Rifle - Ruger Precision Rifle® Tech Tips-Cleaning RugerFirearms
cleaning, maintenance · 2015-07-30
Covers: Ruger Precision Rifle - Ruger Precision Rifle® Tech Tips-Adjustments RugerFirearms
adjustment · 2015-07-30
Covers: Ruger Precision Rifle - Tech Tip - Ruger Precision® Rifle Bolt Shroud Replacement Ruger Firearms · plays on ruger.com
detail strip · 2017-06-30
Covers: Ruger Precision Rifle - Tech Tip - Ruger Precision® Rifle Firing Pin Reset Ruger Firearms · plays on ruger.com
detail strip, detail reassembly · 2016-05-31
Covers: Ruger Precision Rifle - Ruger® Precision® Rifle Gen2 Handguard Adjustments Tech Tip RugerFirearms
adjustment · 2021-11-19
Covers: Ruger Precision Rifle Gen2 handguard
Procedures
Clear and Make Safe
Clear & Make Safe- Keep the muzzle pointed in a safe direction and keep your fingers outside the trigger guard.
- Move the safety selector to the SAFE position if the firing pin is cocked.
- Remove the magazine.WarningA cartridge left in the chamber can still be fired with the magazine out.
- Raise the bolt handle and draw the bolt fully to the rear, extracting and ejecting any cartridge in the chamber.
- If the safety selector is in the FIRE position, move it to SAFE.
- Visually double-check the chamber to be certain it is empty. No magazine should be in the rifle.
Field Strip — Bolt Removal
Field StripManufacturer’s video: Ruger Precision Rifle®-Tech Tip-Disassembly RugerFirearms
- Complete the Clear and Make Safe procedure, with the safety selector on SAFE.WarningRuger disassembles this rifle with the safety on SAFE. Do not move it to FIRE to free the bolt.
- Close the bolt.
- Push the stock pivot lock button and fold the stock to the left.TipThe folded stock is what clears the path for the bolt. This step is not optional and is easy to miss.
- Rotate the tab end of the stock pivot latch clockwise a quarter turn to lock the stock in the folded position.
- Lift the bolt handle and retract the bolt while pressing on the rear of the bolt stop on the left side of the receiver.Removed at this step:
Bolt assembly - Clean the bore from the breech using a bore guide, and clean the bolt face, the locking lugs and the chamber.WarningAlways use a bore guide.
- Stop here. Ruger states this is as far as the rifle needs to come apart for routine cleaning.
Bolt Disassembly for Cleaning
Detail StripManufacturer’s videos: Tech Tip - Ruger Precision® Rifle Bolt Shroud Replacement Ruger Firearms · plays on ruger.com · Tech Tip - Ruger Precision® Rifle Firing Pin Reset Ruger Firearms · plays on ruger.com
- Start with the bolt at rest, with the lobe of the firing pin back sitting in the notch on the cam.
- Grasp the outside of the bolt shroud and firing pin back and rotate them clockwise, viewed from the rear of the bolt, about 30 degrees so the firing pin back lobe aligns with the centre of the bolt handle base.WarningClockwise only, and only to the positions Ruger illustrates. Turned too far, the firing pin back falls to the bottom of the cocking cams.
- Separate the bolt shroud and firing pin assembly from the bolt body.Removed at this step:
Bolt shroudFiring pin assembly - Lubricate the cocking cams.TipRuger notes this is not normally necessary except on rifles used extensively.
- To reassemble, slide the bolt shroud over the firing pin back, then rotate the bolt shroud 30 degrees counterclockwise until the firing pin back locks into its at-rest position in the cam notch.WarningBecause there are dual cocking cams, you may need to rotate the firing pin back through both to return it to the correct notches.
Reassembly
ReassemblyManufacturer’s video: Ruger Precision Rifle®-Tech Tip-Disassembly RugerFirearms
- Confirm the firing pin back is at rest in its notch on the cam before installing the bolt.
- Insert the bolt into the receiver and close it.
- Visually double-check the chamber to be certain it is empty. No magazine should be in the rifle.
- Rotate the stock pivot latch back, unfold the stock, and confirm it locks open.
- Cycle the bolt open and closed three times, confirming it travels freely without binding.
- Perform the function check before any live firing.WarningIf the rifle does not operate correctly after reassembly, do not use it.
Patent drawings
not under copyrightDrawings from US patents on this design. A patent shows the invention as the inventor filed it; the firearm that shipped can differ in detail, and later production often does. Use them to see how the parts relate, not as a parts reference or a procedure. Per the USPTO, the text and drawings of a patent are typically not subject to copyright; each patent here was checked for a copyright notice.
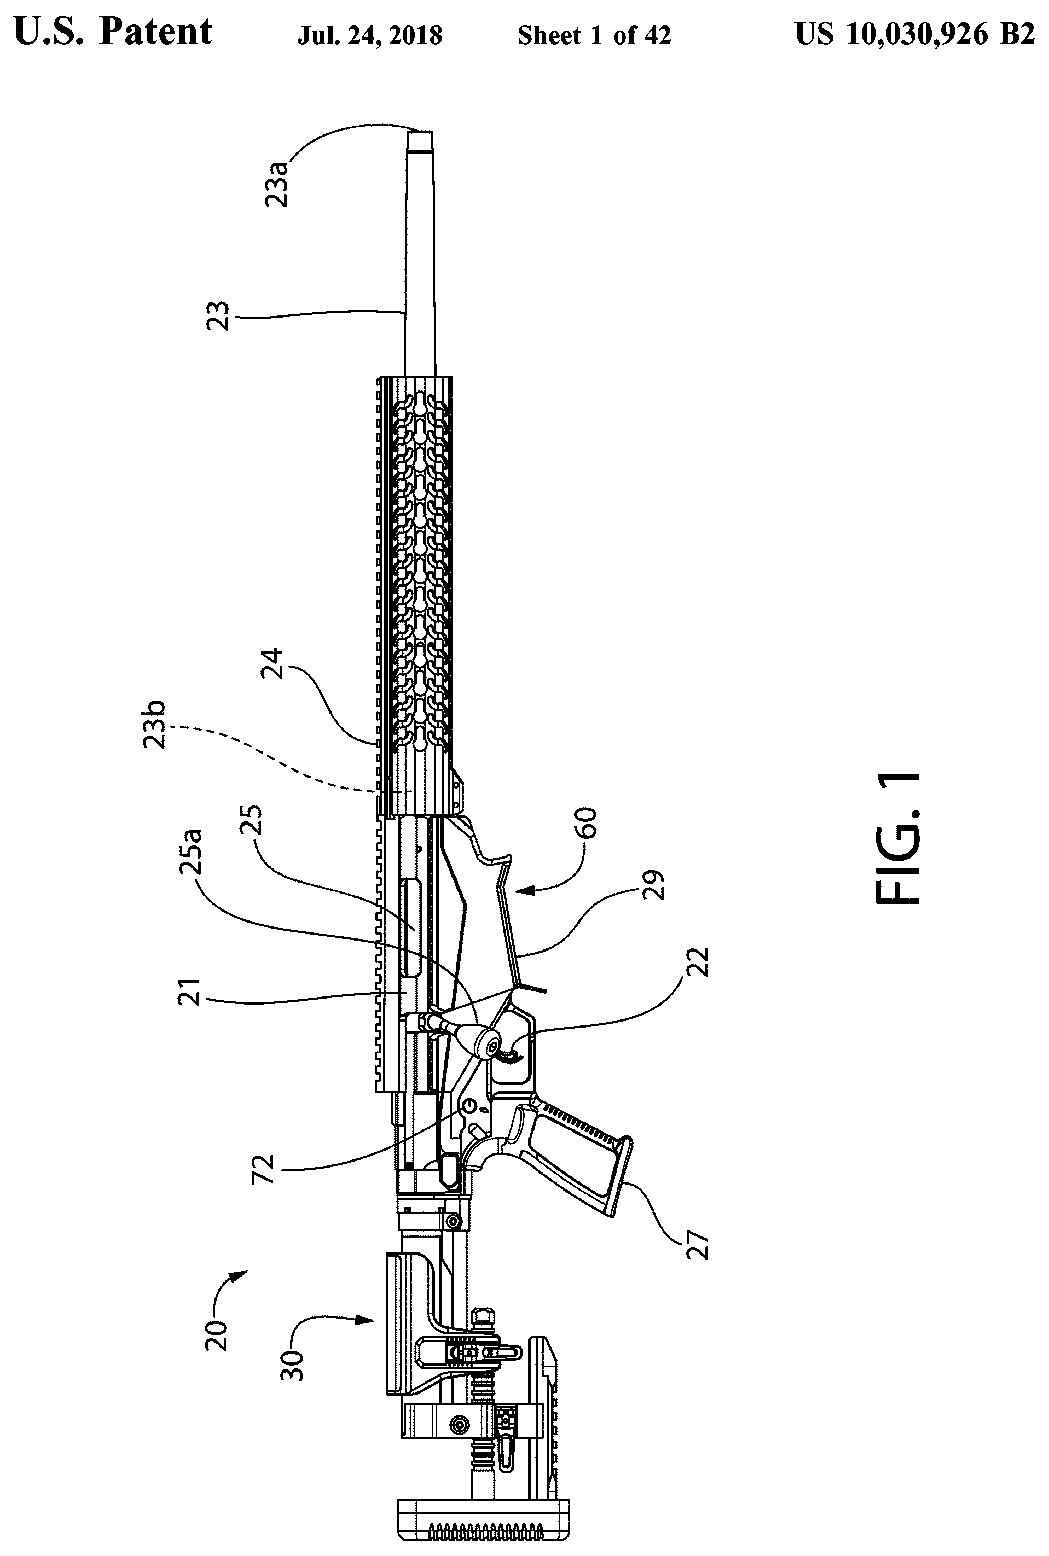
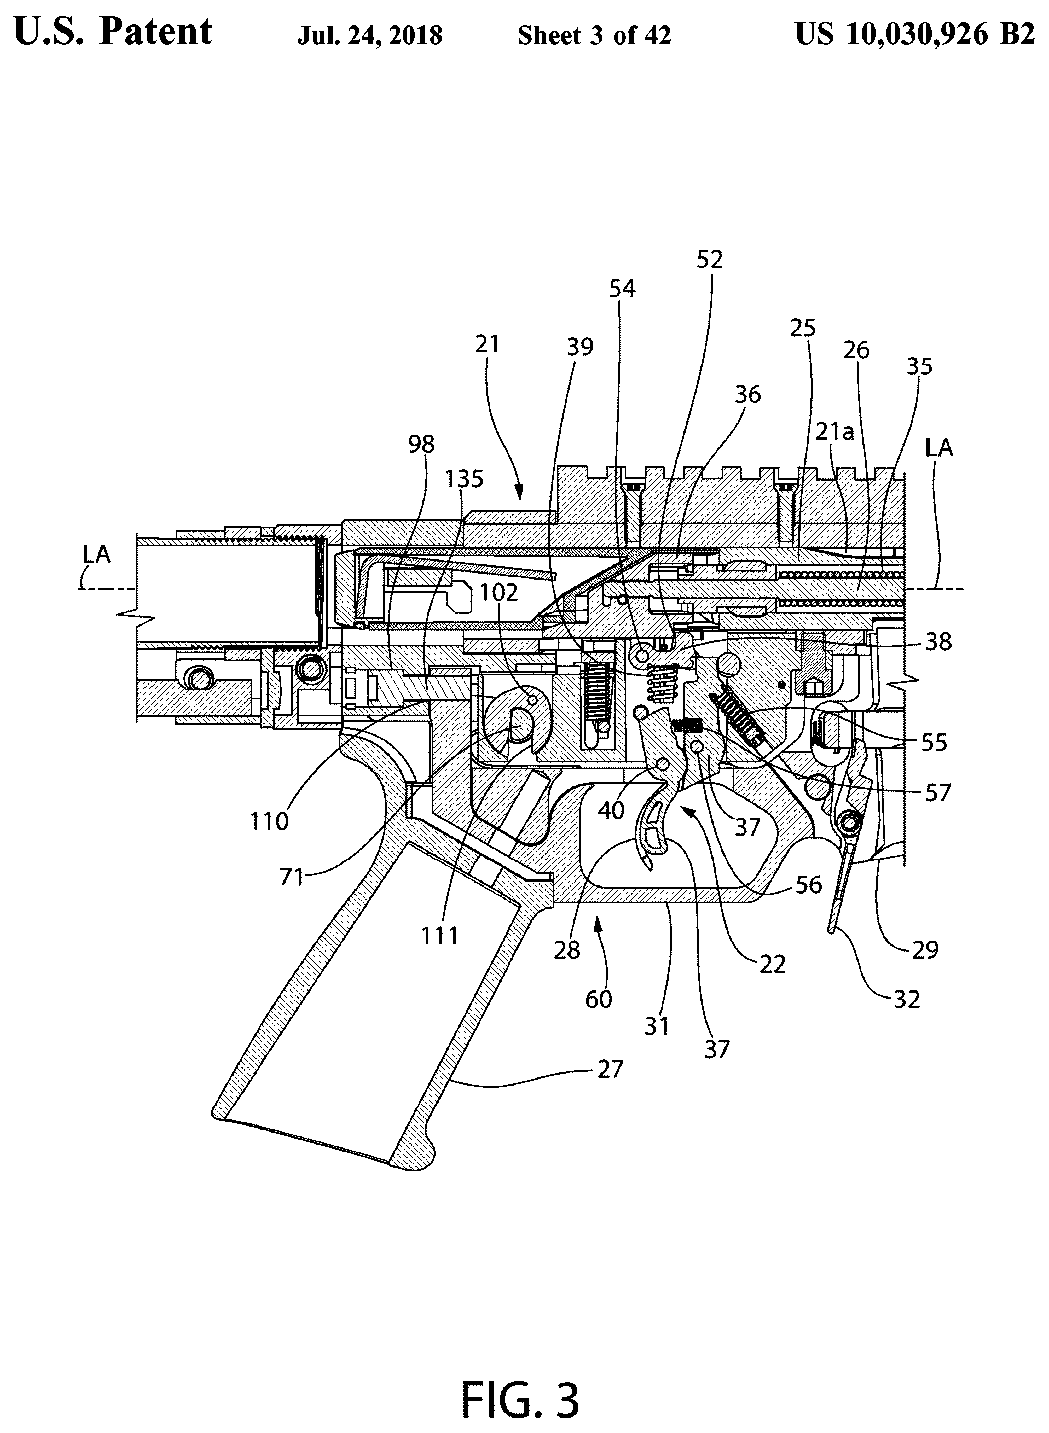
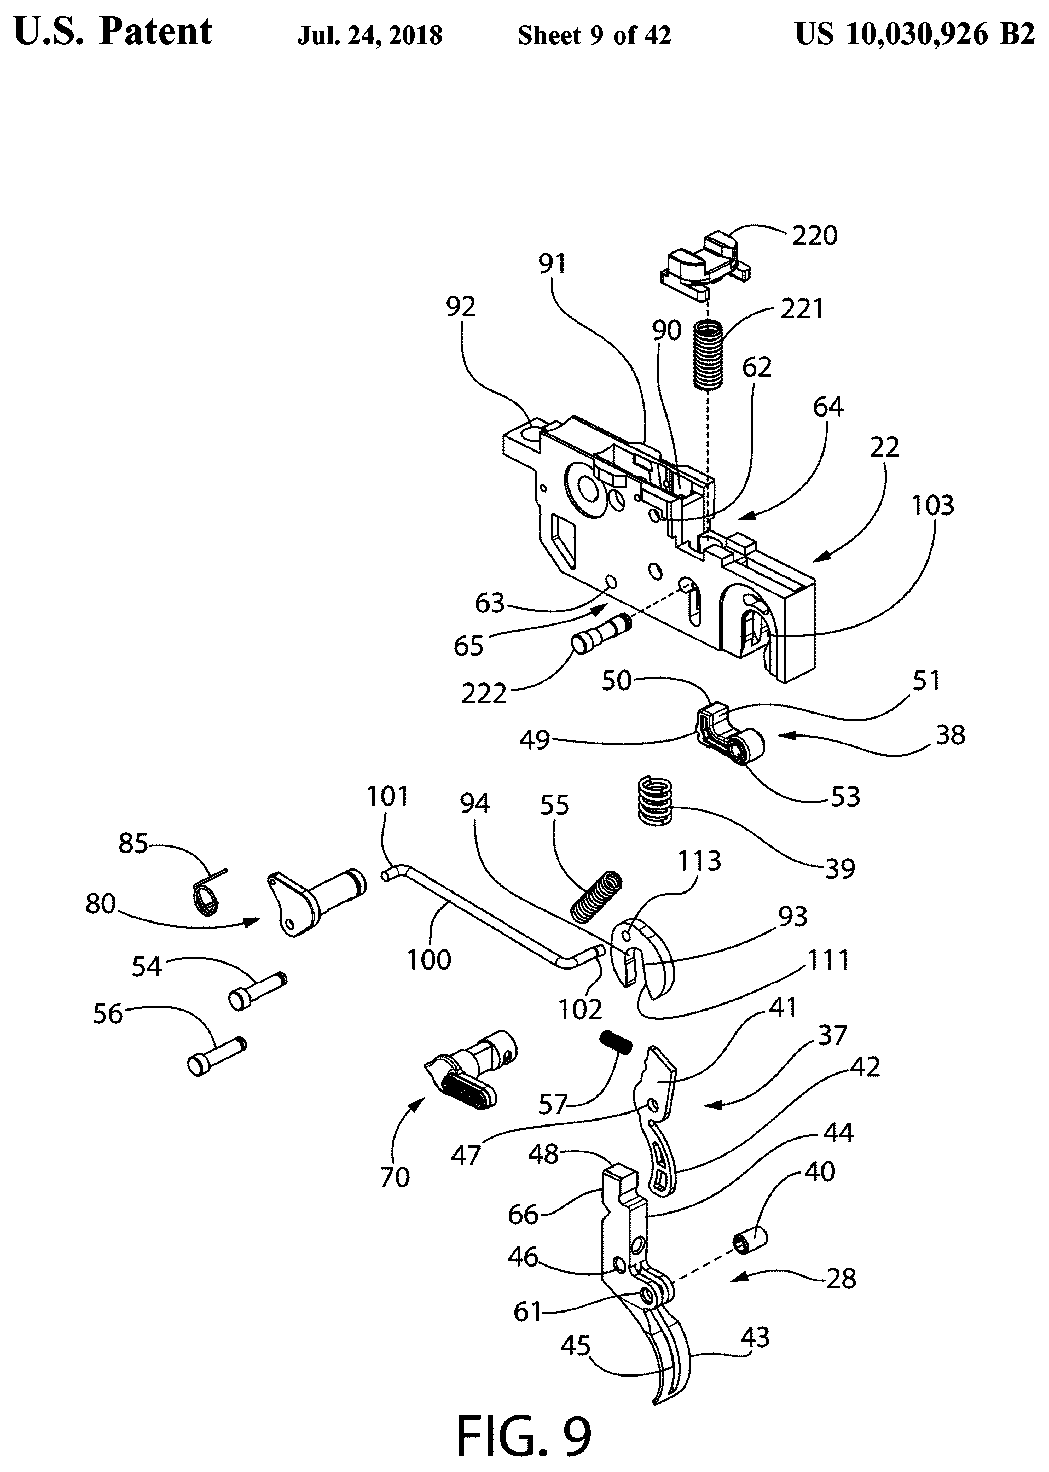
US Patent 10,030,926 — Trigger housing mounting system for firearm
Jonathan Philip MATHER, Adam Jay Taylor, Benjamin K. Parker, Shane M. Bernier, David B. Kangas · assigned to Sturm, Ruger & Company, Inc. · filed 2016-01-21 · granted 2018-07-24. Full patent (USPTO)
The Ruger Precision Rifle's removable trigger housing and how it locks into the upper receiver, with the AR-style lower/grip.
Why this is the Ruger Precision Rifle’s patent: listed on the maker’s patent-marking page — Ruger Patents — Sturm, Ruger & Co., Inc. ruger.com [4]: “Ruger Precision® Rifle 11,105,570; 10,788,287; D891,561; 10,458,731; 10,030,926; 9,885,528; 9,546,845; 9,506,712; 9,506,706; 9,464,863; 9,441,897; 9,194,637; D844,733; D785,122; D774,619”
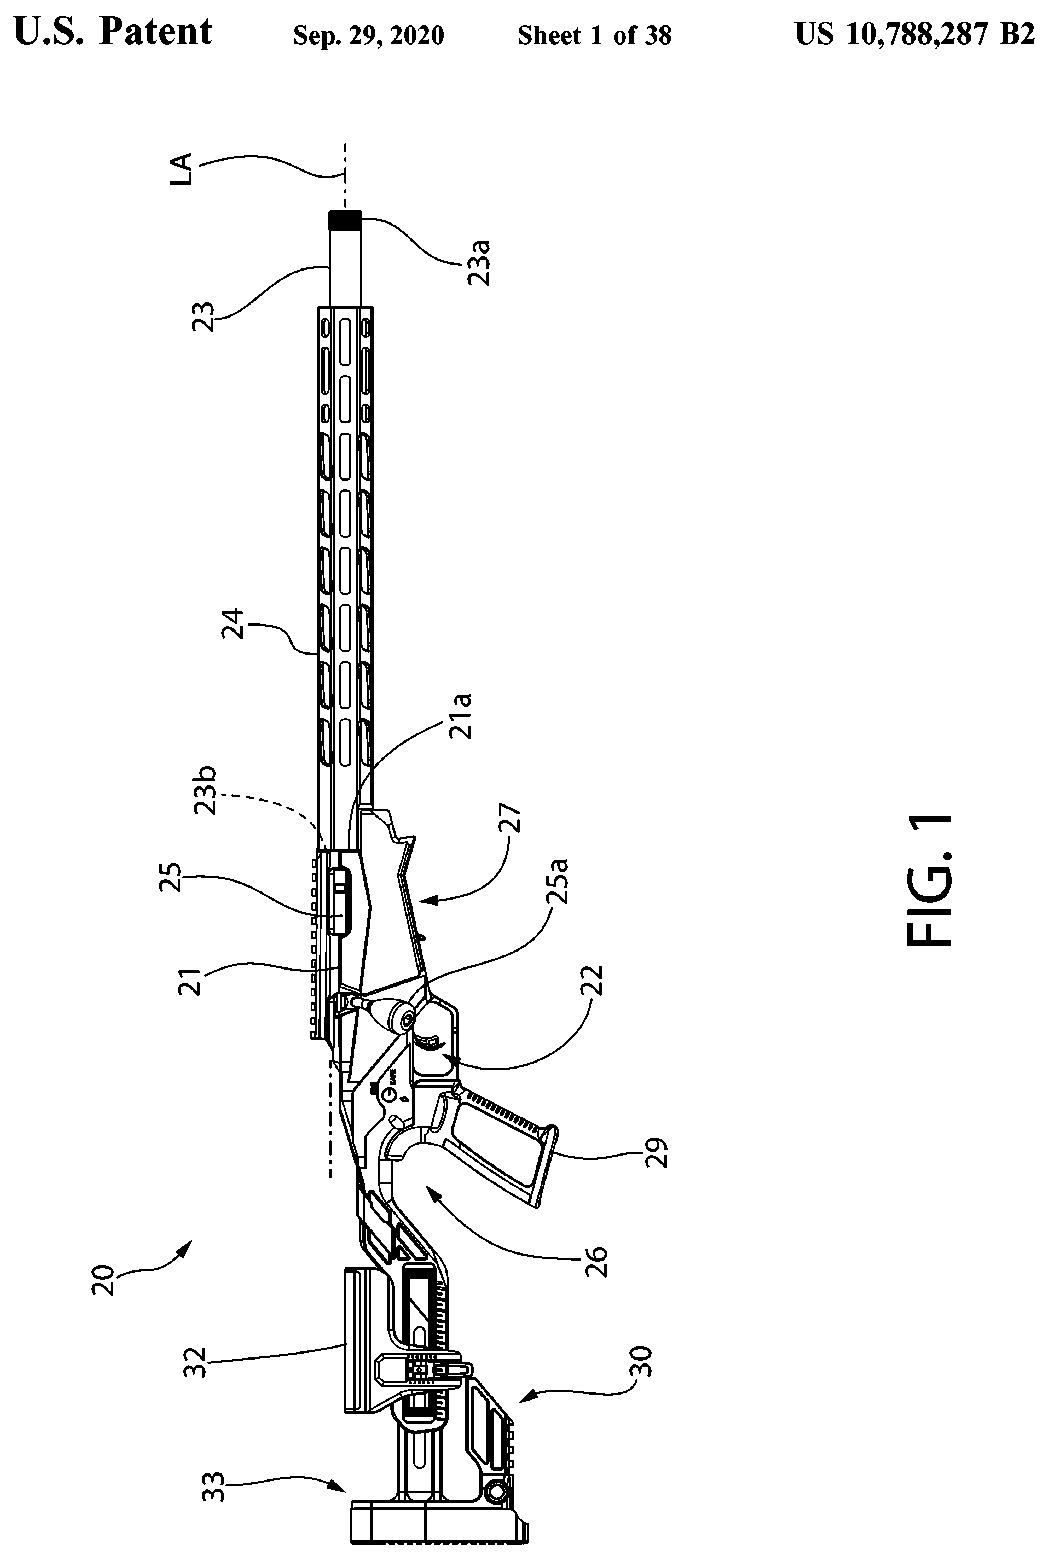
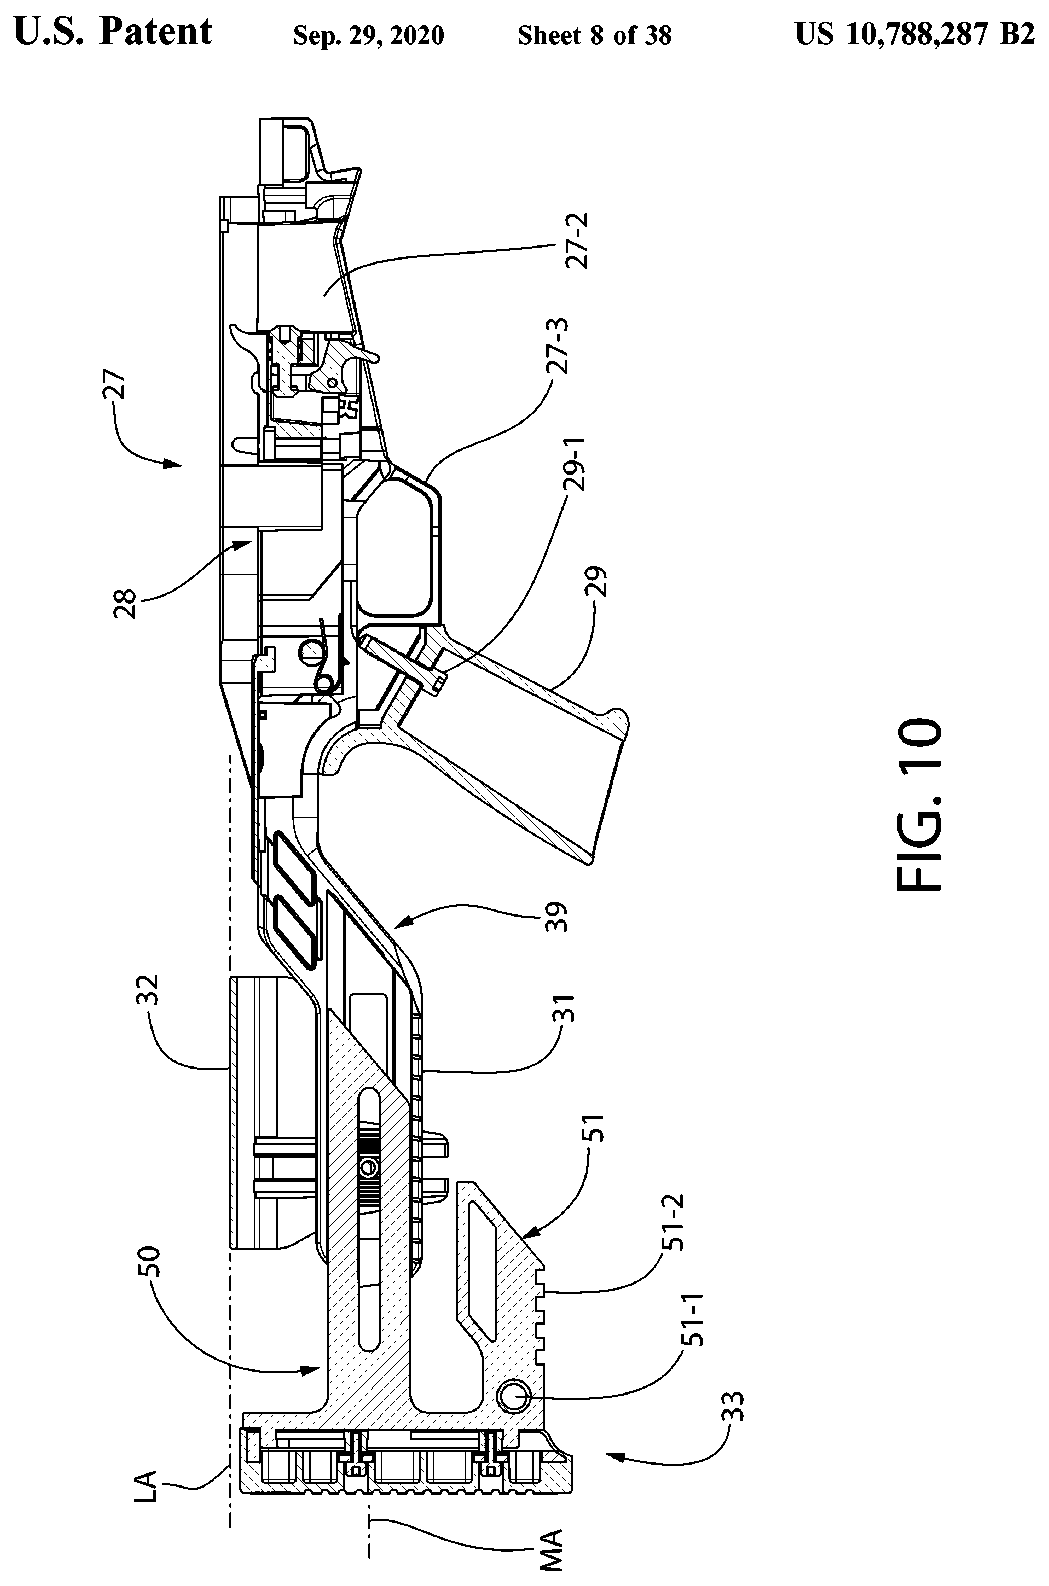
US Patent 10,788,287 — Adjustable stock for firearm
Benjamin Keyes Parker, Jonathan Philip MATHER, Jarod John Wendholt, Robert Earl Craig, Matthew Scott Willson, Nathan Brown · assigned to Sturm, Ruger & Company, Inc. · filed 2018-10-26 · granted 2020-09-29. Full patent (USPTO)
The Ruger Precision Rifle's adjustable folding buttstock (length of pull and cheek rest).
Why this is the Ruger Precision Rifle’s patent: listed on the maker’s patent-marking page — Ruger Patents — Sturm, Ruger & Co., Inc. ruger.com [4]: “Ruger Precision® Rifle 11,105,570; 10,788,287; D891,561; 10,458,731; 10,030,926; 9,885,528; 9,546,845; 9,506,712; 9,506,706; 9,464,863; 9,441,897; 9,194,637; D844,733; D785,122; D774,619”
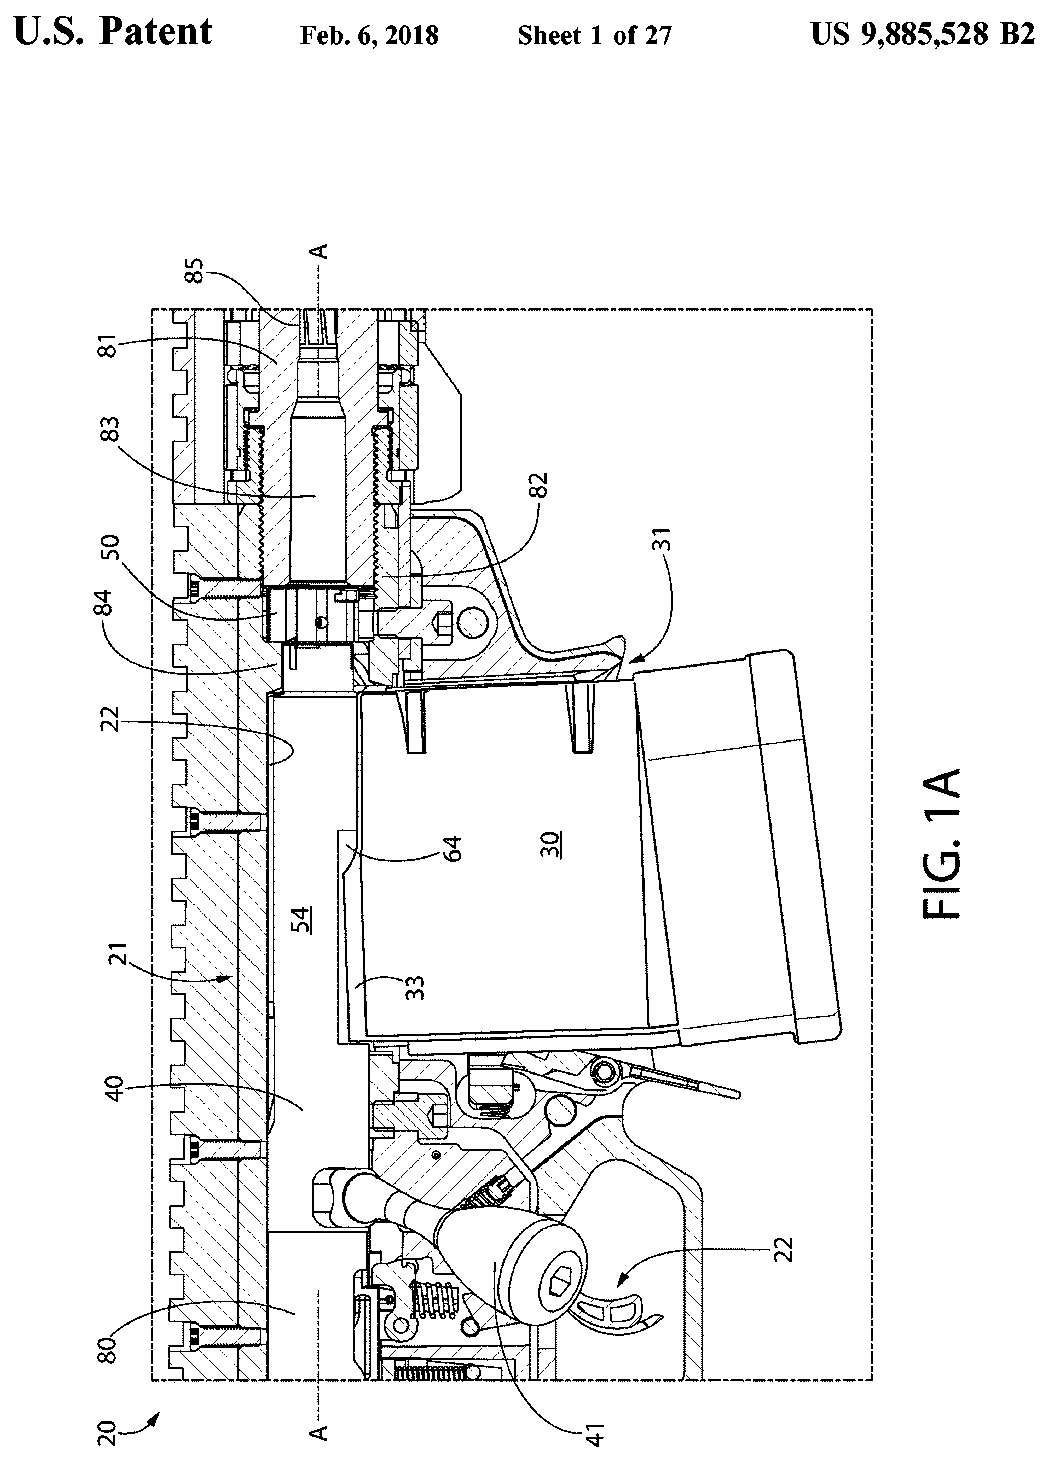
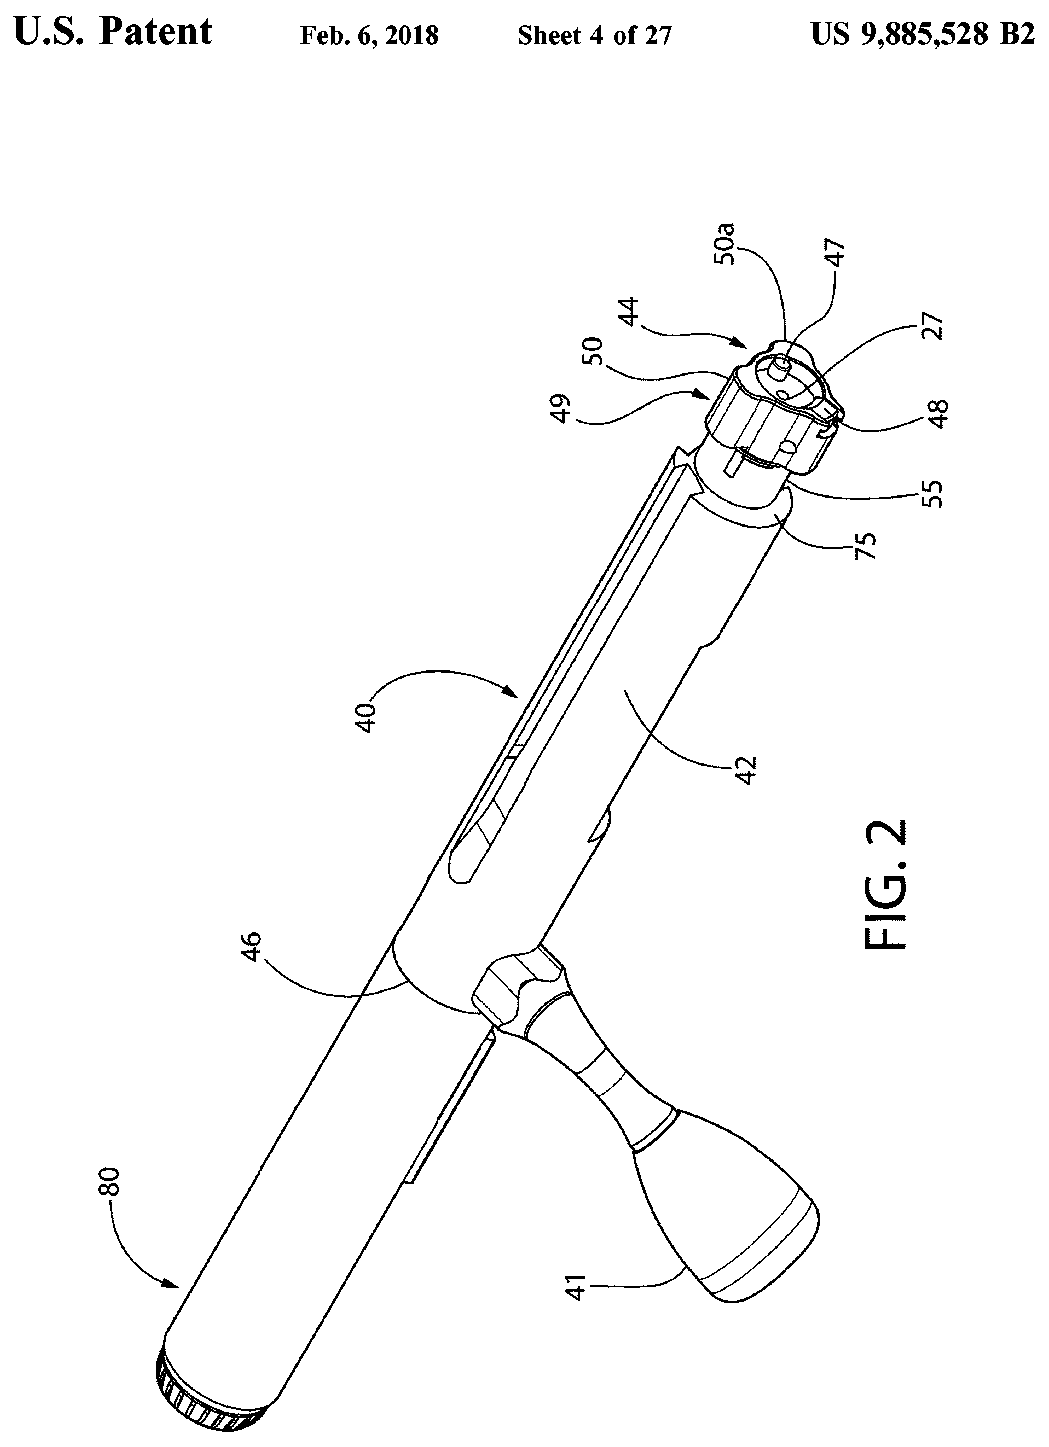
US Patent 9,885,528 — Bolt for bolt action rifles
Jonathan Philip MATHER · assigned to Sturm, Ruger & Company, Inc. · filed 2016-02-25 · granted 2018-02-06. Full patent (USPTO)
The three-lug bolt and bolt extension used in Ruger bolt-action rifles, including the Precision Rifle.
Why this is the Ruger Precision Rifle’s patent: listed on the maker’s patent-marking page — Ruger Patents — Sturm, Ruger & Co., Inc. ruger.com [4]: “Ruger Precision® Rifle 11,105,570; 10,788,287; D891,561; 10,458,731; 10,030,926; 9,885,528; 9,546,845; 9,506,712; 9,506,706; 9,464,863; 9,441,897; 9,194,637; D844,733; D785,122; D774,619”
Torque specifications
| Fastener | Torque | Sequence, notes and the source's words | Where it comes from |
|---|---|---|---|
| Front trigger assembly screw | 70 in-lb 7.9 N·m · 5.8 ft-lb |
Seat the trigger group, maneuver the firing pin back guide fully against the receiver, and compress its spring into the short leg of the J-slot before tightening. “Using a 3/16” Allen wrench, tighten the front trigger assembly screw, torquing to 70 in-lbs.” |
Ruger Precision Rifle Instruction Manual — Sturm, Ruger & Co., Inc., p. 48 ruger-docs.s3.amazonaws.com [1] |
| Magazine well cap screw — rear of receiver | 70 in-lb 7.9 N·m · 5.8 ft-lb |
Fold the stock and fit the rear receiver cap screw first, then unfold the stock and fit the front magazine-well cap screw. Ruger: "This sequence is important to properly seat the components." Put the safety selector on SAFE before refitting the magazine well. “Fold the stock and install the cap screw into the rear of the receiver, torquing to 70 in-lbs.” |
Ruger Precision Rifle Instruction Manual — Sturm, Ruger & Co., Inc., p. 48 ruger-docs.s3.amazonaws.com [1] |
| Magazine well cap screw — front of magazine well | 70 in-lb 7.9 N·m · 5.8 ft-lb |
Fold the stock and fit the rear receiver cap screw first, then unfold the stock and fit the front magazine-well cap screw. Ruger: "This sequence is important to properly seat the components." Put the safety selector on SAFE before refitting the magazine well. “Then, unfold the stock and install the cap screw into the front of the magazine well, torquing to 70 in-lbs.” |
Ruger Precision Rifle Instruction Manual — Sturm, Ruger & Co., Inc., p. 48 ruger-docs.s3.amazonaws.com [1] |
| Muzzle brake jam nut Rifles fitted with the factory muzzle brake |
25 ft-lb 33.9 N·m · 300 in-lb |
Thread the jam nut and brake on clockwise until they stop without tightening, back the brake out counter-clockwise until the side ports are at 3 and 9 o'clock, then tighten the jam nut with a 15/16" wrench. “Torque the jam nut to 25 ft-lbs.” |
Ruger Precision Rifle Instruction Manual — Sturm, Ruger & Co., Inc., p. 18 ruger-docs.s3.amazonaws.com [1] |
| Handguard nut | 35–50 ft-lb 47.5–67.8 N·m · 420–600 in-lb |
Only disturbed when re-timing the handguard bushing so its threaded holes line up with the holes in the top of the handguard. Ruger notes it may take a few attempts. “Remember to tighten the nut to the required 35 - 50 foot-lbs.” |
Ruger Precision Rifle Instruction Manual — Sturm, Ruger & Co., Inc., p. 39 ruger-docs.s3.amazonaws.com [1] |
| Handguard mounting screws (6) | 25 in-lb 2.8 N·m · 2.1 ft-lb |
T-15 Torx. Fit the two bottom screws first and confirm the handguard is centred on the barrel — if not, the bushing is mistimed and a tab is touching the scope base. Then fit the remaining four. “Install the first two mounting screws on the bottom of the handguard, tightening to 25 inch-lbs, and confirm that the handguard remains centered on the barrel.” |
Ruger Precision Rifle Instruction Manual — Sturm, Ruger & Co., Inc., p. 39 ruger-docs.s3.amazonaws.com [1] |
| Cheek piece base screws (2) | 15 in-lb 1.7 N·m · 1.2 ft-lb |
Remove only the two base screws; Ruger says not to remove the cheek piece rail screws. “Using a 5/32” Allen wrench, reinstall the two cheek piece base screws by turning them clockwise (torque to 15 in-lbs.)” |
Ruger Precision Rifle Instruction Manual — Sturm, Ruger & Co., Inc., p. 32 ruger-docs.s3.amazonaws.com [1] |
Materials and factory finish
As stated by Sturm, Ruger & Co.. Prep, masking and cure depend on these; a polymer or aluminium part, a nitrided or anodised finish, and a blued steel part are each a different job. Variants with other finishes may exist — check the maker's page for the exact SKU on the bench.
| Component | Material | Factory finish | Where it comes from |
|---|---|---|---|
| Receiver (upper) Model 18095 (6.5 Creedmoor) | pre-hardened chrome-moly steel | — | Ruger Precision Rifle Bolt-Action Rifle — Specifications (model 18095) — Sturm, Ruger & Co. ruger.com [3] “"Upper" receiver and one-piece bolt are precision CNC-machined from pre-hardened chrome-moly steel to minimize distortion.” |
| Receiver Model 18095 | — | Smoked Bronze Cerakote | Ruger Precision Rifle Bolt-Action Rifle — Specifications (model 18095) — Sturm, Ruger & Co. ruger.com [3] “Finish Smoked Bronze Cerakote” |
| Receiver (lower) Model 18095 | aerospace-grade aluminum | cerakote | Ruger Precision Rifle Bolt-Action Rifle — Specifications (model 18095) — Sturm, Ruger & Co. ruger.com [3] “"Lower" magazine well halves are precision machined from aerospace-grade aluminum and have a cerakote finish for maximum durability.” |
| Bolt Model 18095 | — | DLC coated | Ruger Precision Rifle Bolt-Action Rifle — Specifications (model 18095) — Sturm, Ruger & Co. ruger.com [3] “Bolt body is DLC coated for corrosion resistance, smooth operation and durability.” |
| Barrel Model 18095 | chrome-moly steel | — | Ruger Precision Rifle Bolt-Action Rifle — Specifications (model 18095) — Sturm, Ruger & Co. ruger.com [3] “Cold hammer-forged, chrome-moly steel barrel with 5R Rifling at minimum bore and groove dimensions, minimum headspace and centralized chamber.” |
| Handguard Model 18095 | aluminum | black hard-coat anodized | Ruger Precision Rifle Bolt-Action Rifle — Specifications (model 18095) — Sturm, Ruger & Co. ruger.com [3] “15" aluminum free-float handguard is black hard-coat anodized aluminum and features Magpul M-LOK slots on all four sides for improved scope clearance for long-range scopes and easy mounting of M-LOK-compatible rails and accessories.” |
| Grips Model 18095 | Magpul MOE-K2-XL | — | Ruger Precision Rifle Bolt-Action Rifle — Specifications (model 18095) — Sturm, Ruger & Co. ruger.com [3] “Grip Magpul MOE-K2-XL” |
Parts list
Transcribed from the manufacturer's parts list (Ruger Precision Rifle Instruction Manual — Sturm, Ruger & Co., Inc., p. 56–58 ruger-docs.s3.amazonaws.com [1]) — Ruger Precision Rifle. Exploded views on pp. 59–62. Key numbers refer to the exploded view in that document.
114 parts
| Key | Part | Part no. | Qty | Group |
|---|---|---|---|---|
| 1 | Bolt / Firing Pin Assembly – Complete Parts so marked must be factory fit. | 1 | ||
| 2 | Firing Pin Back Parts so marked must be factory fit. | 1 | ||
| 3 | Firing Pin, Short Action Parts so marked must be factory fit. | 1 | ||
| 4 | Firing Pin Spring Stop Parts so marked must be factory fit. | 1 | ||
| 5 | Firing Pin Spring Parts so marked must be factory fit. | 1 | ||
| 6 | Ejector/Firing Pin Back Pin | 2 | ||
| 7 | Extractor | 1 | ||
| 8 | Extractor Ball | 1 | ||
| 9 | Extractor Spring | 1 | ||
| 10 | Ejector Spring | 1 | ||
| 11 | Ejector Plunger, Short Action | 1 | ||
| 12 | Bolt Handle | 1 | ||
| 13 | Bolt Knob | 1 | ||
| 14 | Bolt Body, Short Action Parts so marked must be factory fit. | 1 | ||
| 15 | Bolt Shroud Assembly w/Wrench – Complete | 1 | ||
| 16 | Bolt Shroud | 1 | ||
| 17 | Bolt Shroud O’Ring | 1 | ||
| 18 | Bolt Shroud Cap | 1 | ||
| 19 | Allen Key | 1 | ||
| 20 | Trigger Assembly – Complete Parts so marked must be factory fit. | 1 | ||
| 21 | Trigger Housing Parts so marked must be factory fit. | 1 | ||
| 22 | Trigger Parts so marked must be factory fit. | 1 | ||
| 23 | Trigger Release | 1 | ||
| 24 | Trigger Release Pin | 1 | ||
| 25 | Trigger Release Spring | 1 | ||
| 26 | Safety Shaft | 1 | ||
| 27 | Safety Shaft E-Clip | 1 | ||
| 28 | Trigger-Sear Pin | 3 | ||
| 29 | Sear | 1 | ||
| 30 | Sear Stop Pin | 1 | ||
| 31 | Trigger Block Pin | 1 | ||
| 32 | Safety Connector | 1 | ||
| 33 | Safety Link | 1 | ||
| 34 | Firing Pin Back Guide Spring | 1 | ||
| 35 | Firing Pin Back Guide | 1 | ||
| 36 | E-Clip, .156 Parts so marked must be factory fit. | 1 | ||
| 37 | Trigger-Sear Pin E-Clip | 3 | ||
| 38 | Sear Spring | 1 | ||
| 39 | Trigger Adjustment Spring The manufacturer's list gives key 39 twice: “Trigger Adjustment Spring” and “Trigger Pull Adjustment Spring”. | 1 | ||
| 40 | Safety Spring | 1 | ||
| 41 | Trigger Adjustment Screw | 1 | ||
| 42 | Stock Assembly – Complete | 1 | ||
| 43 | Stock Body | 1 | ||
| 44 | Stock Extension | 1 | ||
| 45 | Buttpad | 1 | ||
| 46 | Cheek Piece Base | 1 | ||
| 47 | Cheek Piece Rail | 1 | ||
| 48 | Cheek Piece | 1 | ||
| 49 | Cheek Rail Button | 1 | ||
| 50 | Cheek Thumbwheel | 1 | ||
| 51 | Cheek Threaded Rod | 1 | ||
| 52 | Cheek Guide Rod | 2 | ||
| 53 | Thumbwheel Detent | 1 | ||
| 54 | Length of Pull Lock | 1 | ||
| 55 | Length of Pull Button | 1 | ||
| 56 | Length of Pull Lever | 1 | ||
| 57 | Length of Pull Base | 1 | ||
| 58 | Stock Front Cover | 1 | ||
| 59 | Front Cover Lock | 1 | ||
| 60 | Cheek Piece Rail Screw | 3 | ||
| 61 | Cheek Piece Base Screw | 1 | ||
| 62 | Front Cover Lock Spring | 1 | ||
| 63 | Buttpad Button Spring | 1 | ||
| 64 | Cheek Rail Spring | 1 | ||
| 65 | Thumbwheel Spring | 1 | ||
| 66 | Base Washer | 1 | ||
| 67 | Length of Pull Button Spring | 1 | ||
| 68 | Castle Nut | 1 | ||
| 69 | Cheek Piece Base Screw | 2 | ||
| 70 | Buttpad Screw | 1 | ||
| 71 | Cheek Piece Button Pin | 1 | ||
| 72 | Buttpad Button | 1 | ||
| 73 | Stock Hinge Pin | 1 | ||
| 74 | Stock Hinge Pin Washer | 2 | ||
| 75 | Stock Mount Back | 1 | ||
| 76 | Stock Pivot Latch | 1 | ||
| 77 | Stock Pivot Latch Pin | 1 | ||
| 78 | Latch Spring | 1 | ||
| 79 | Stock Latch Detent Washer | 1 | ||
| 80 | Stock Pivot Lock Button | 1 | ||
| 81 | Stock Mount Top | 1 | ||
| 82 | Scope Mount Screw | 4 | ||
| 83 | Scope Base | 1 | ||
| 84 | Bolt Stop | 1 | ||
| 85 | Bolt Stop Spring | 1 | ||
| 86 | Bolt Stop Pin | 1 | ||
| 87 | Hinge Mounting Screw | 2 | ||
| 88 | Stock Mount Bottom | 1 | ||
| 89 | Receiver The receiver is a serial-numbered part and is not offered for sale. | 1 | ||
| 90 | Barrel Nut | 1 | ||
| 91 | Handguard Nut | 1 | ||
| 92 | Handguard Bushing | 1 | ||
| 93 | Handguard Screw | 6 | ||
| 94 | Handguard | 1 | ||
| 95 | Safety Selector | 1 | ||
| 96 | Ambidextrous Safety Selector | 1 | ||
| 97 | Safety Selector Screw | 1 | ||
| 98 | Safety Selector Spring | 1 | ||
| 99 | Magazine Well, Right | 1 | ||
| 100 | Magazine Well, Left | 1 | ||
| 101 | Magazine Side Latch Pin | 1 | ||
| 102 | Magazine Side Latch Catch | 1 | ||
| 103 | Magazine Latch Lever Spring | 1 | ||
| 104 | Magazine Latch Lever | 1 | ||
| 105 | Lower Lever Pin | 1 | ||
| 106 | Pistol Grip | 1 | ||
| 107 | Grip Screw | 1 | ||
| 108 | Grip Washer | 1 | ||
| 109 | Barrel Nut Lock | 1 | ||
| 110 | Lower Front Mount | 1 | ||
| 111 | Mounting Screw | 3 | ||
| 112 | Mounting Screw | 2 | ||
| 113 | Barrel Parts so marked must be factory fit. | 1 | ||
| 114 | Muzzle Brake with Locking Nut | 1 |
Function check
- First be sure there is no ammunition in the chamber or magazine, and keep the rifle pointed in a safe direction.
- With the magazine removed, cycle the bolt open and closed three times. It should travel freely without binding.
- Close the bolt and move the safety selector to FIRE. Pull the trigger; the firing pin should release.
- Cock the action again and move the safety selector to SAFE. Pull the trigger; the firing pin must not release.
- Confirm the folding stock locks positively both folded and extended.
- Confirm the magazine seats, locks and drops free on the release.
Maintenance
Lubrication points
- Three bolt lugs and the locking recesses
- Bolt body in the raceway
- Cocking cam surfaces
- Extractor
Cleaning notes
Clean from the breech with a bore guide. Do not over-lubricate the firing pin assembly. Keep the chamber dry and oil-free before shooting — oil in a chamber raises bolt thrust, which matters more on a precision rifle fired from a bipod.
Suggested inspection interval: roughly every 500 rounds. This is a general guideline, not a manufacturer specification.
Wear parts to inspect
Bolt lugs · Extractor and ejector · Firing pin spring · Crown · Action screw torque
Common issues
| Symptom | Likely cause | What to do |
|---|---|---|
| Group size opens up | Action screw or rail fastener torque changed | Retorque to specification. This is the first thing to check on any precision rifle. |
| Remington 700 parts do not fit the action | The RPR uses its own three-lug bolt and action | AR-pattern grip, stock, and safety parts interchange; action parts do not. |
Also covers
The procedures above are reported to apply to: Ruger Precision Rimfire (scaled-down rimfire version). Verify against the manual for your specific model.
Similar manual of arms
Sourcing
- Confidence
- high — Cross-checked against a primary source such as the manufacturer's manual or an issuing military technical manual.
- Verification
- Checked against the manufacturer manual
- Last updated
- 2026-10-29
References
Every source this page draws on, with its web address so you can read it yourself. Numbers in brackets elsewhere on the page point here.
- [1] Ruger Precision Rifle Instruction Manual — Sturm, Ruger & Co., Inc. manufacturer manual primary source
https://ruger-docs.s3.amazonaws.com/_manuals/Ruger_Precision_Rifle.pdf (checked 2026-09-15) - [2] Ruger — Ruger Precision Rifle Safety Bulletin — Sturm, Ruger & Co., Inc. website primary source
https://ruger.com/dataProcess/rprSafety/index.php (checked 2026-10-03) - [3] Ruger Precision Rifle Bolt-Action Rifle — Specifications (model 18095) — Sturm, Ruger & Co. website primary source
https://ruger.com/products/precisionRifle/specSheets/18095.html (checked 2026-10-03) - [4] Ruger Patents — Sturm, Ruger & Co., Inc. website primary source
https://ruger.com/micros/Patents/index.html (checked 2026-10-13)
Notes: Verified against Ruger's current Ruger Precision Rifle manual (68 pages), sections "Disassembly" (pp. 40-42) and "Reassembly" (pp. 48-49). Two corrections were made against the previous text. First, the earlier entry told the reader to move the safety selector to FIRE if the bolt would not release; Ruger's procedure runs with the selector on SAFE throughout and says so twice. Second, bolt removal requires folding and locking the stock first, which the earlier entry omitted entirely — without it the bolt has nowhere to go. Trigger-group and magazine-well screws are torqued to 70 in-lbs per the manual; that work is beyond the scope of these procedures. A separate manual covers rifles manufactured 2015-2024.